Help Center The CATALOG Module
CATALOG Workflow
The TrackStage workflow takes boring administrative tasks and makes them quick and easy... and just maybe even kinda fun.
There are five steps to getting your tracks from completion to ready for prime time: SYNC, LINK, TABS, FILL,and TAG.
Step One: ADD your Audio Files to TrackStage
Step Two: LINK your Primary, Alternates, & Stems
Step Three: Complete the TABS
Step Four: FILL the Info to all Versions.
Step Five: TAG your Metadata
Step One: ADD your Audio Files to TrackStage
In this first step we take your AIF, MP3, and WAV files – your completed, ready to submit song and all its alternate and stem versions – and bring them into the TrackStage Catalog.
First, check that TrackSync is running — nothing will come in without it. The status icon at the top of the window is purple when it's running. If it's orange, open TrackSync from your Applications folder or Start Menu.

There are two ways to bring them in, both under Add Tracks in the Side Menu. Use TrackStage GO for a new song you want to tag as you add it, or Add Tracks from TrackStage Folder for a batch you have already exported.

Not sure which? Help me choose in the same menu will walk you through it.
TrackStage GO
Best for a brand-new song. Drop in one file, enter its metadata, and hit GO — the track lands in your Catalog and your TrackStage Folder organized, tagged and ready.
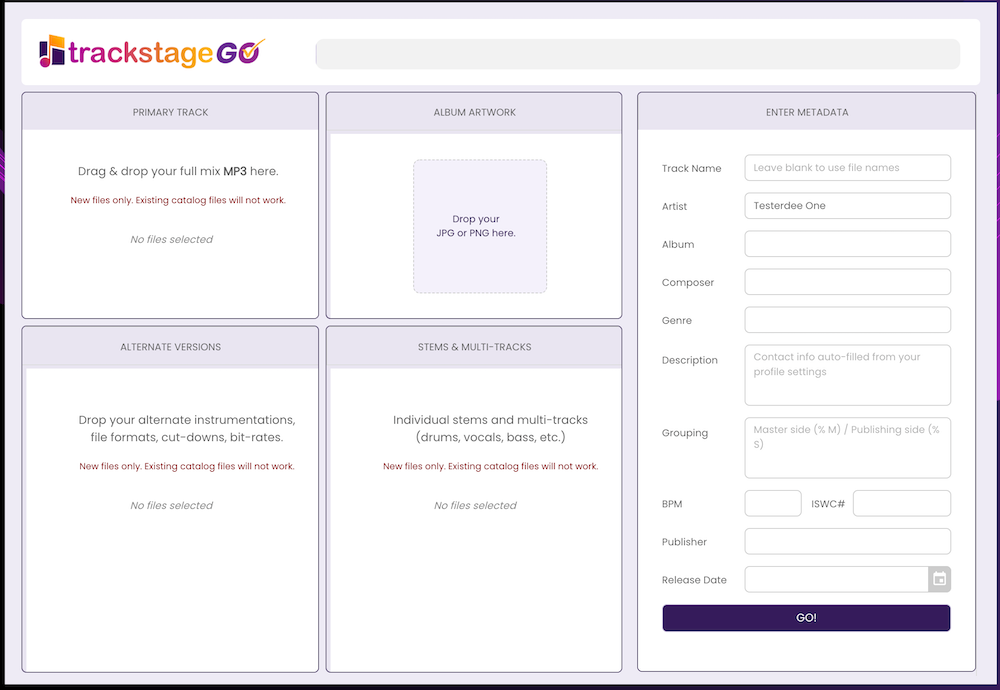
See TrackStage GO for the full walkthrough, then pick this workflow back up at Step Two.
Add Tracks from TrackStage Folder
Best when you have a finished song and all its versions exported and ready to move across in one go.
- Click Add Tracks › Add Tracks from TrackStage Folder.
The Add Tracks from Your TrackStage Folder window opens. - Click Go To Folder.
Your TrackStage folder opens on your computer. Leave the TrackStage window open — you will come back to it.

- Move your completed audio files into your TrackStage Folder.
Copy, cut and paste, or drag and drop the AIF/MP3/WAV audio file(s) including all your alternate and stem versions.
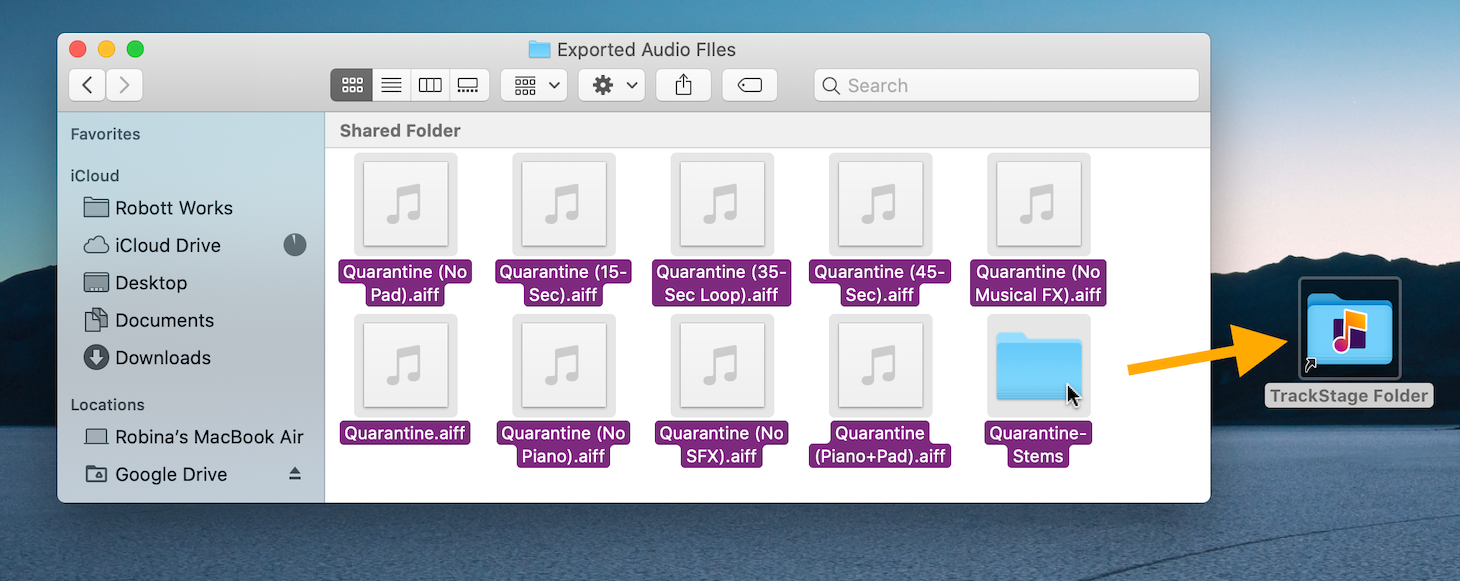
You can create folders to house them within the TrackStage folder, or move them into existing folders if you prefer. It doesn't matter what kind of organization you have, TrackSync will be able to find it. - Back in TrackStage, click Continue.

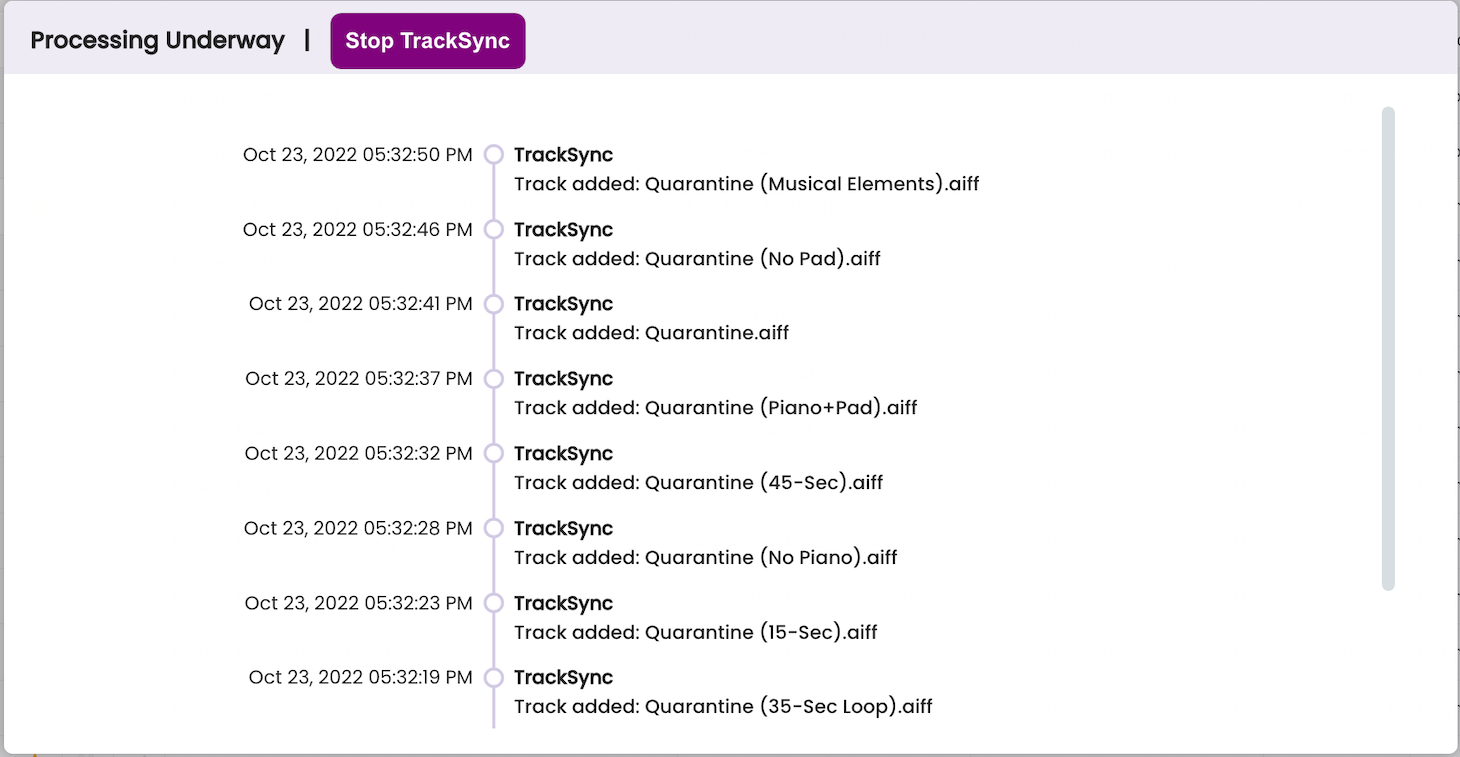
TrackSync brings your tracks into your CATALOG. Depending on how many tracks you are bringing in, this may take a few minutes.
Step Two: LINK your Primary, Alternates, & Stems
Now we are going to link your song with all its alternate and stem versions together. This will enable bulk editing and will help keep your CATALOG.
- Select the Full Mix Version of the track.
Click on the Full Version AIF or MP3 of the song (WAVs don’t hold as much metadata, so you don’t want a WAV to be the Primary).
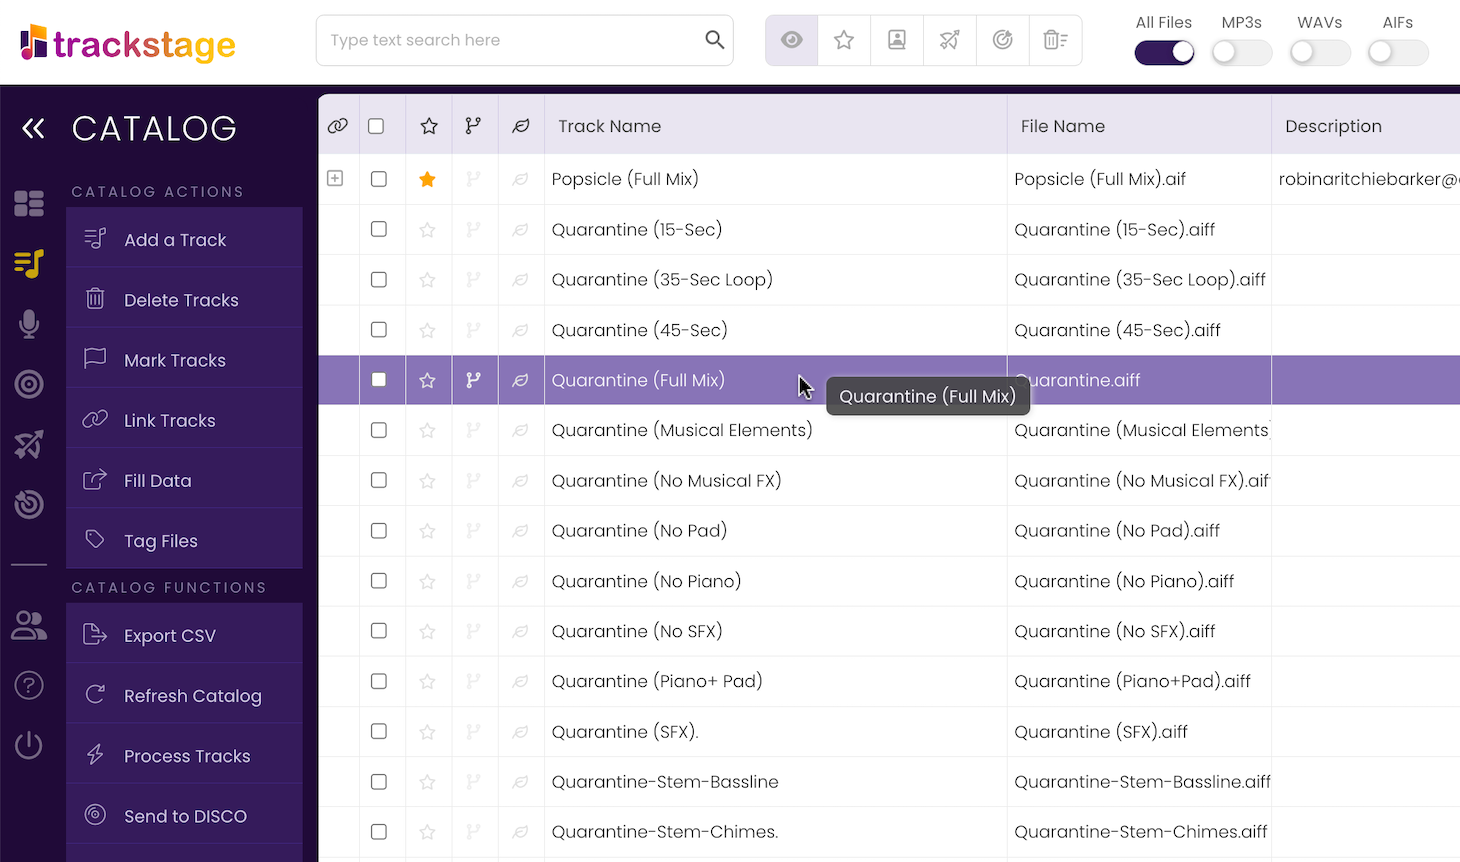 NOTE: You can only have ONE primary version of a track. If you have multiple Full Versions, just select one to be the Primary and the others can be Alternates.
- Mark the Track as a Primary.
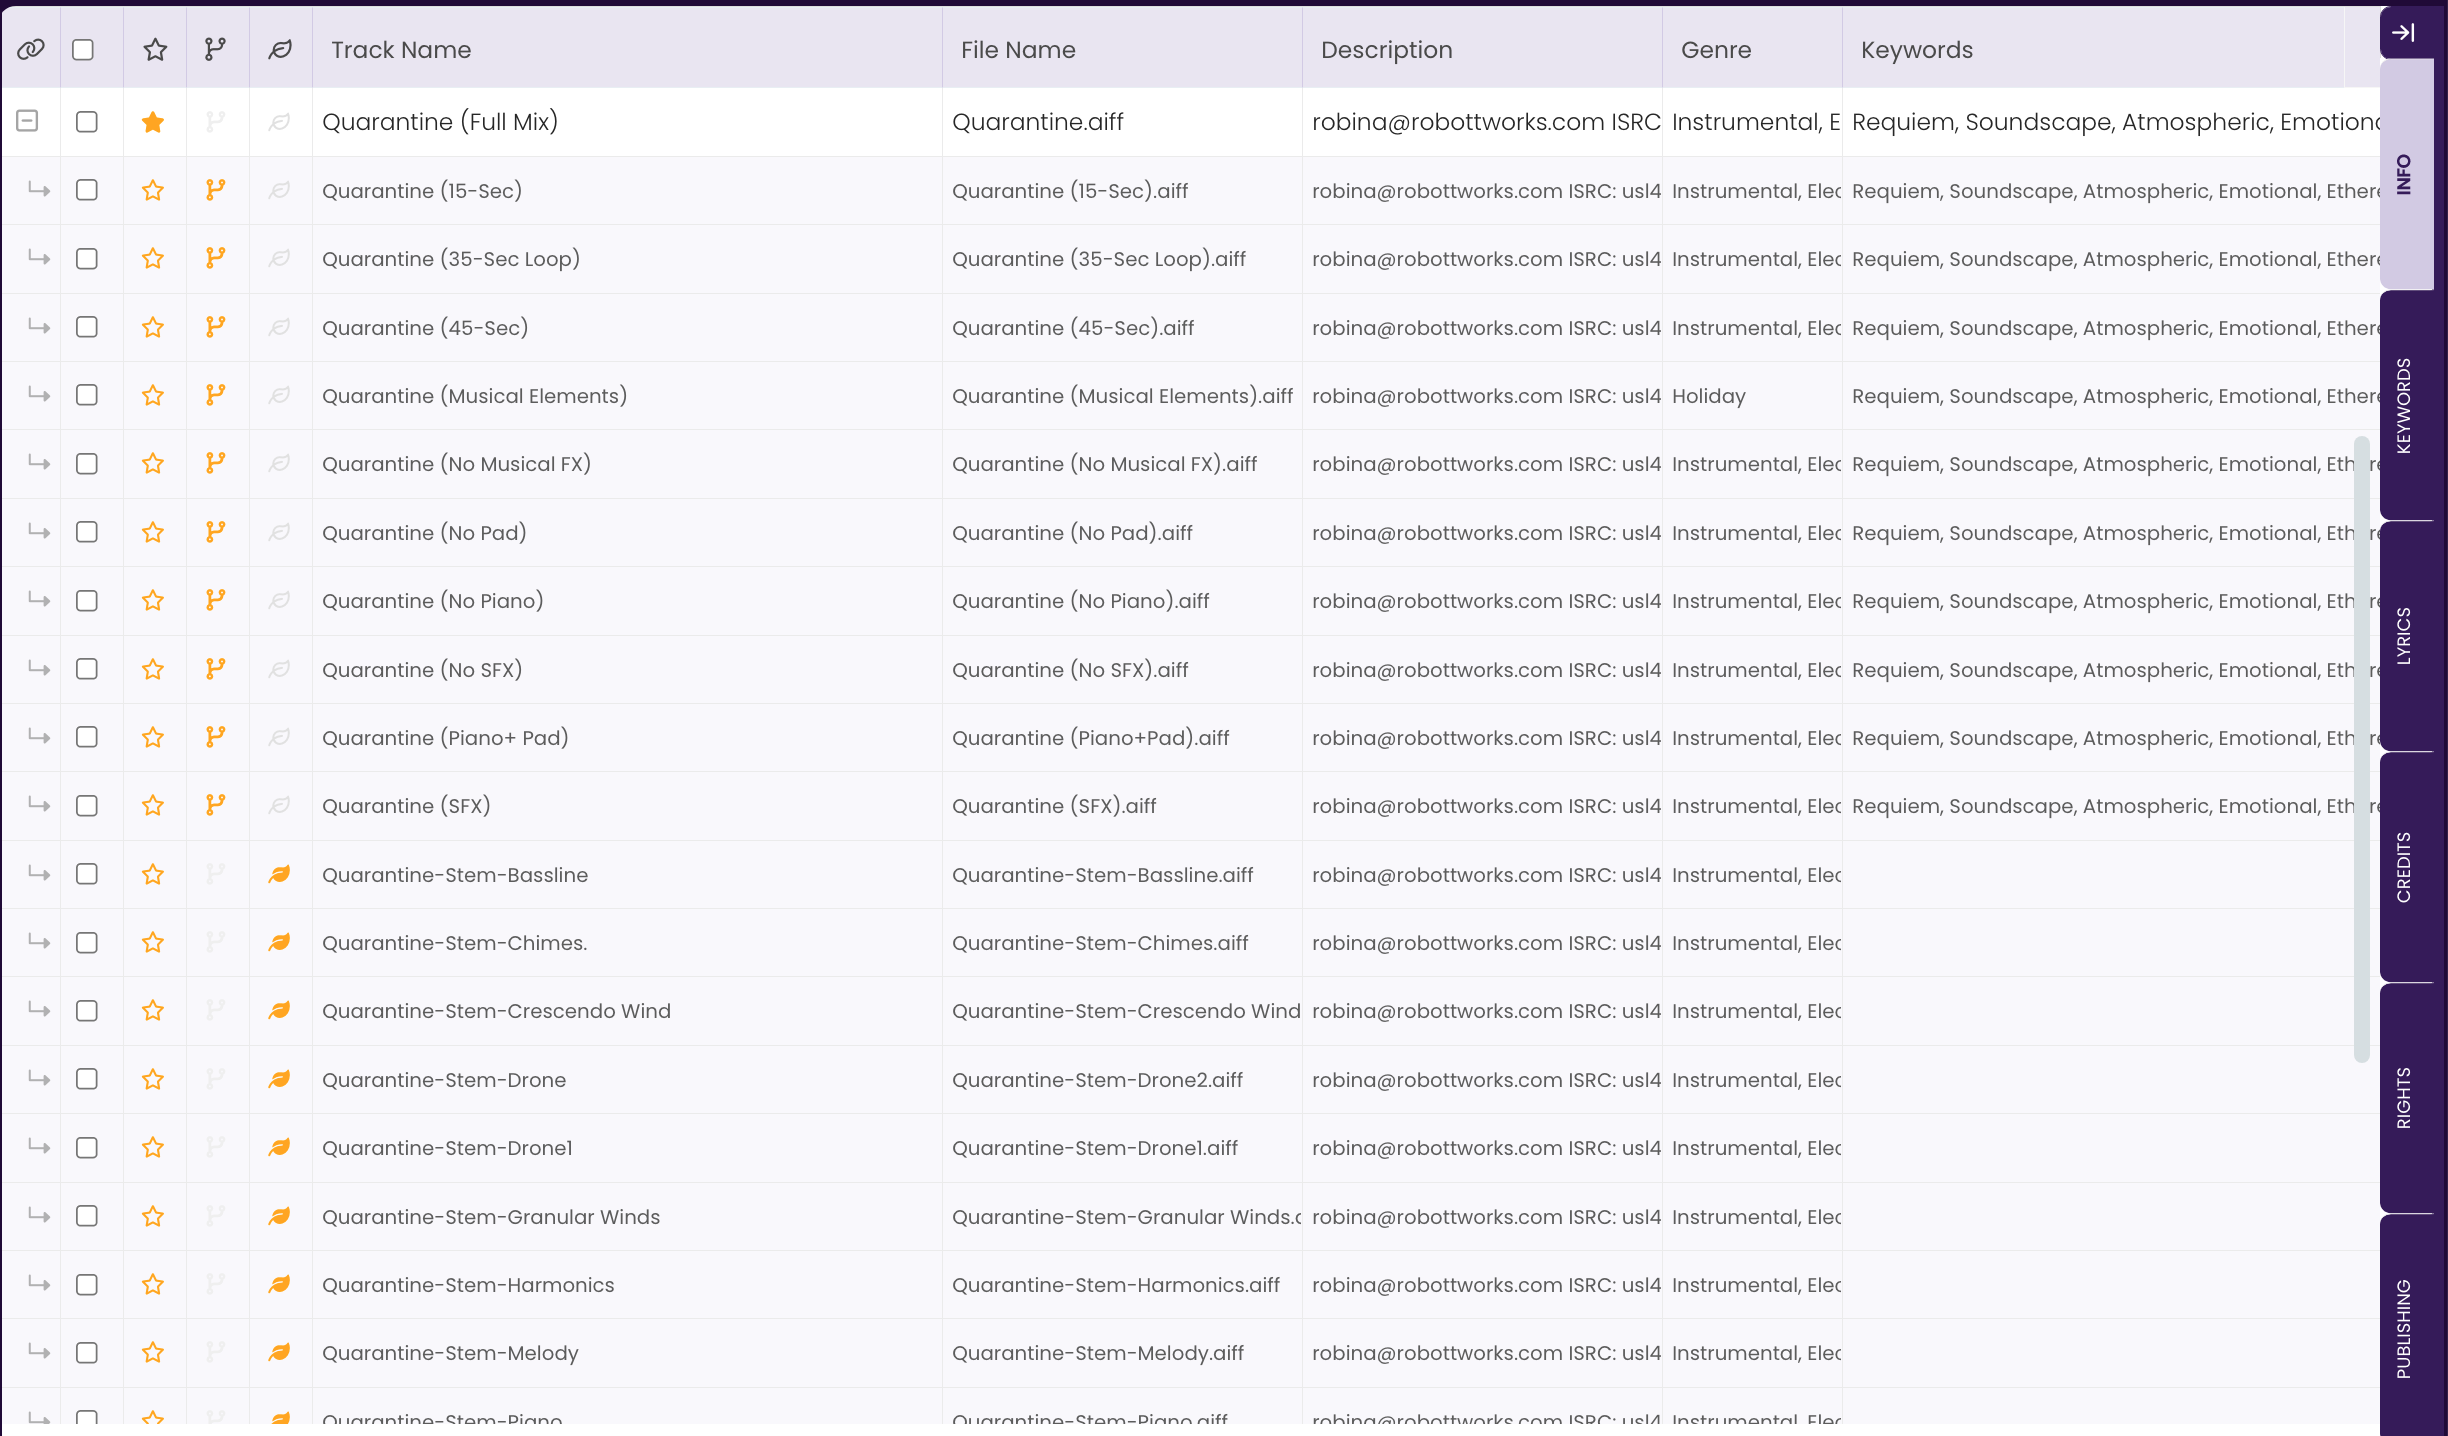
Click the star icon in the third column to the left of the Track Name.
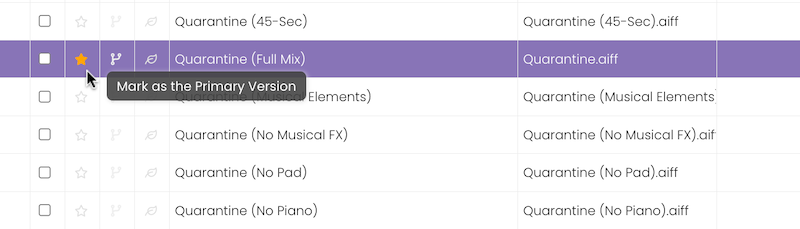
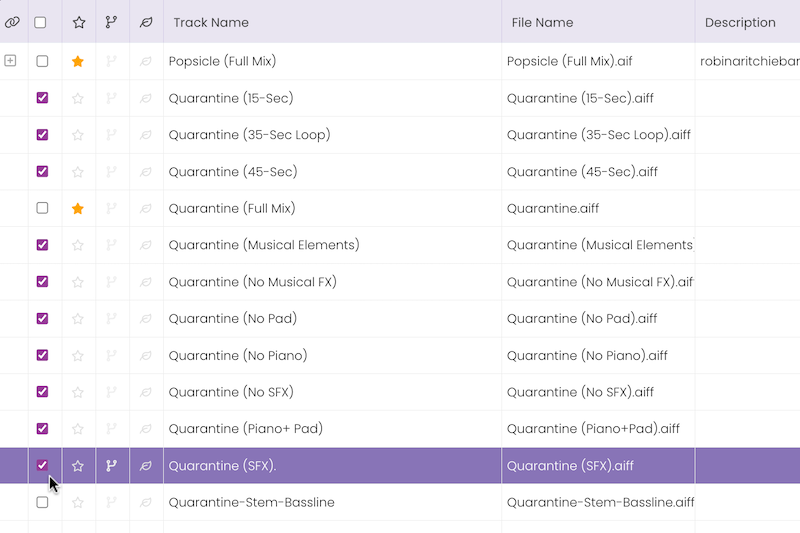
- Select the Alternate versions (not stems) of your track.
Click the checkbox of each track to select it. Shift-click to select multiple tracks.
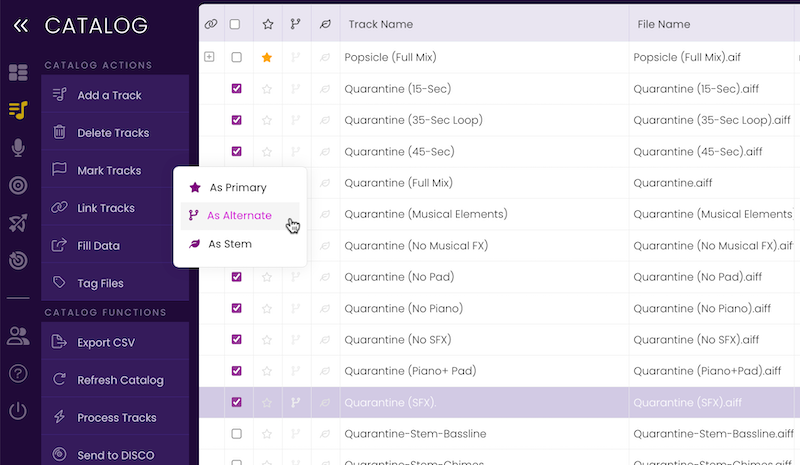
- Mark the tracks as Alternates.
Click on Mark Tracks and select As Alternate.
- Select the Stem versions of your track.
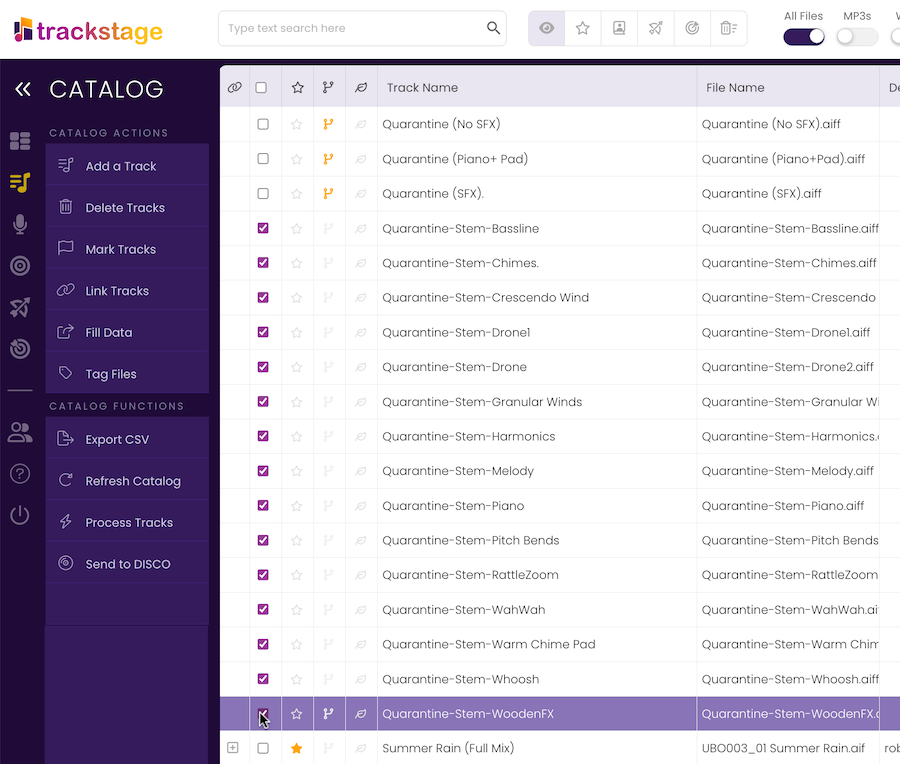
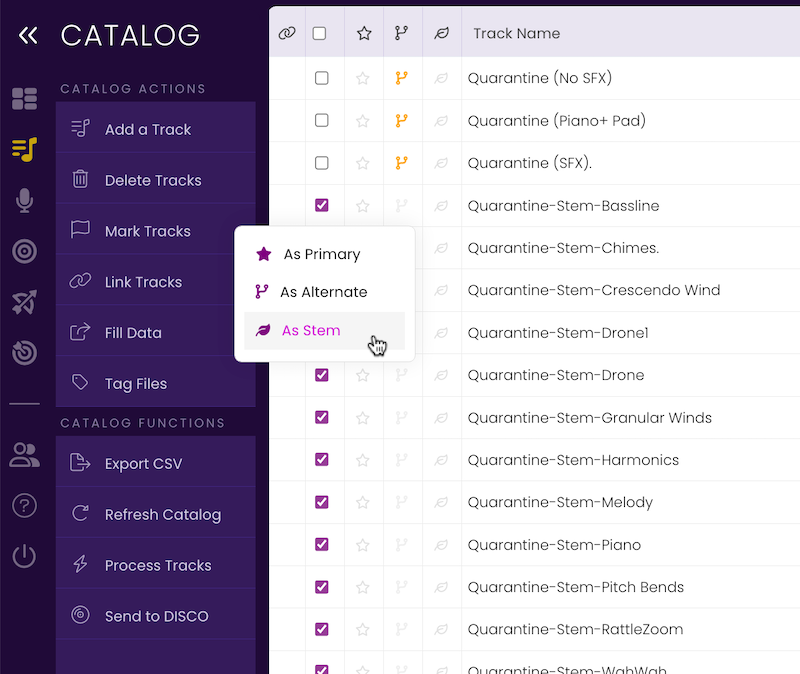
- Mark the tracks as Stems.
Click on Mark Tracks and select As Stem.
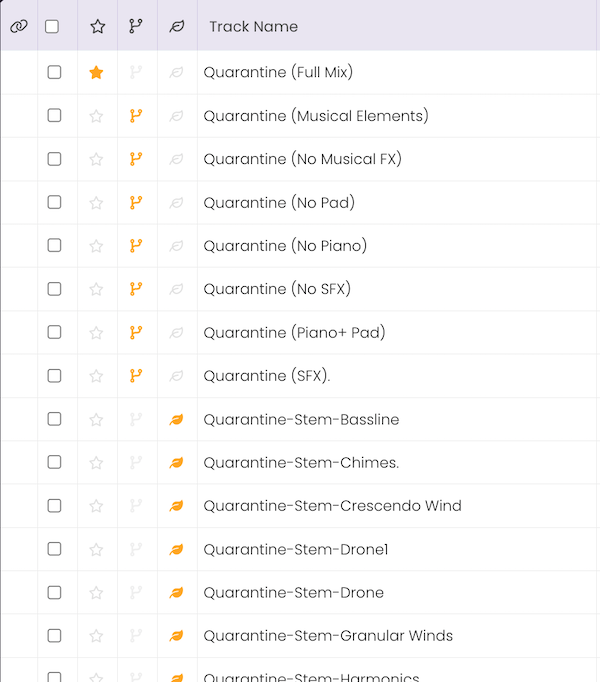
The tracks are now all categorized and ready to be grouped.
- Select all versions of the track and click Link Tracks.
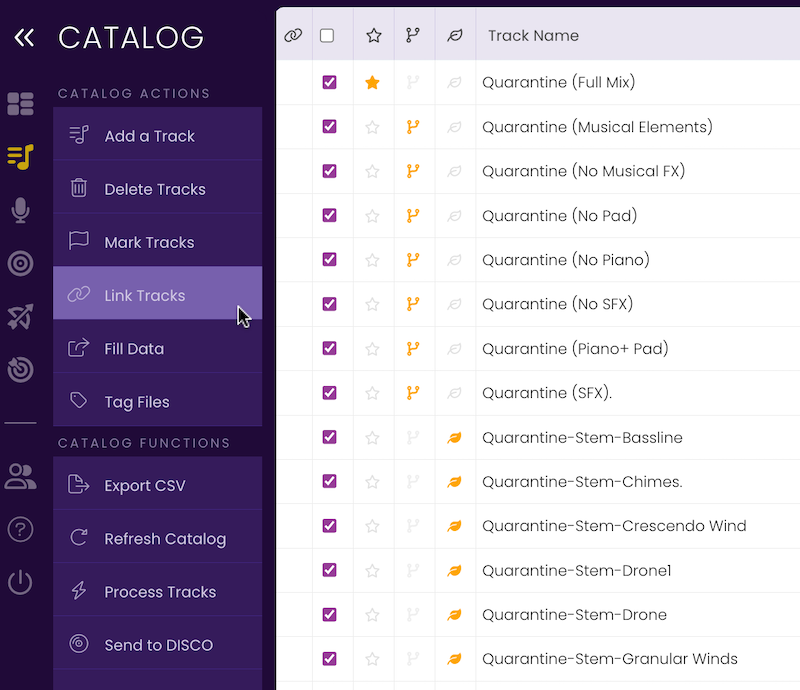
The tracks are now grouped. You can click on the icon next to the Primary track to expand and view the linked alternates and stems, or click the
 icon to collapse and hide the versions under the Primary.

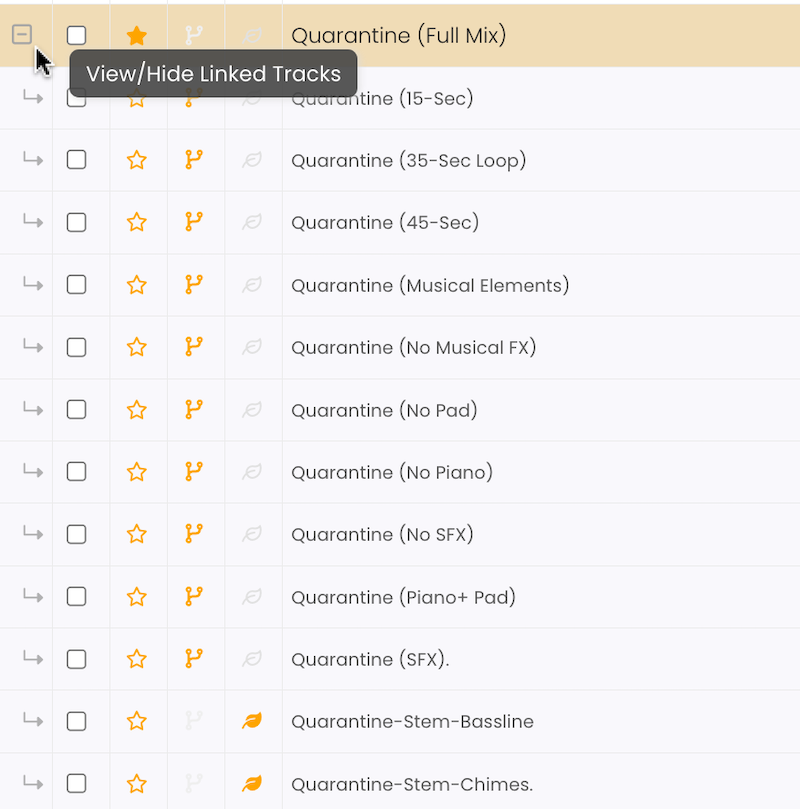
Step Three: Complete the TABS
Now comes the heavy lifting. Enter in all the information you want to attach to your track in the INFO, LYRICS, KEYWORDS, CREDITS, RIGHTS, and PUBLISHING Tabs.
- Select the PRIMARY version of your track and click on the INFO Tab.
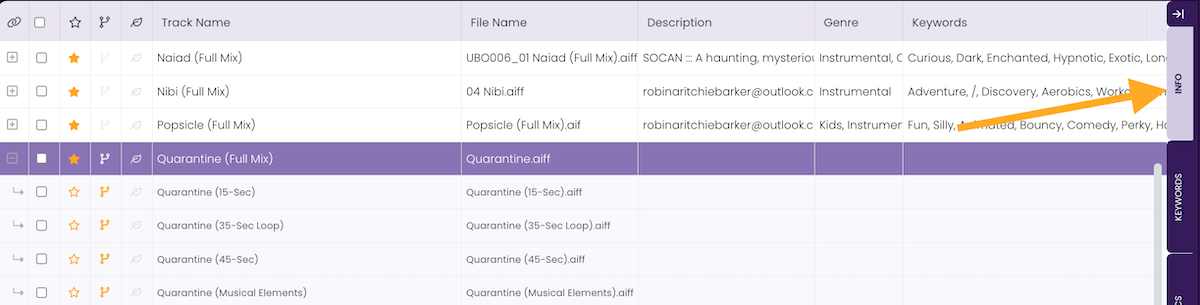
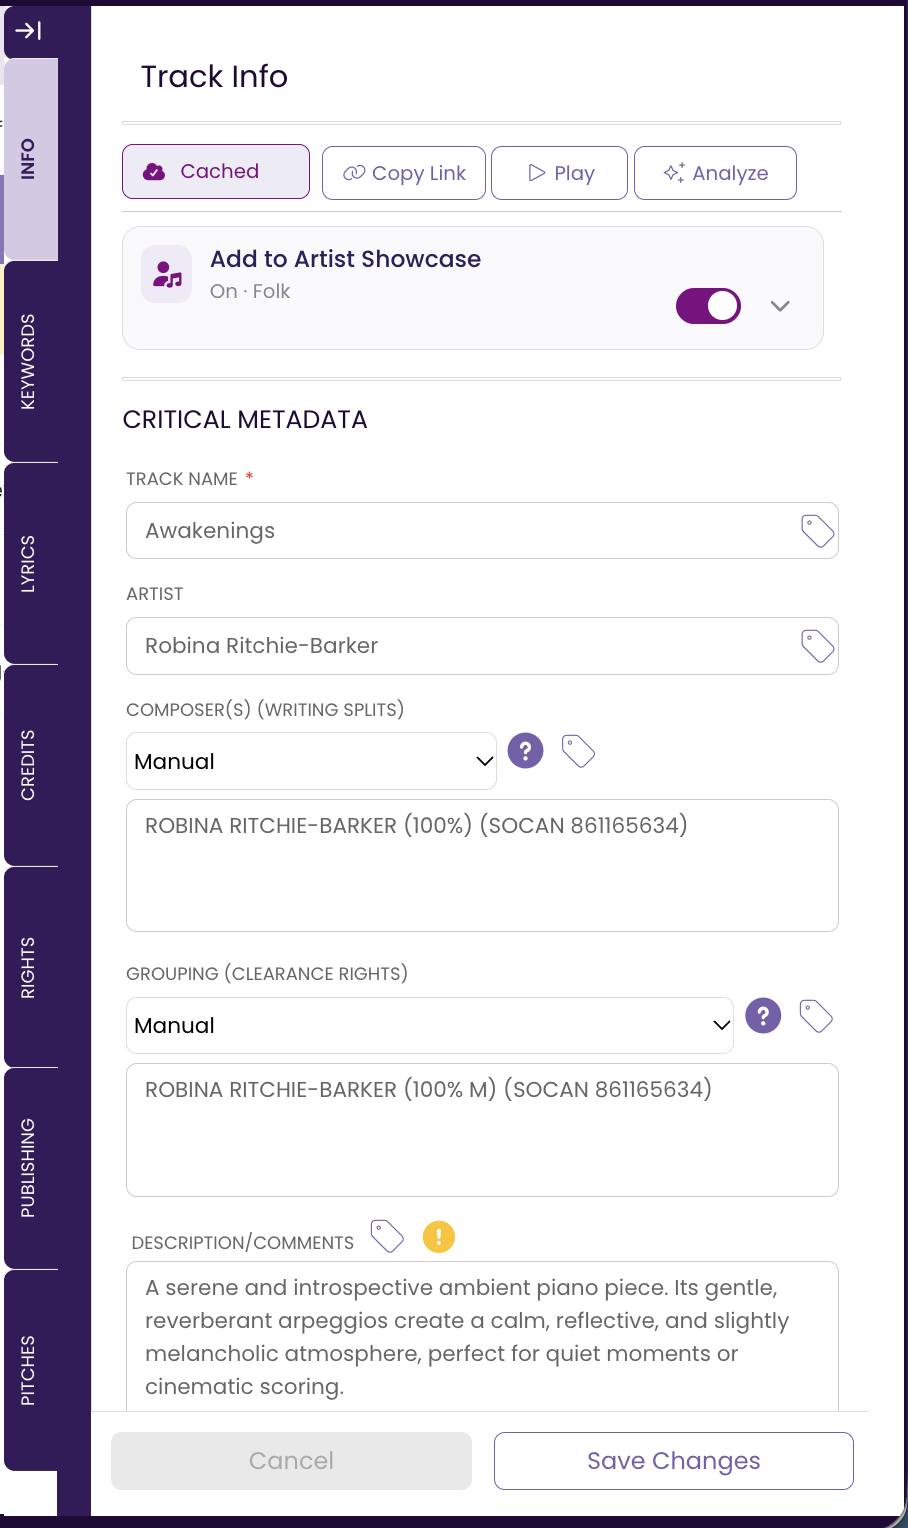
- Complete the INFO Tab.
Make sure to complete at very least the CRITICAL METADATA section of the INFO Tab.
See The INFO Tab.
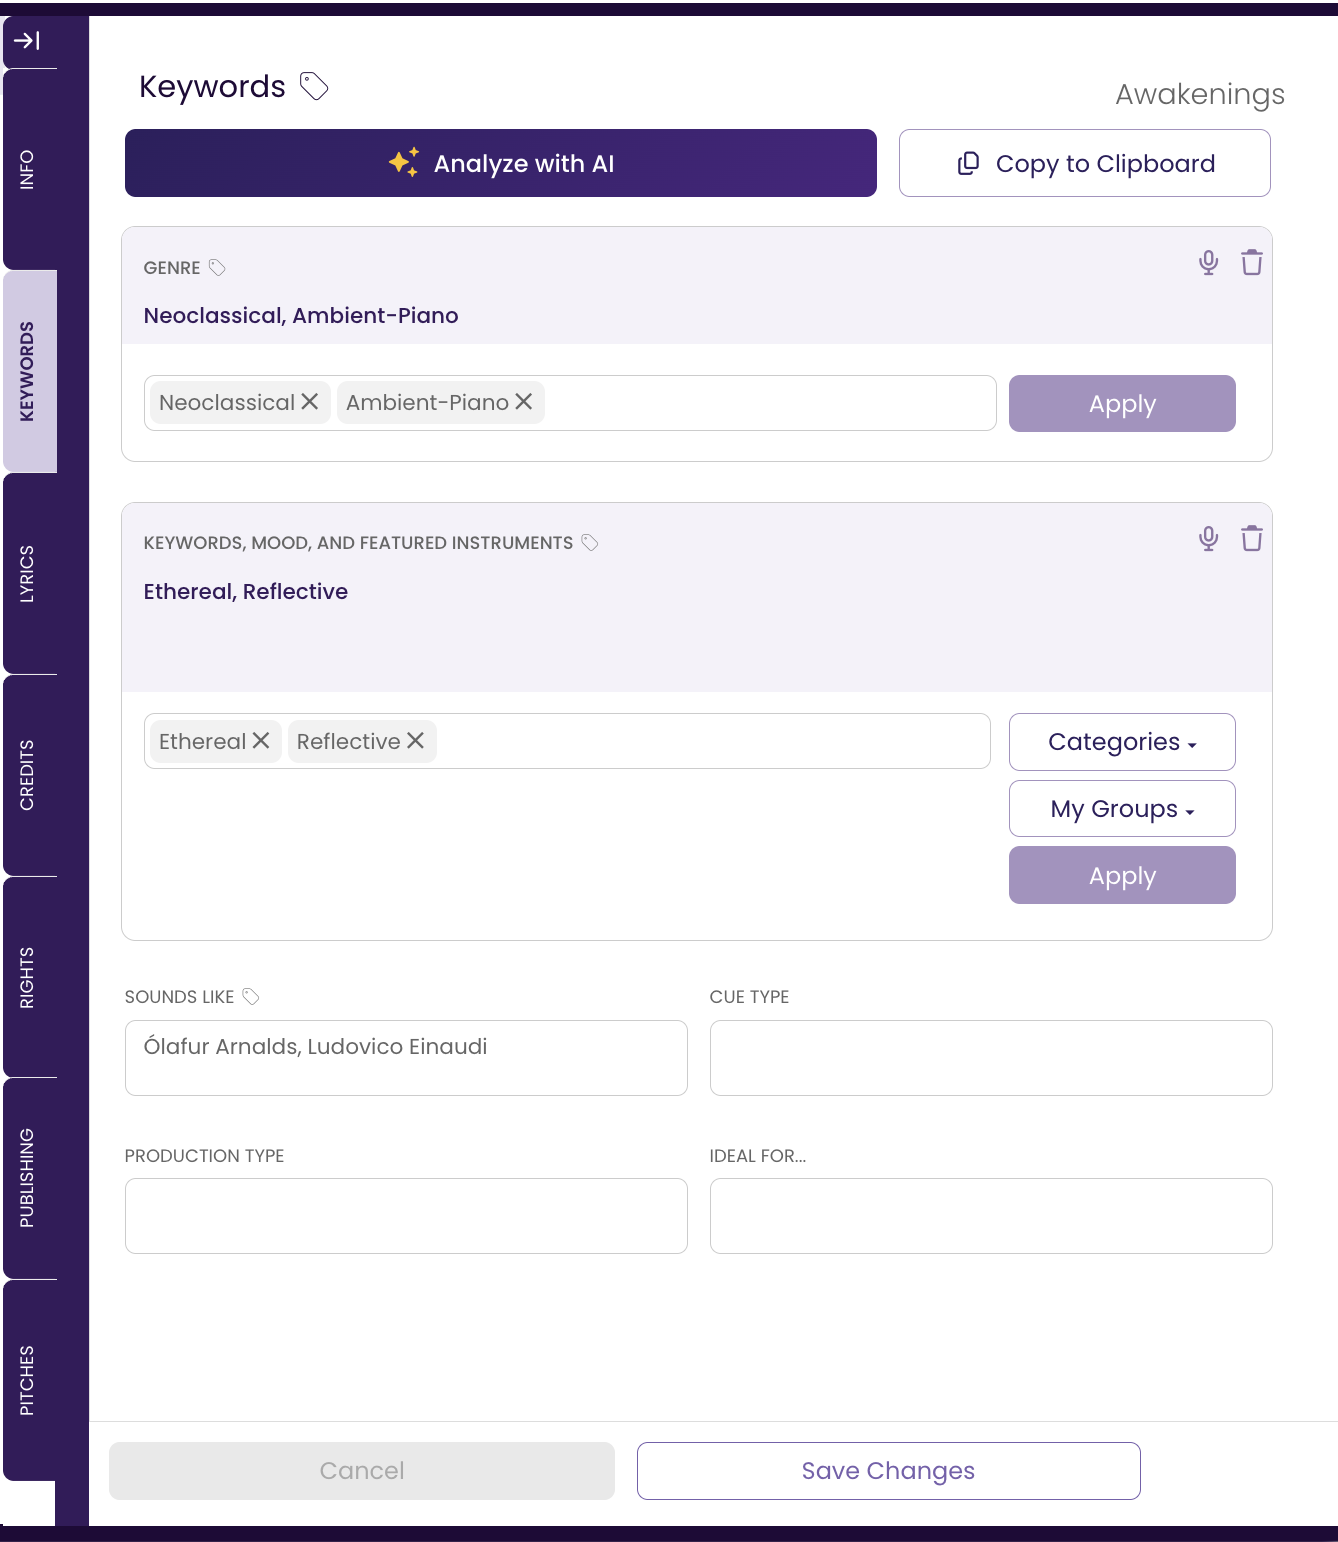
- Complete the KEYWORDS Tab.
Add the Genre, Mood, Keywords, Sounds Like, Cue Types, etc.
See The KEYWORDS Tab
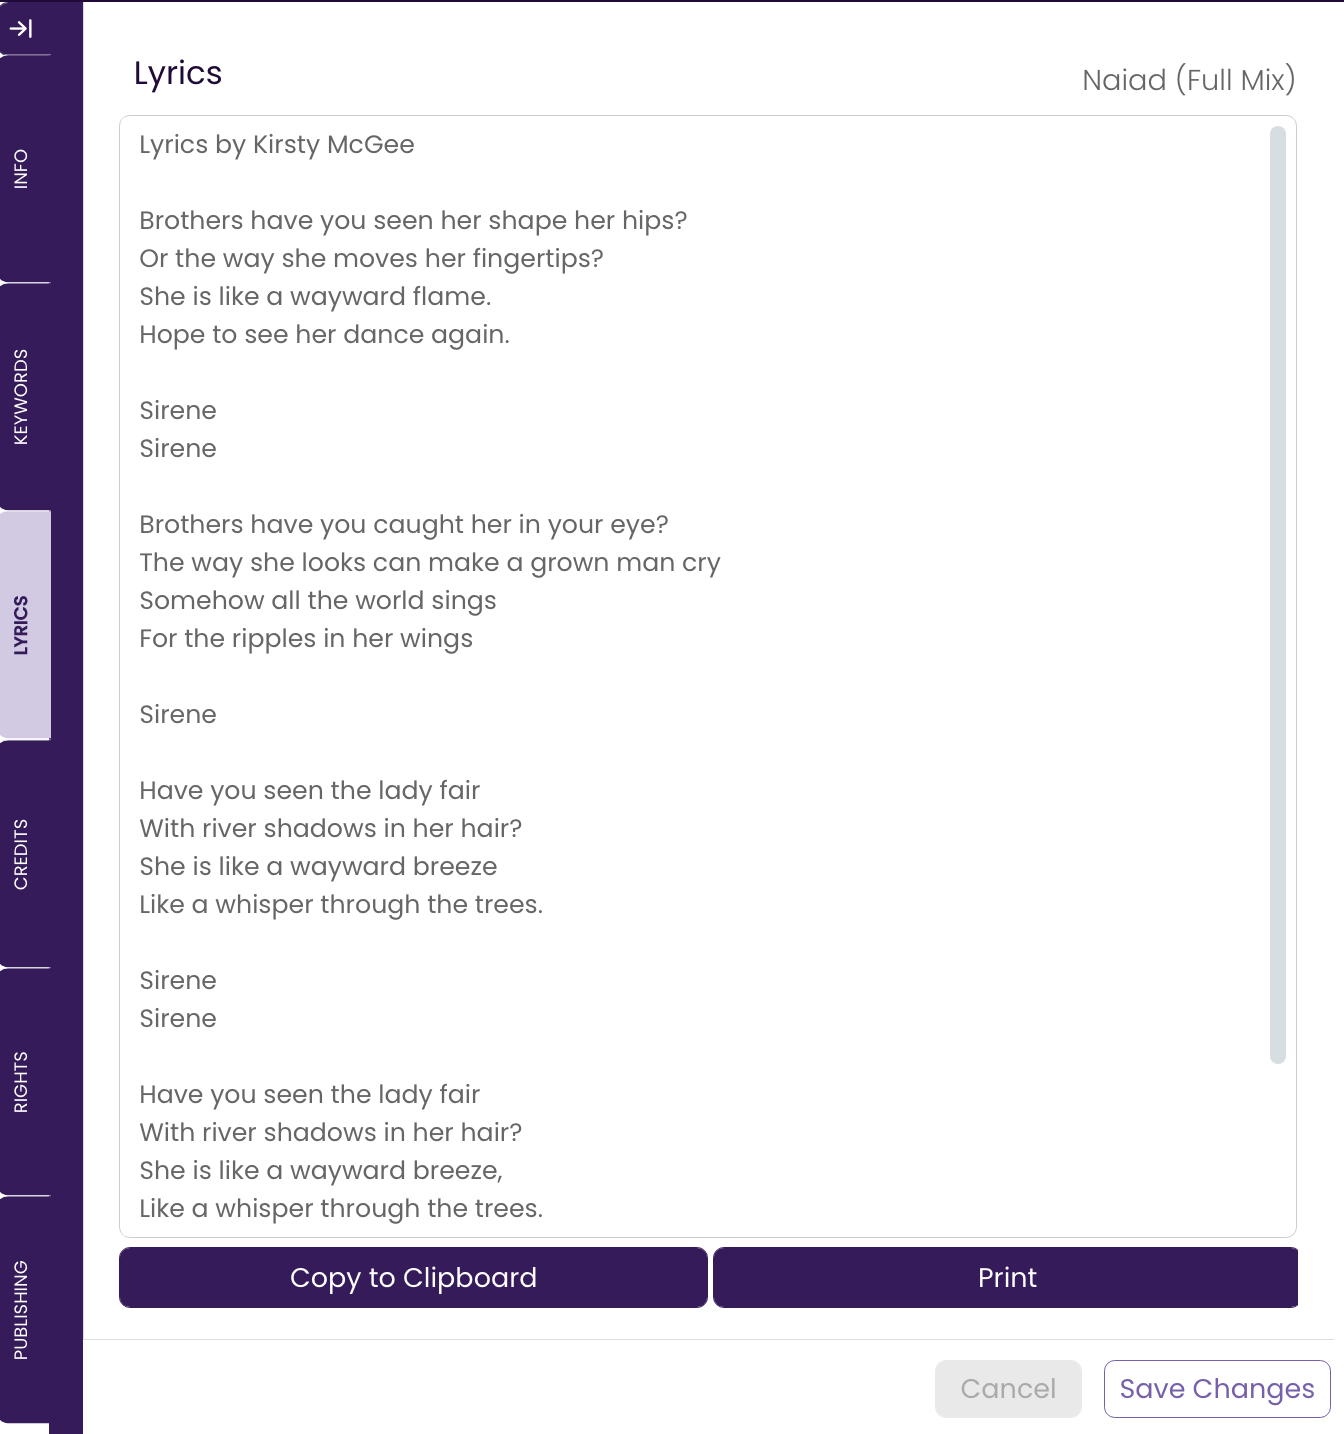
- Complete the LYRICS Tab (if necessary).
Enter any lyrics your song has here. If this is an instrumental, no need to enter anything.
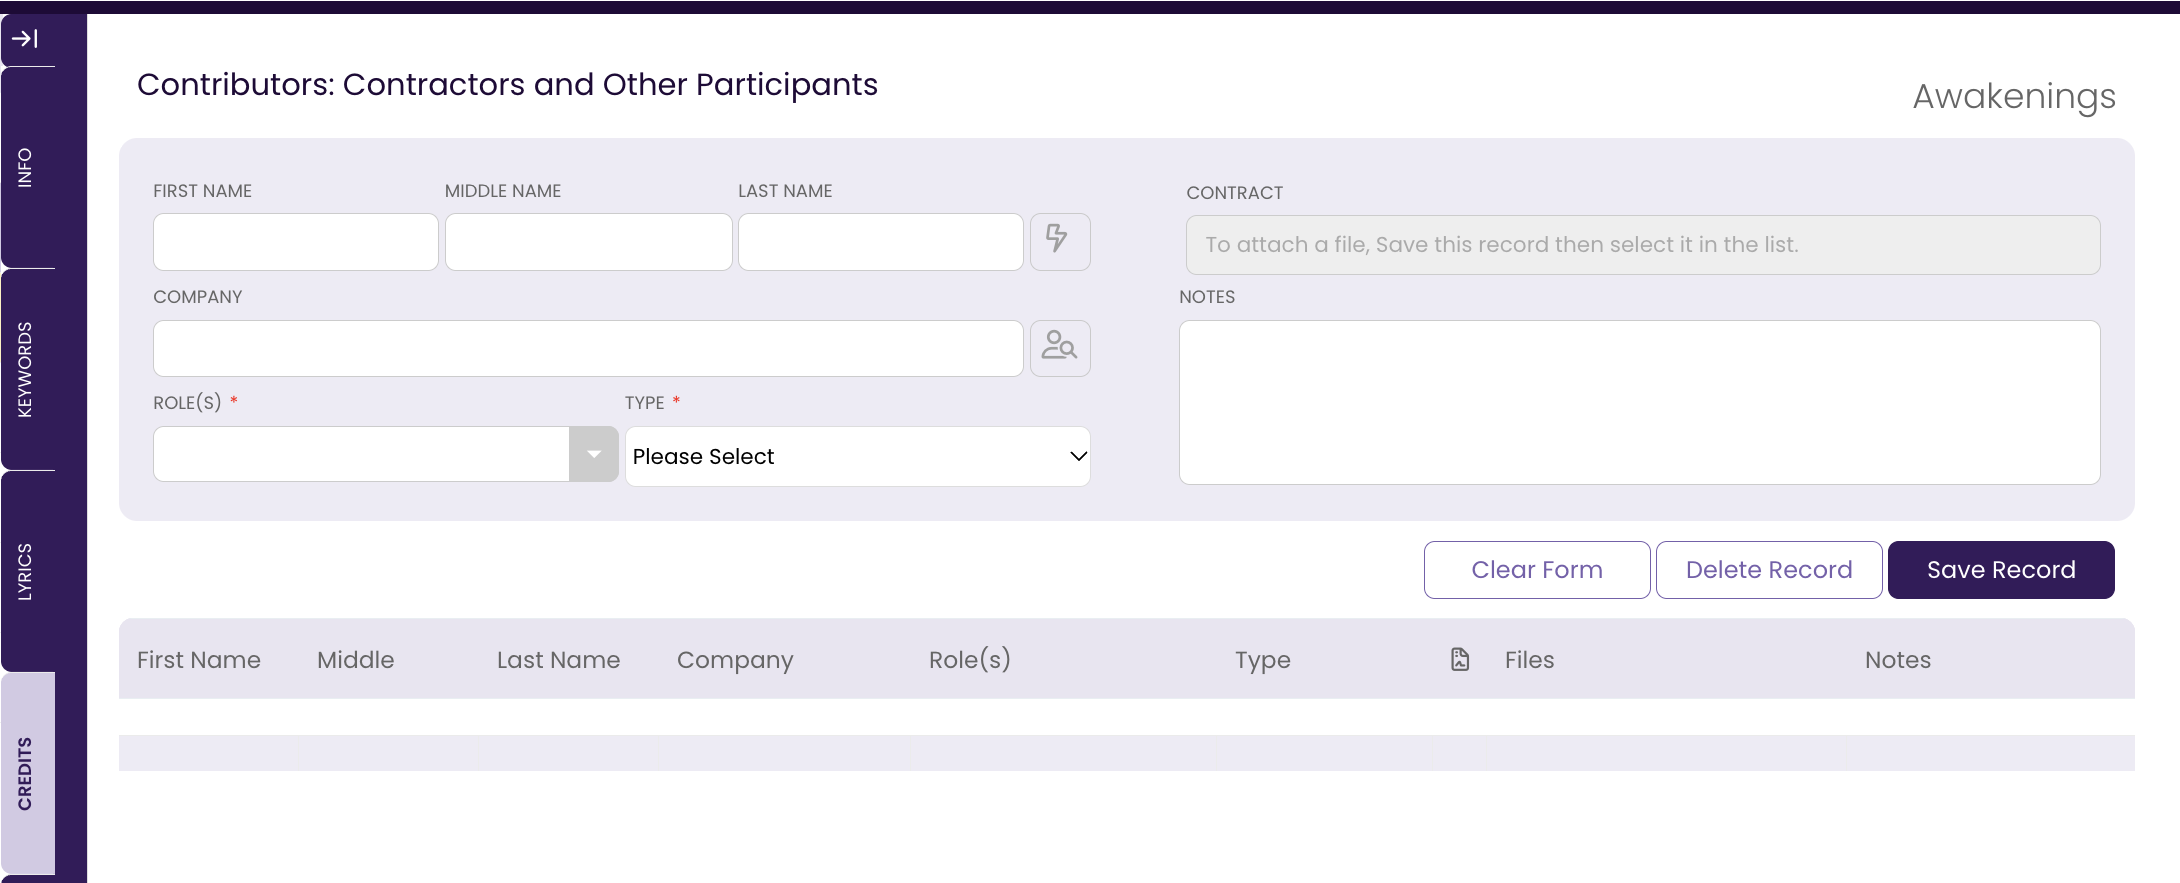
- Complete the CREDITS Tab.
Add any work-for-hire or other non-rights participants here. You can choose to enter collaborators who share rights in this tab, but you'll also need to enter them in the RIGHTS Tab to ensure the splits are recorded properly. See The CREDITS Tab
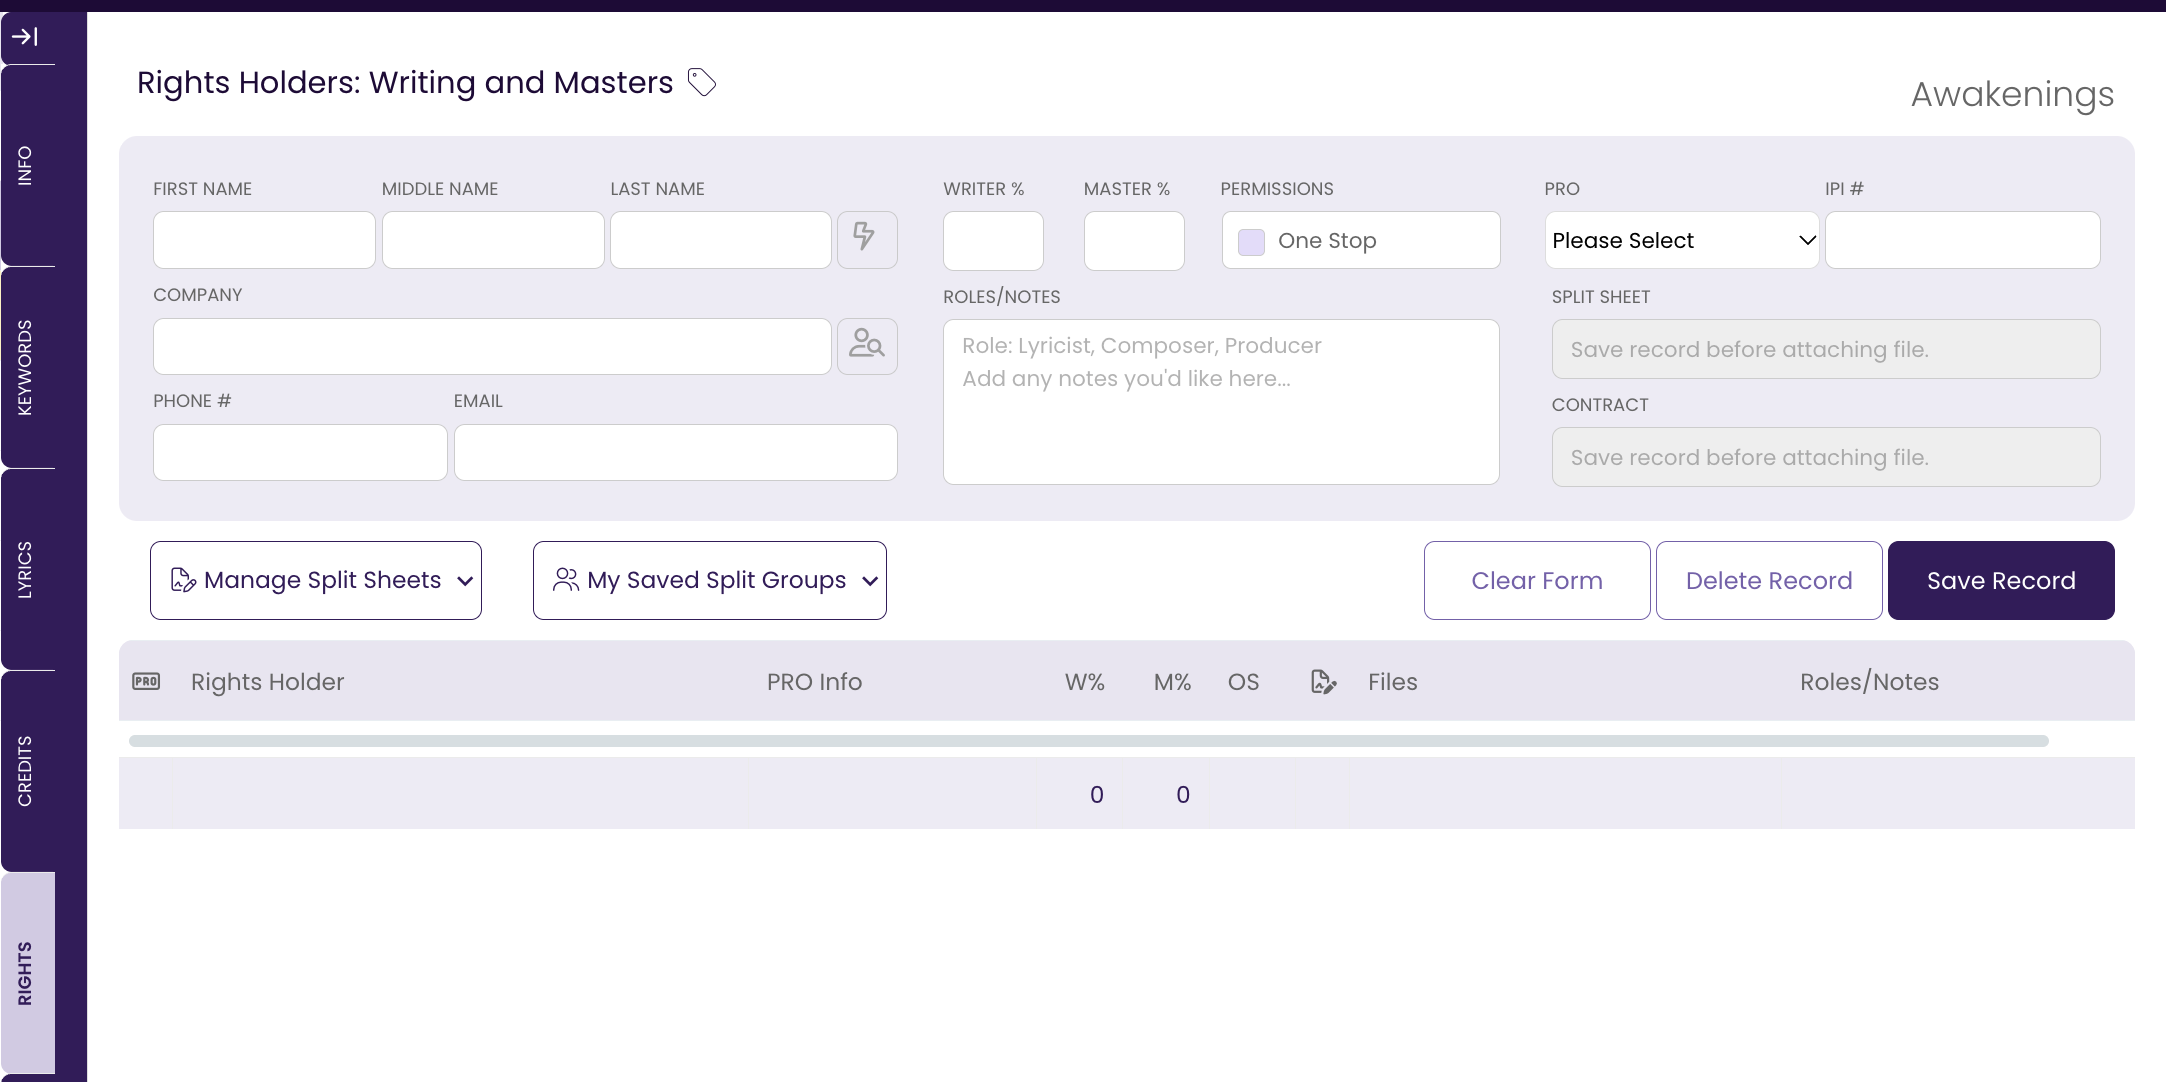
- Complete the RIGHTS Tab.
Add all splits info here to ensure your rights are properly recorded. Attach agreements and split sheets. See The RIGHTS Tab.
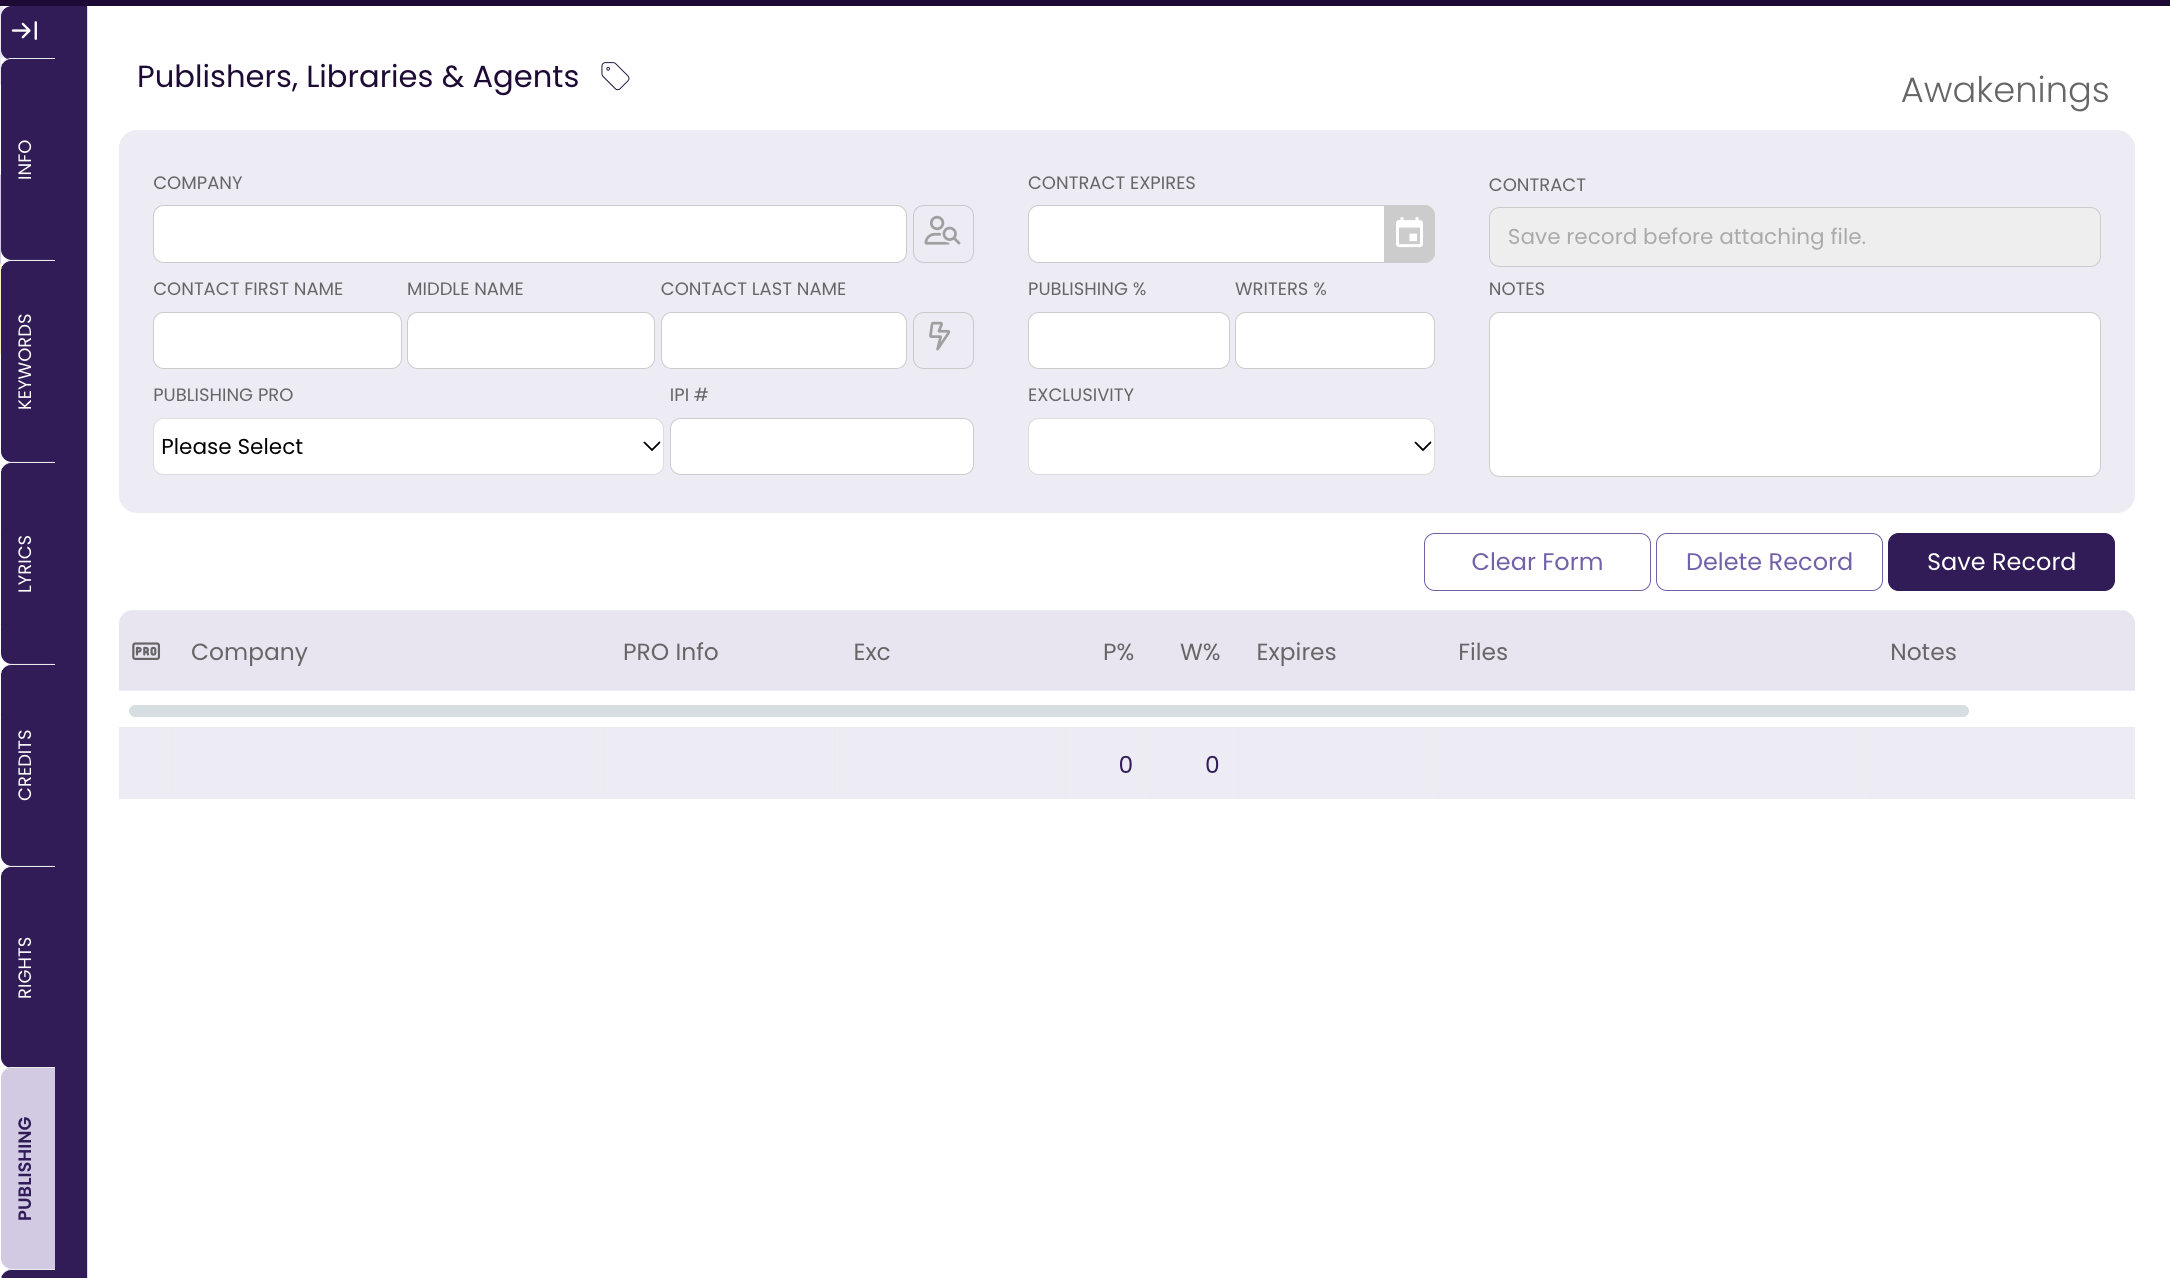
- Complete the PUBLISHING Tab.
If your track is signed with a publisher, library, or sync agency, enter the details of the agreement here.
See The PUBLISHING Tab
Step Four: FILL DATA across all versions.
Now that you’ve added all the information about your track, let’s copy that info out to the other versions of your track. See Filling Data
- Select ALL versions of your track (Primary, Alternates & Stems).
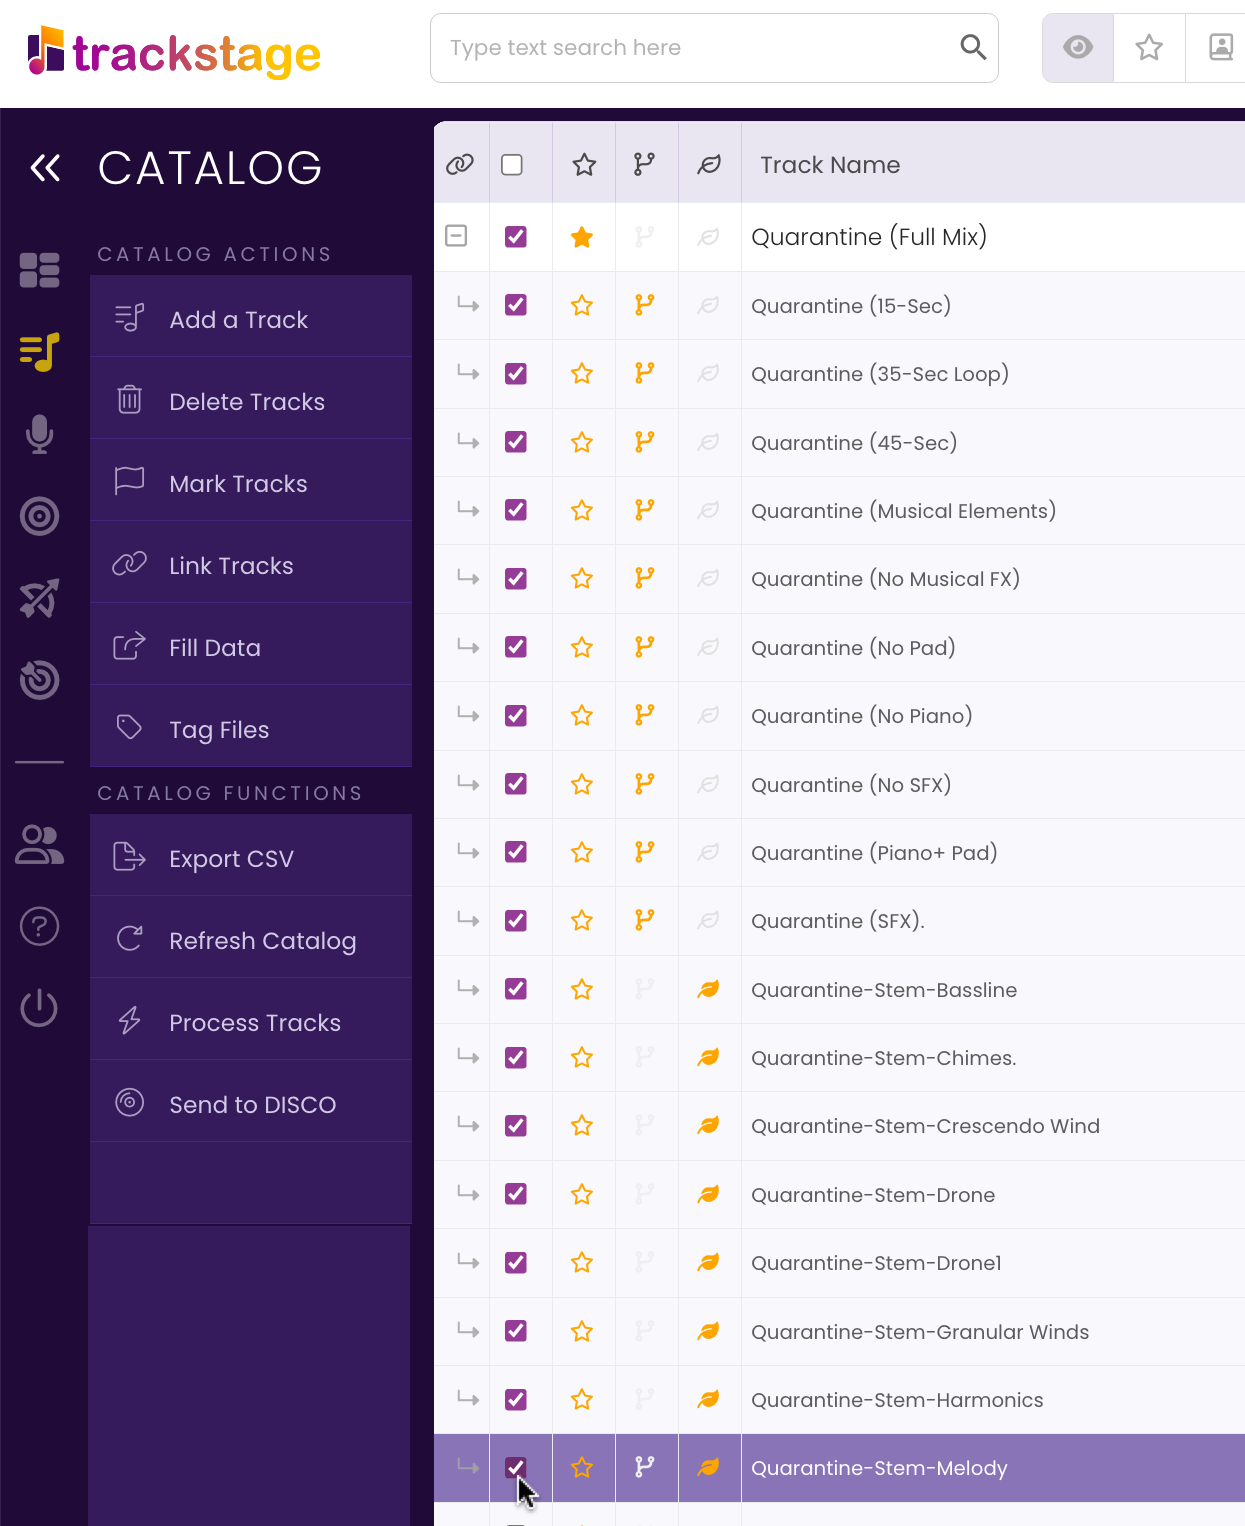
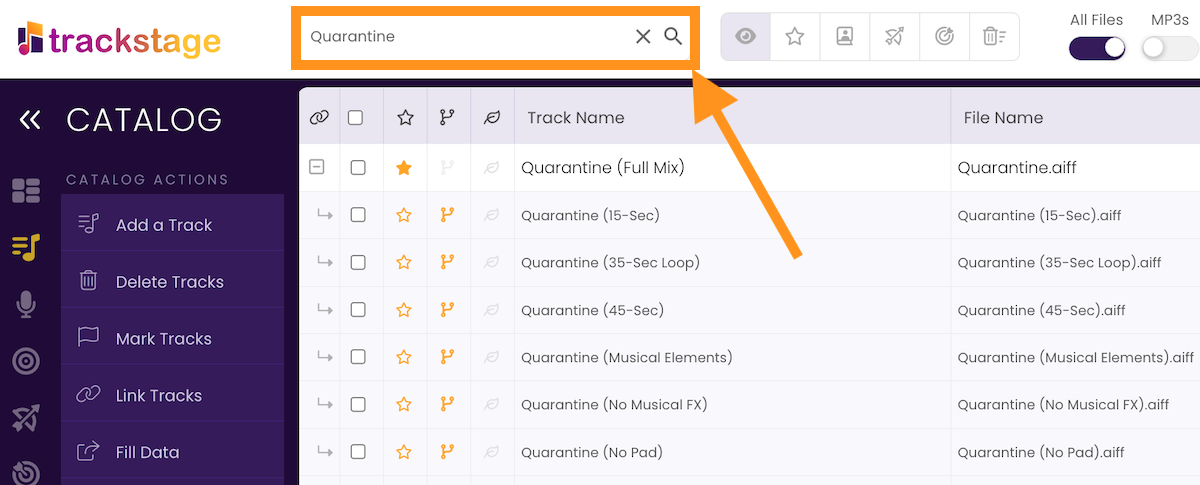
HINT: Enter your track’s name into the SEARCH field to isolate all versions of your track, then check the checkbox in the header bar to quickly select all tracks with a single click.
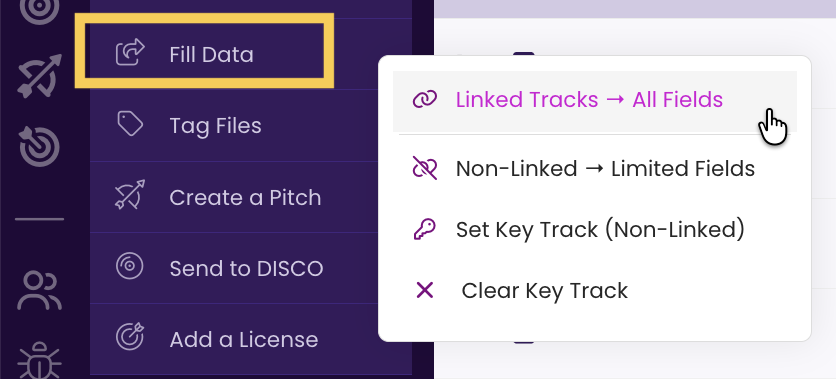
- Click on the FILL DATA button in the Side Menu.
Select Linked Tracks -> All Fields.
The Fill Data window opens.
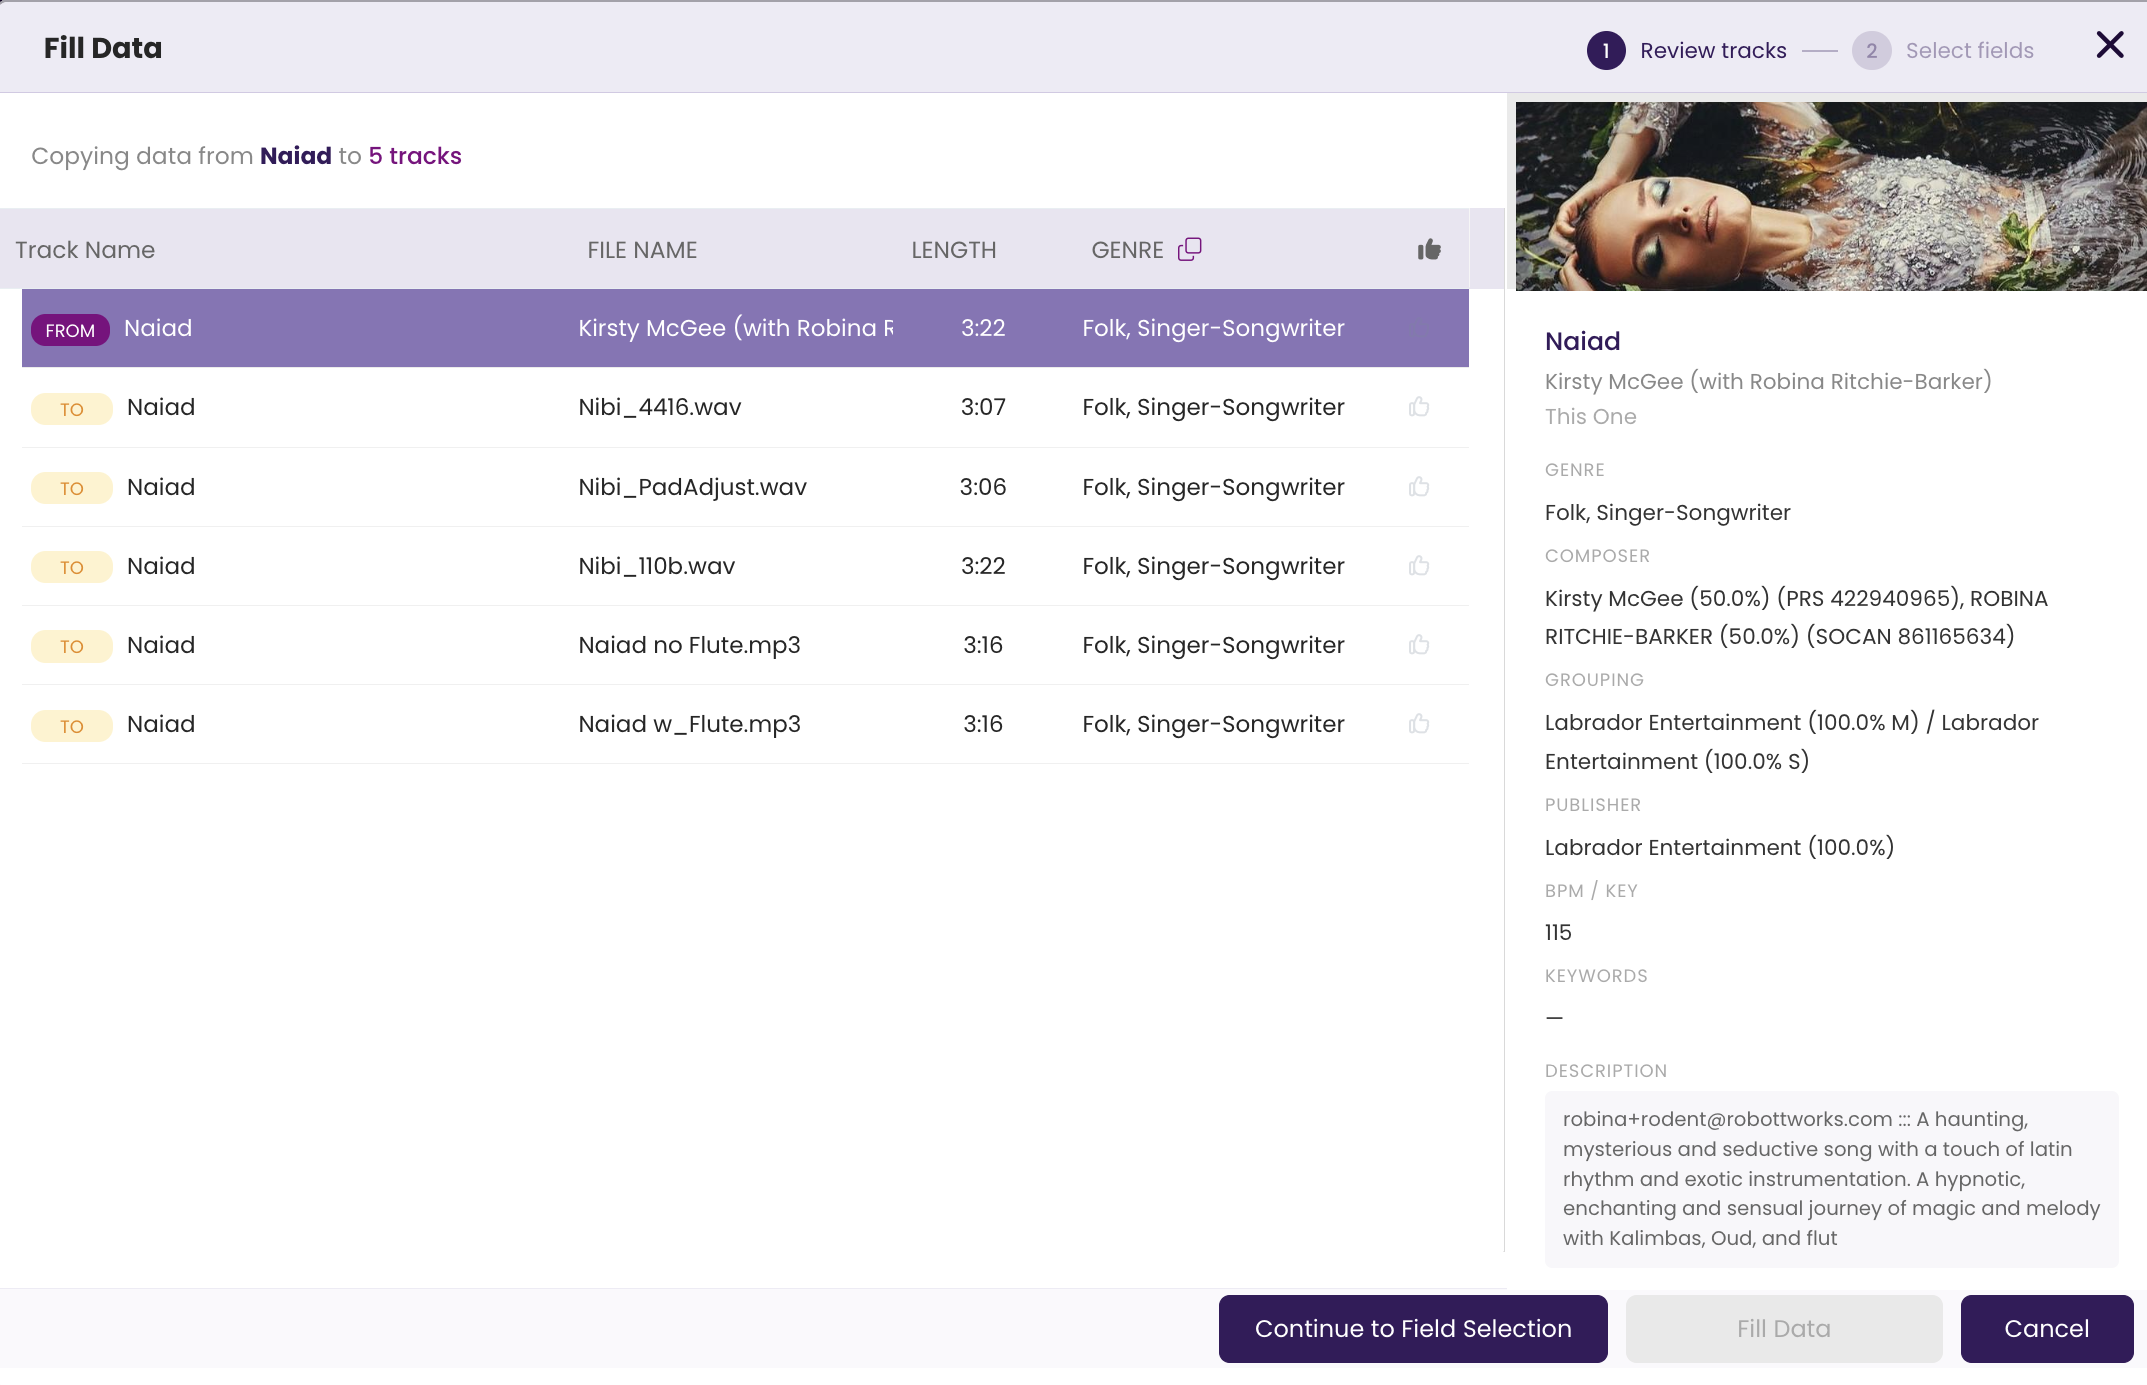
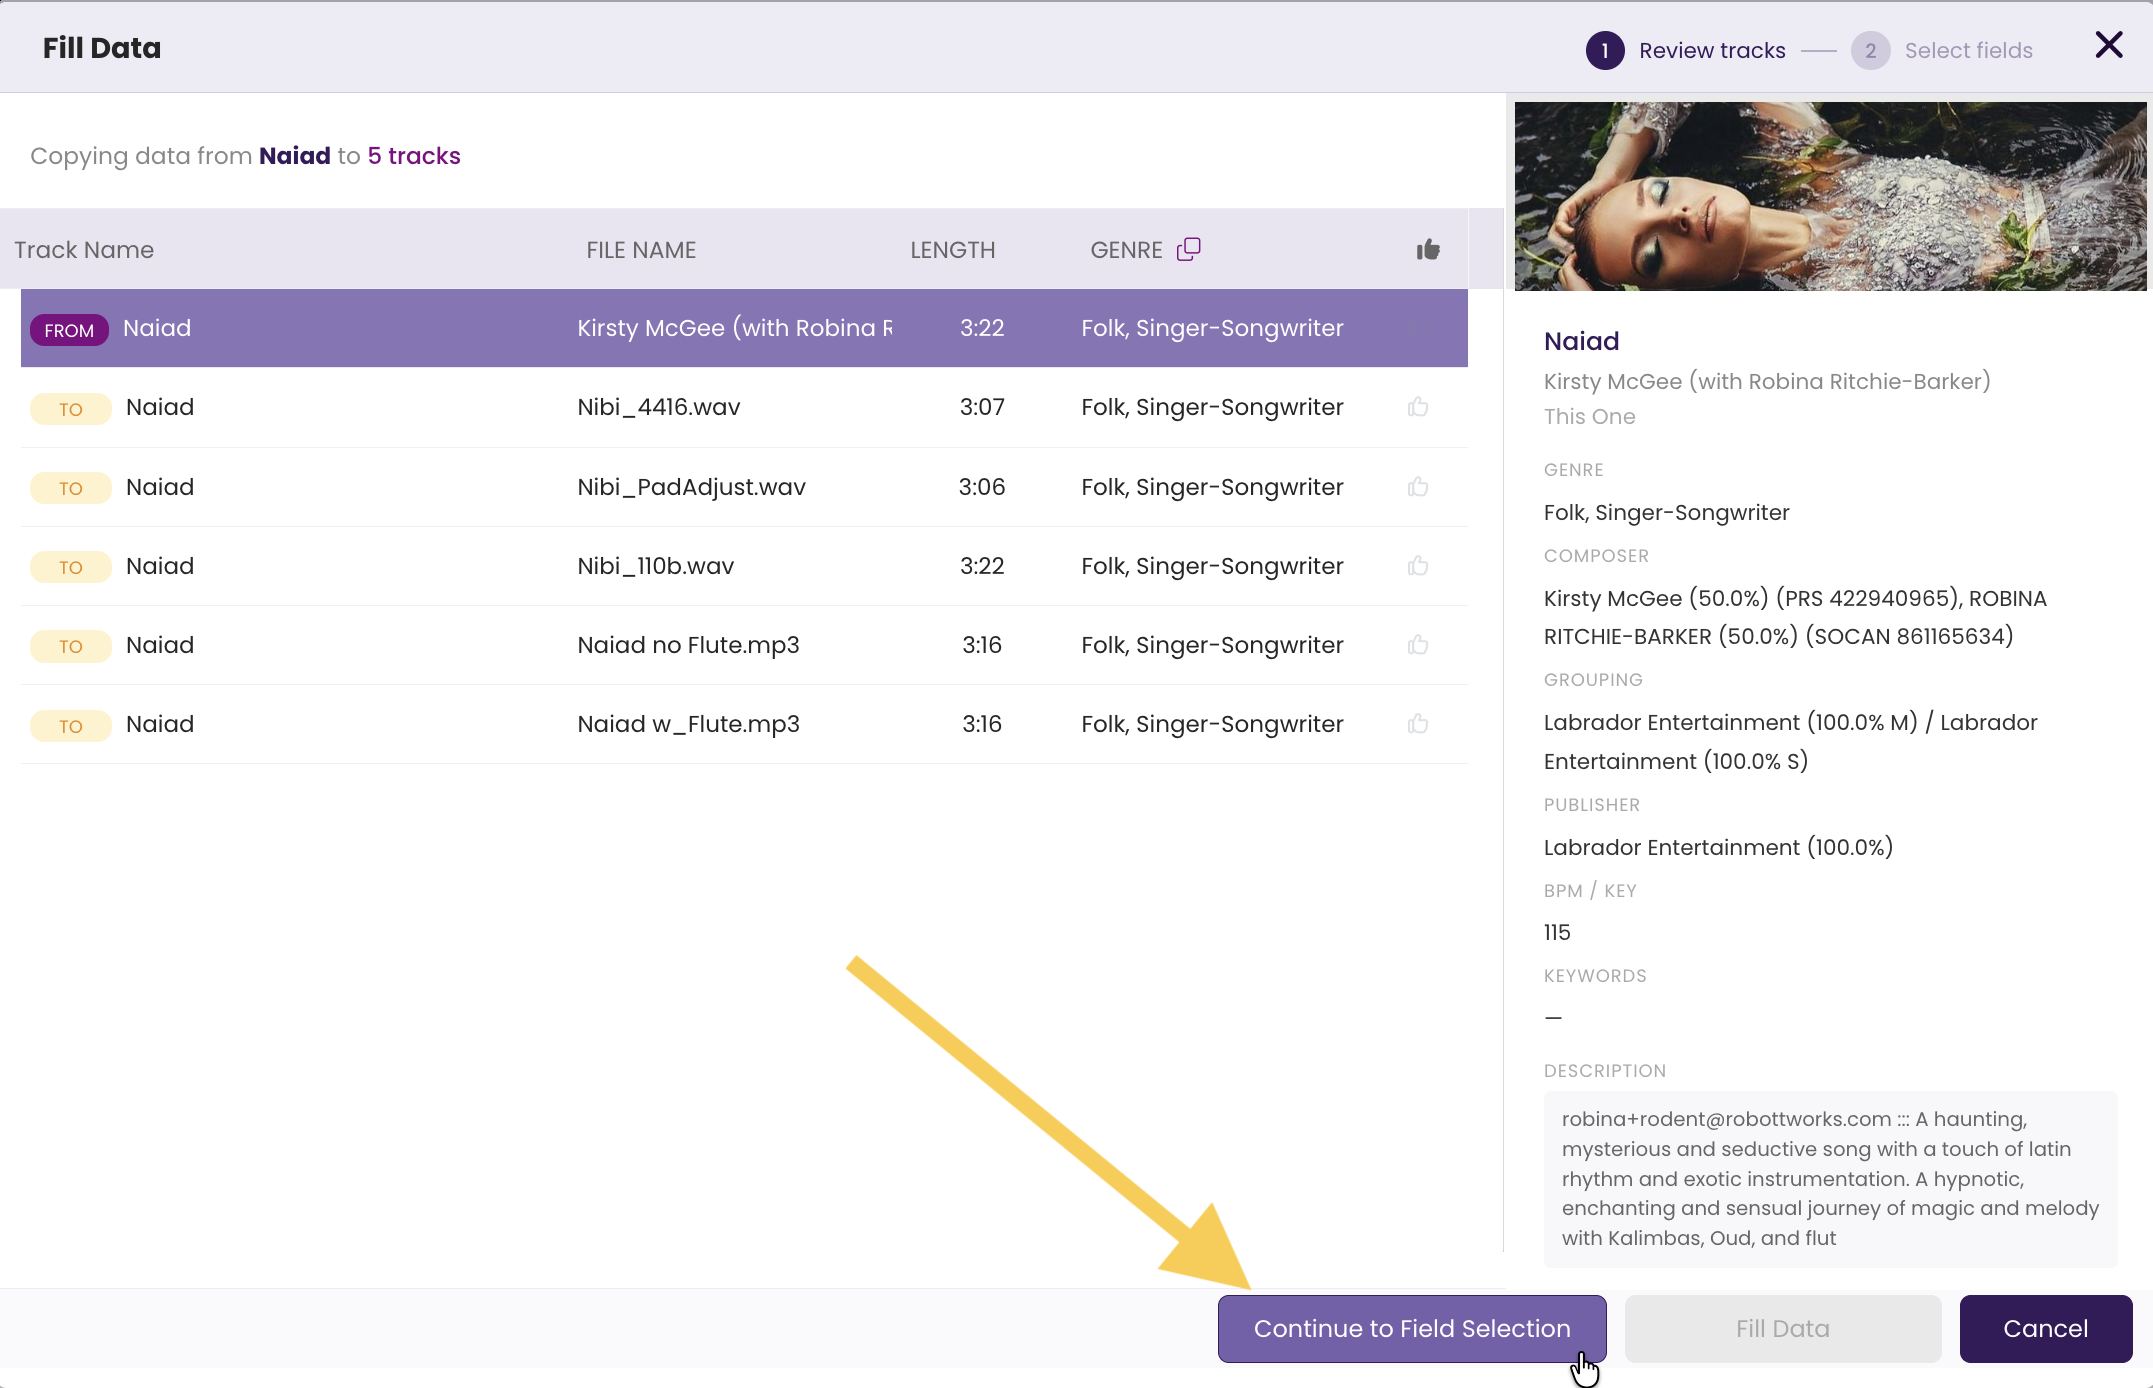
- Add and edit Track Names and Genres as desired.
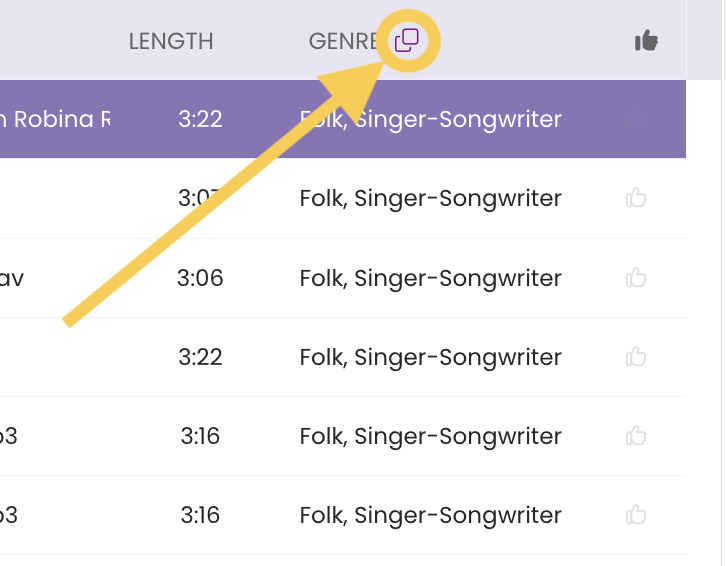
Use the to autofill the Primary Track's genre to all versions.
- Click Continue to Field Selection to save your changes.
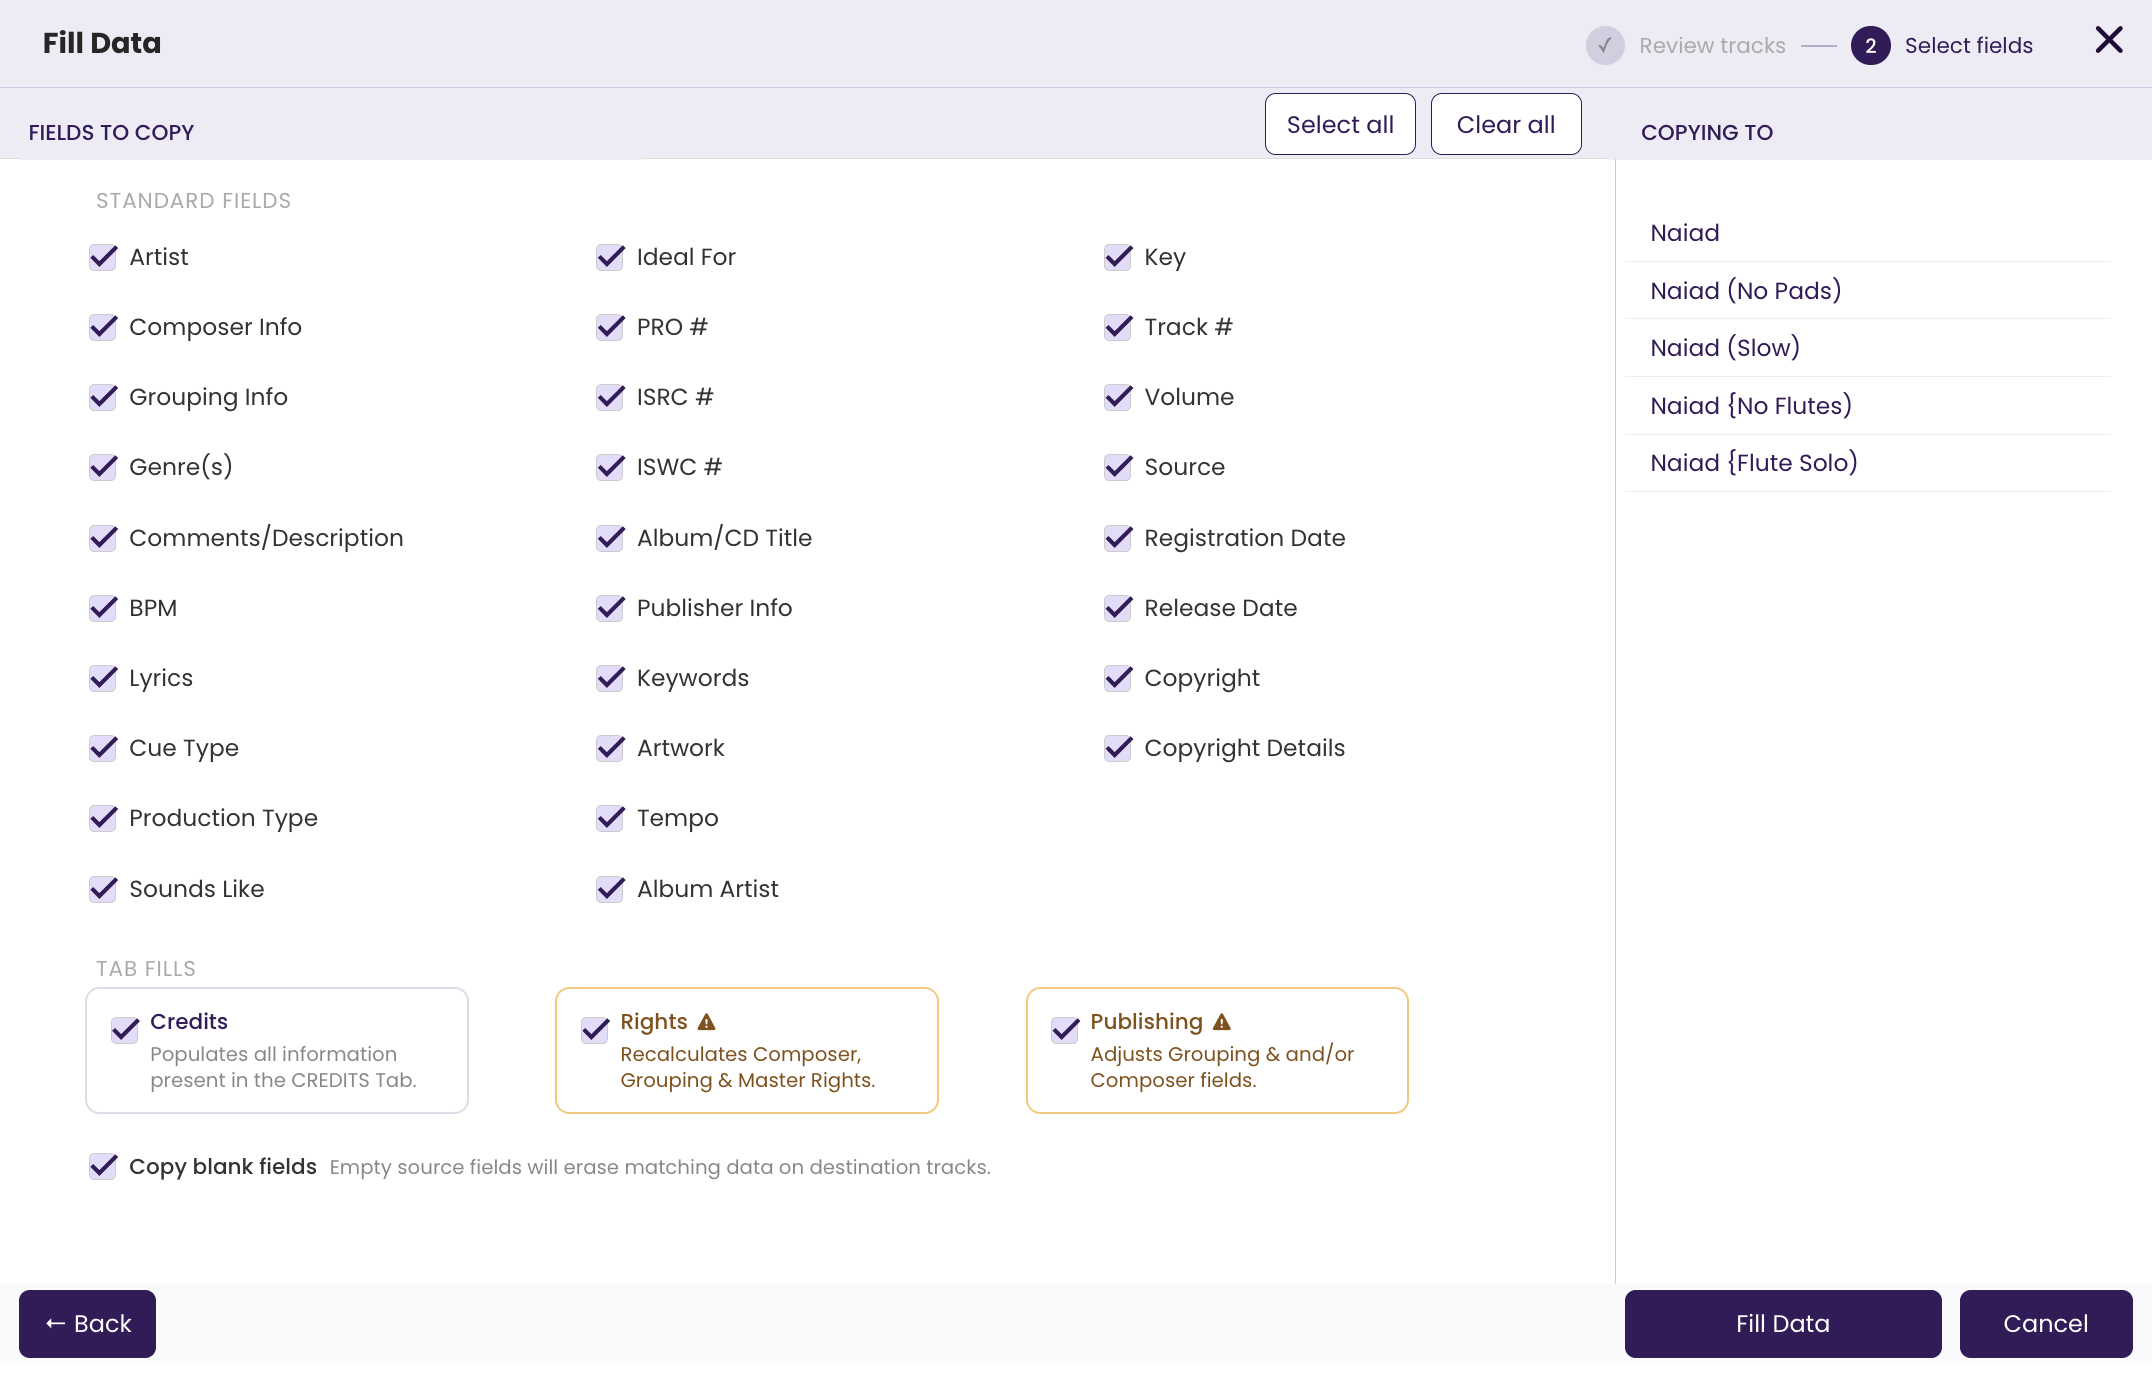
The Field Selection panel opens. - Choose the data you want to FILL.
From the Data Select panel, check the boxes of the data you want to copy from the Primary to the rest of the tracks.
- Click Fill Data > Ok.
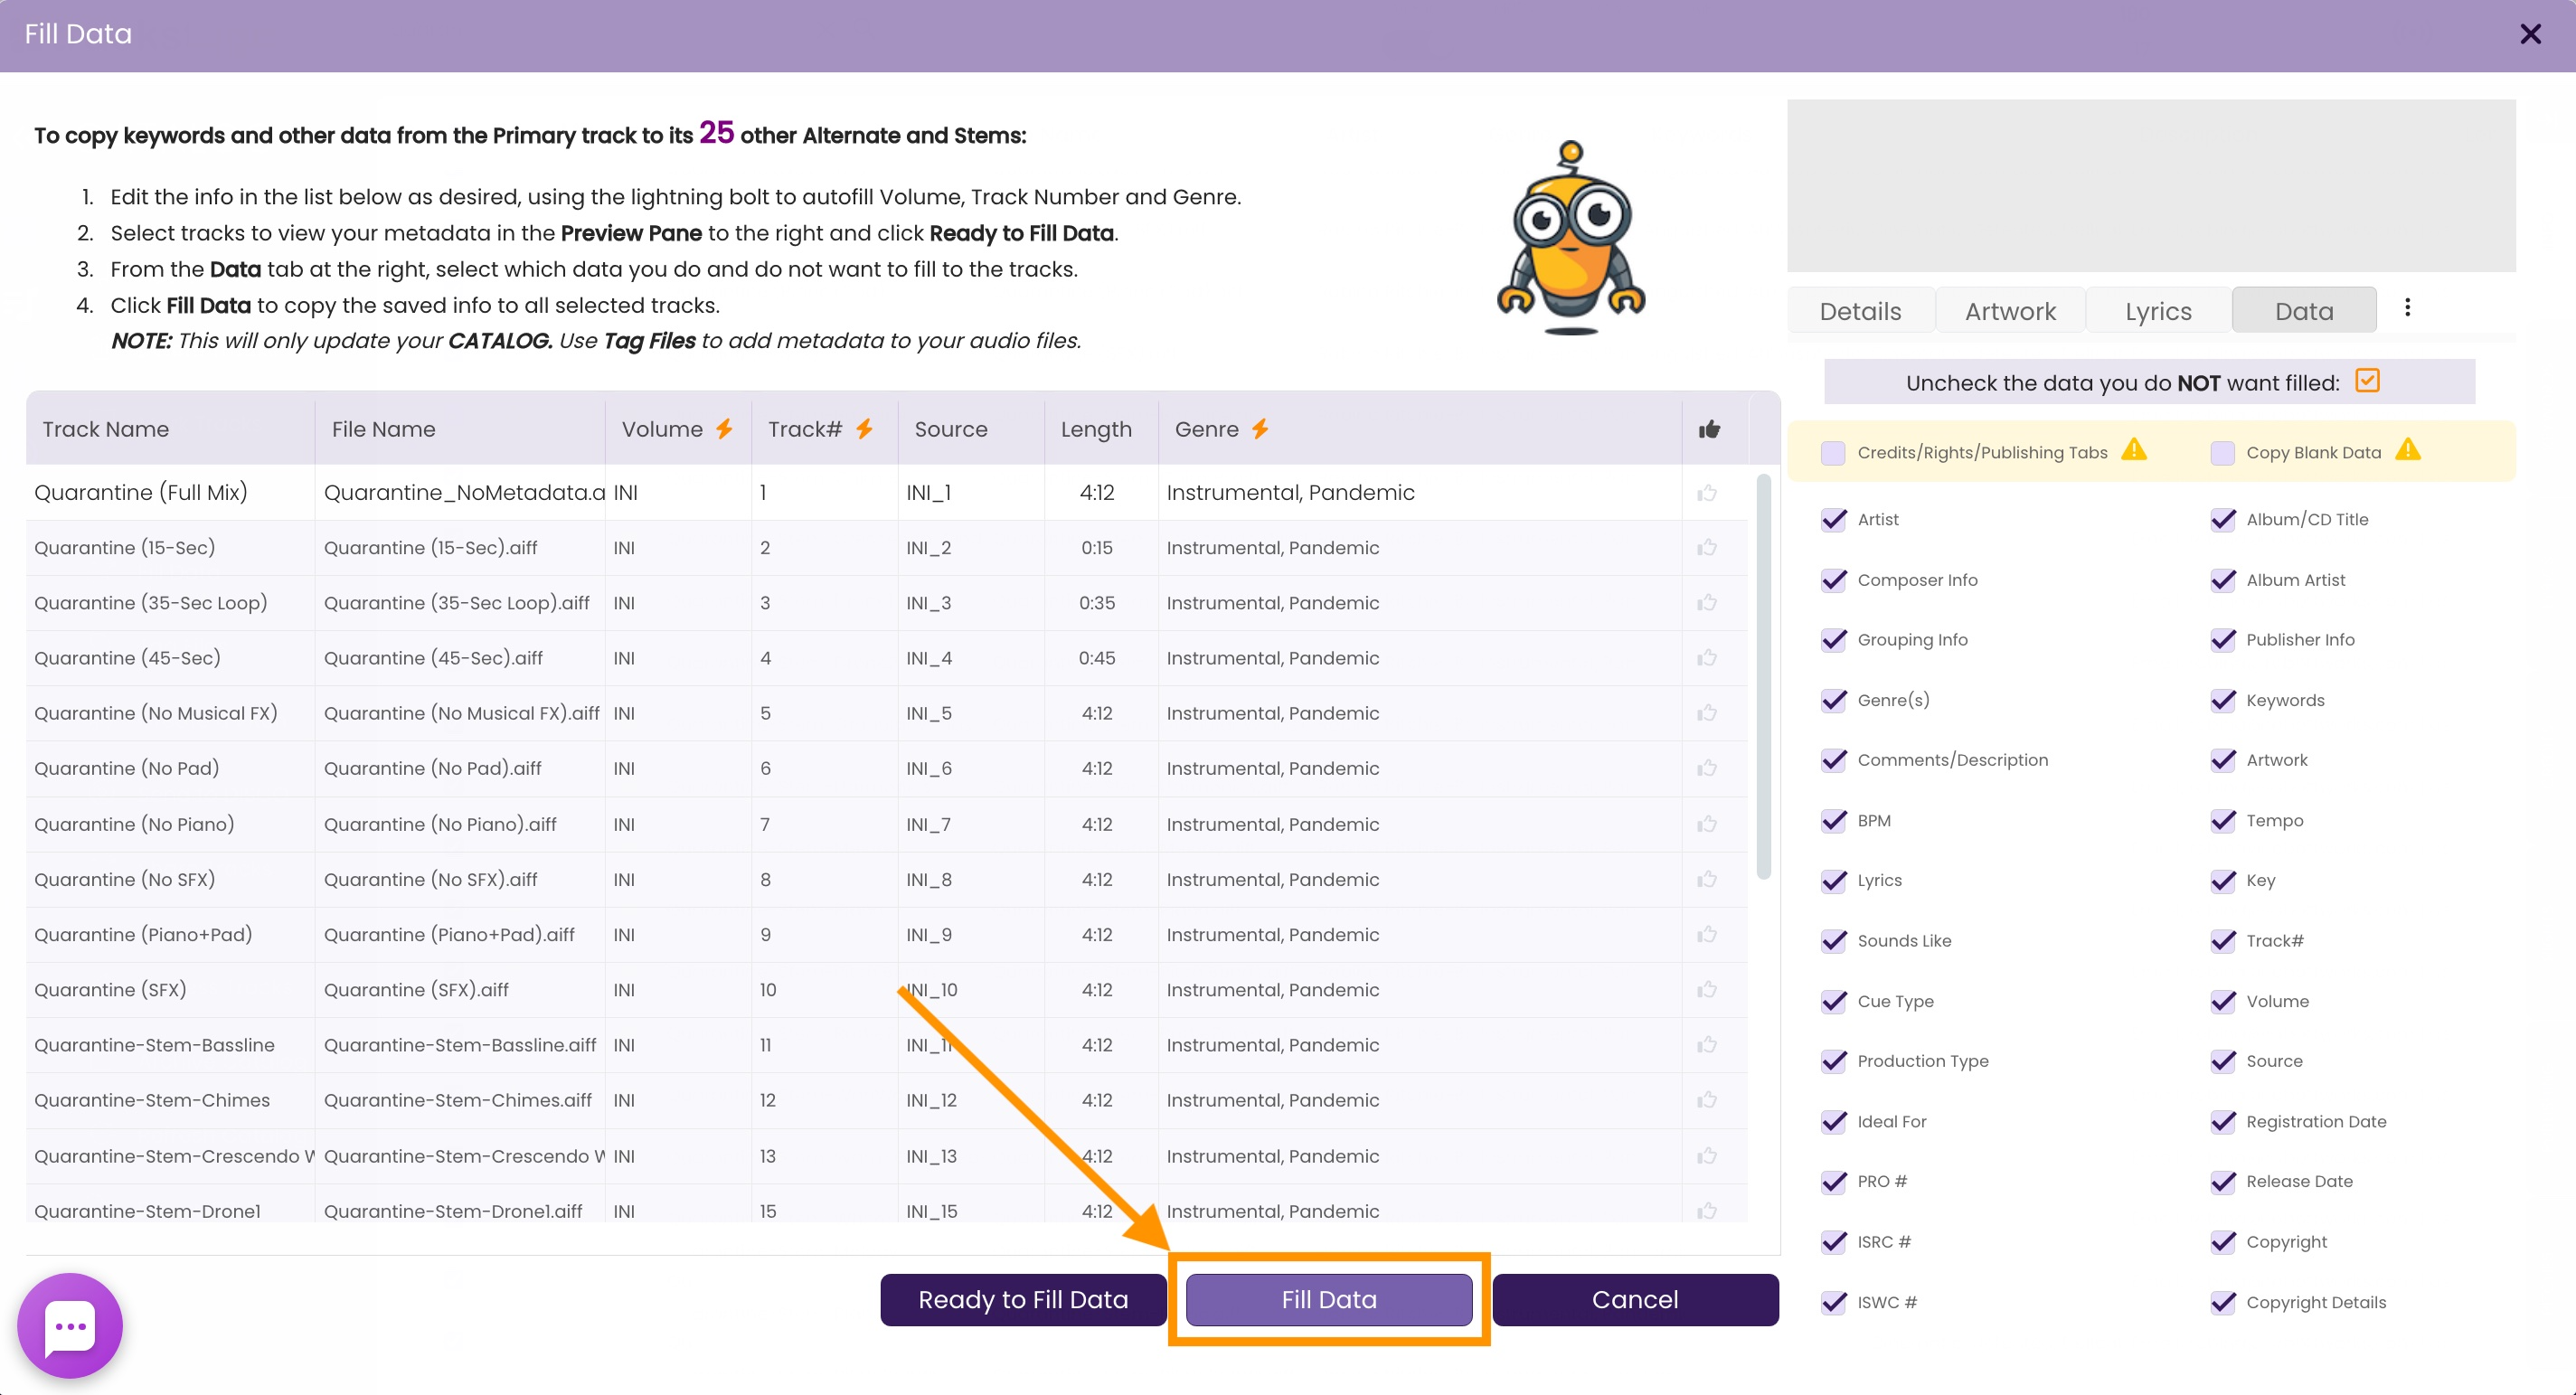
TrackStage will copy all data on your Primary Track to the Alternate versions of your tracks, and critical data to your Stem versions (Keywords, artwork, splits etc. are not necessary for Stems as you only send stems in AFTER you get the job). The window will close, and you’ll see the updated tracks are now highlighted in the CATALOG. This alerts you that changes have been made to the tracks that need to be tagged to the audio files on your hard drive.
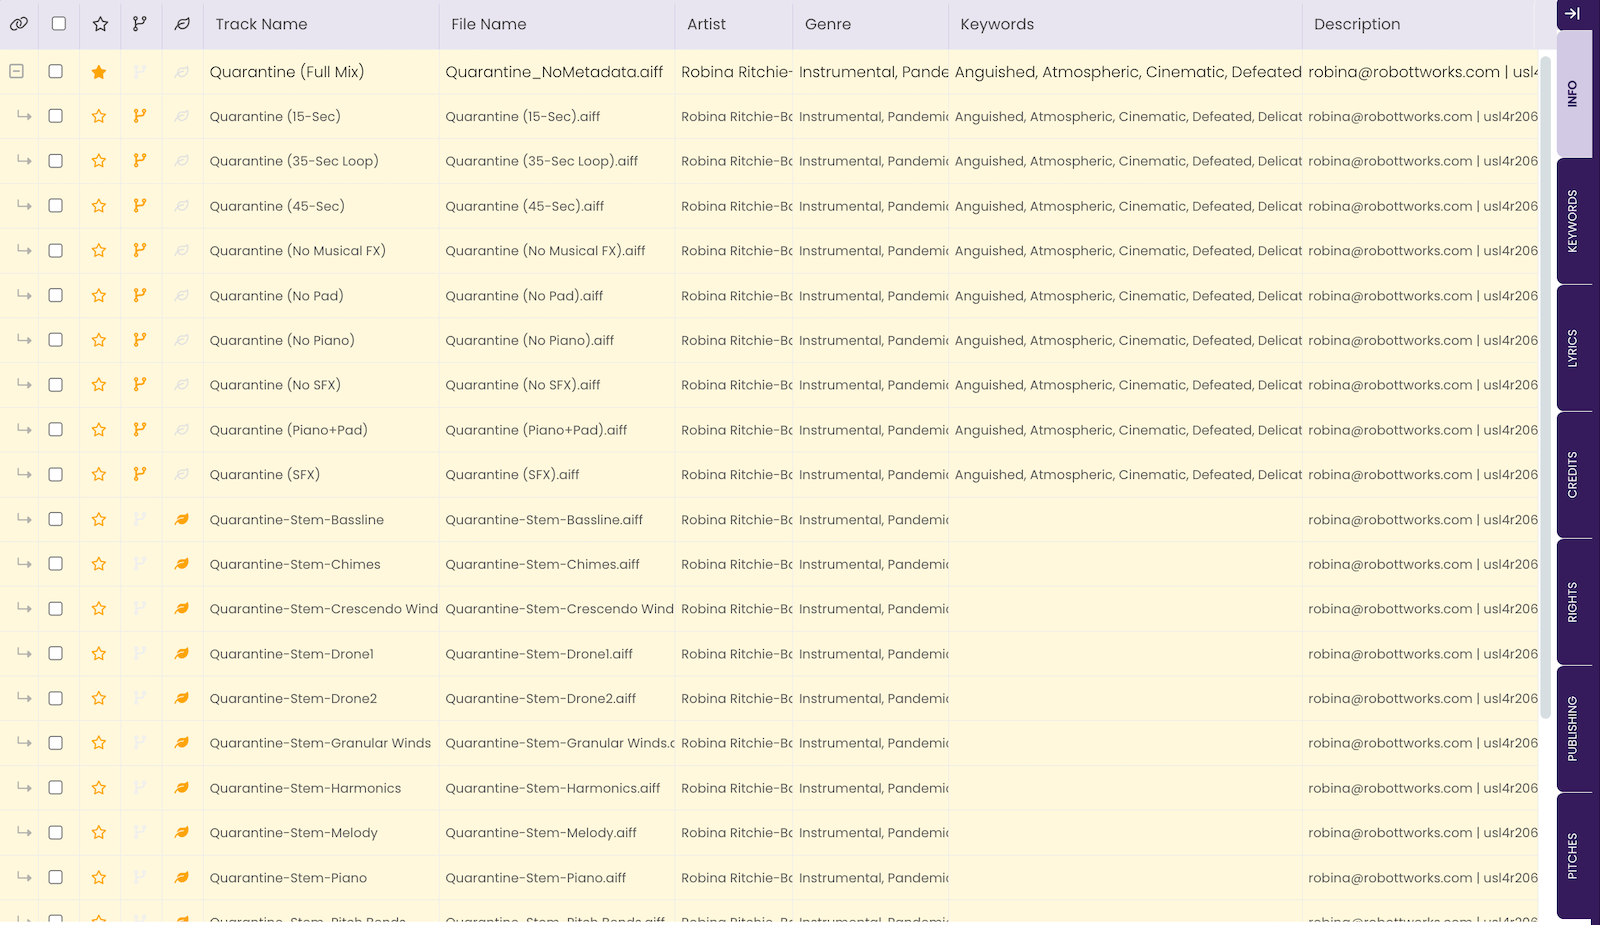
NOTE: Only contact information is copied to the Stem versions of your track. As Stems are typically delivered to contacts after your track is licensed, they don't require the same level of metadata tagging. If you want your Stems to have all the same metadata, just mark them as Alternates until the tagging process is complete.
Step Five: TAG the Metadata to your Audio Files.
Now that the information has been entered on all versions of your track, it’s time to move the metadata to the audio files on your hard drive. See Filling Data
- Select all versions of your track – Primary, Alternates & Stems.
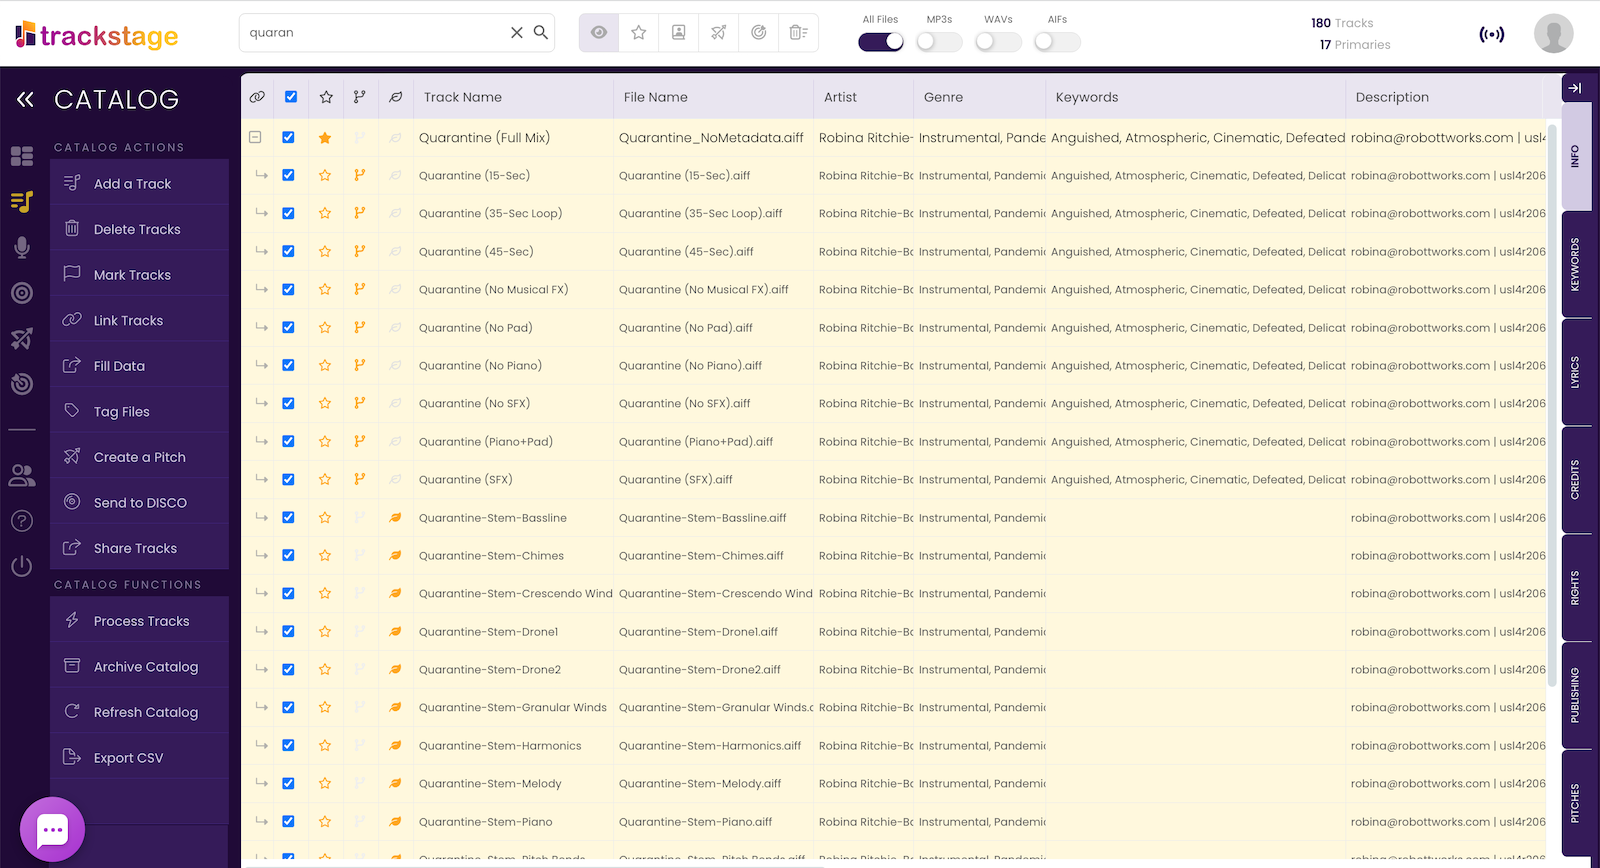
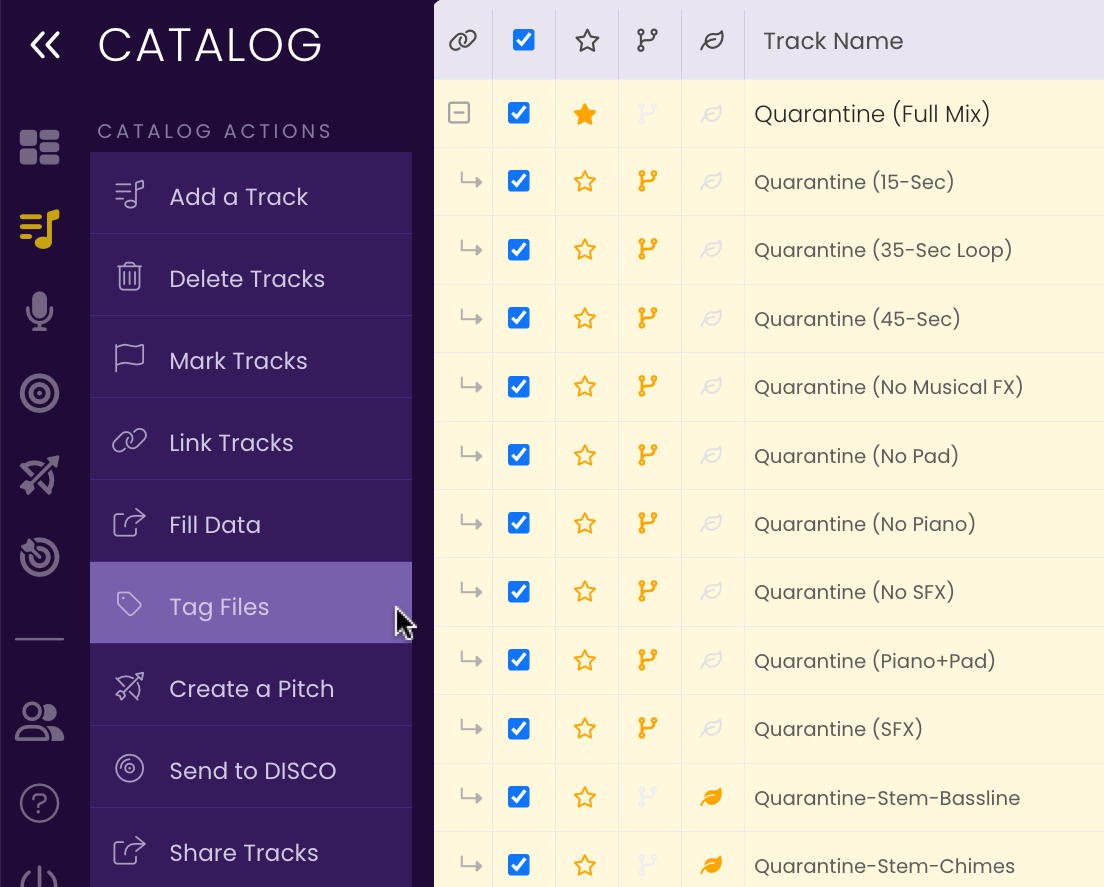
- Click on the Tag Files button in the Side Menu.
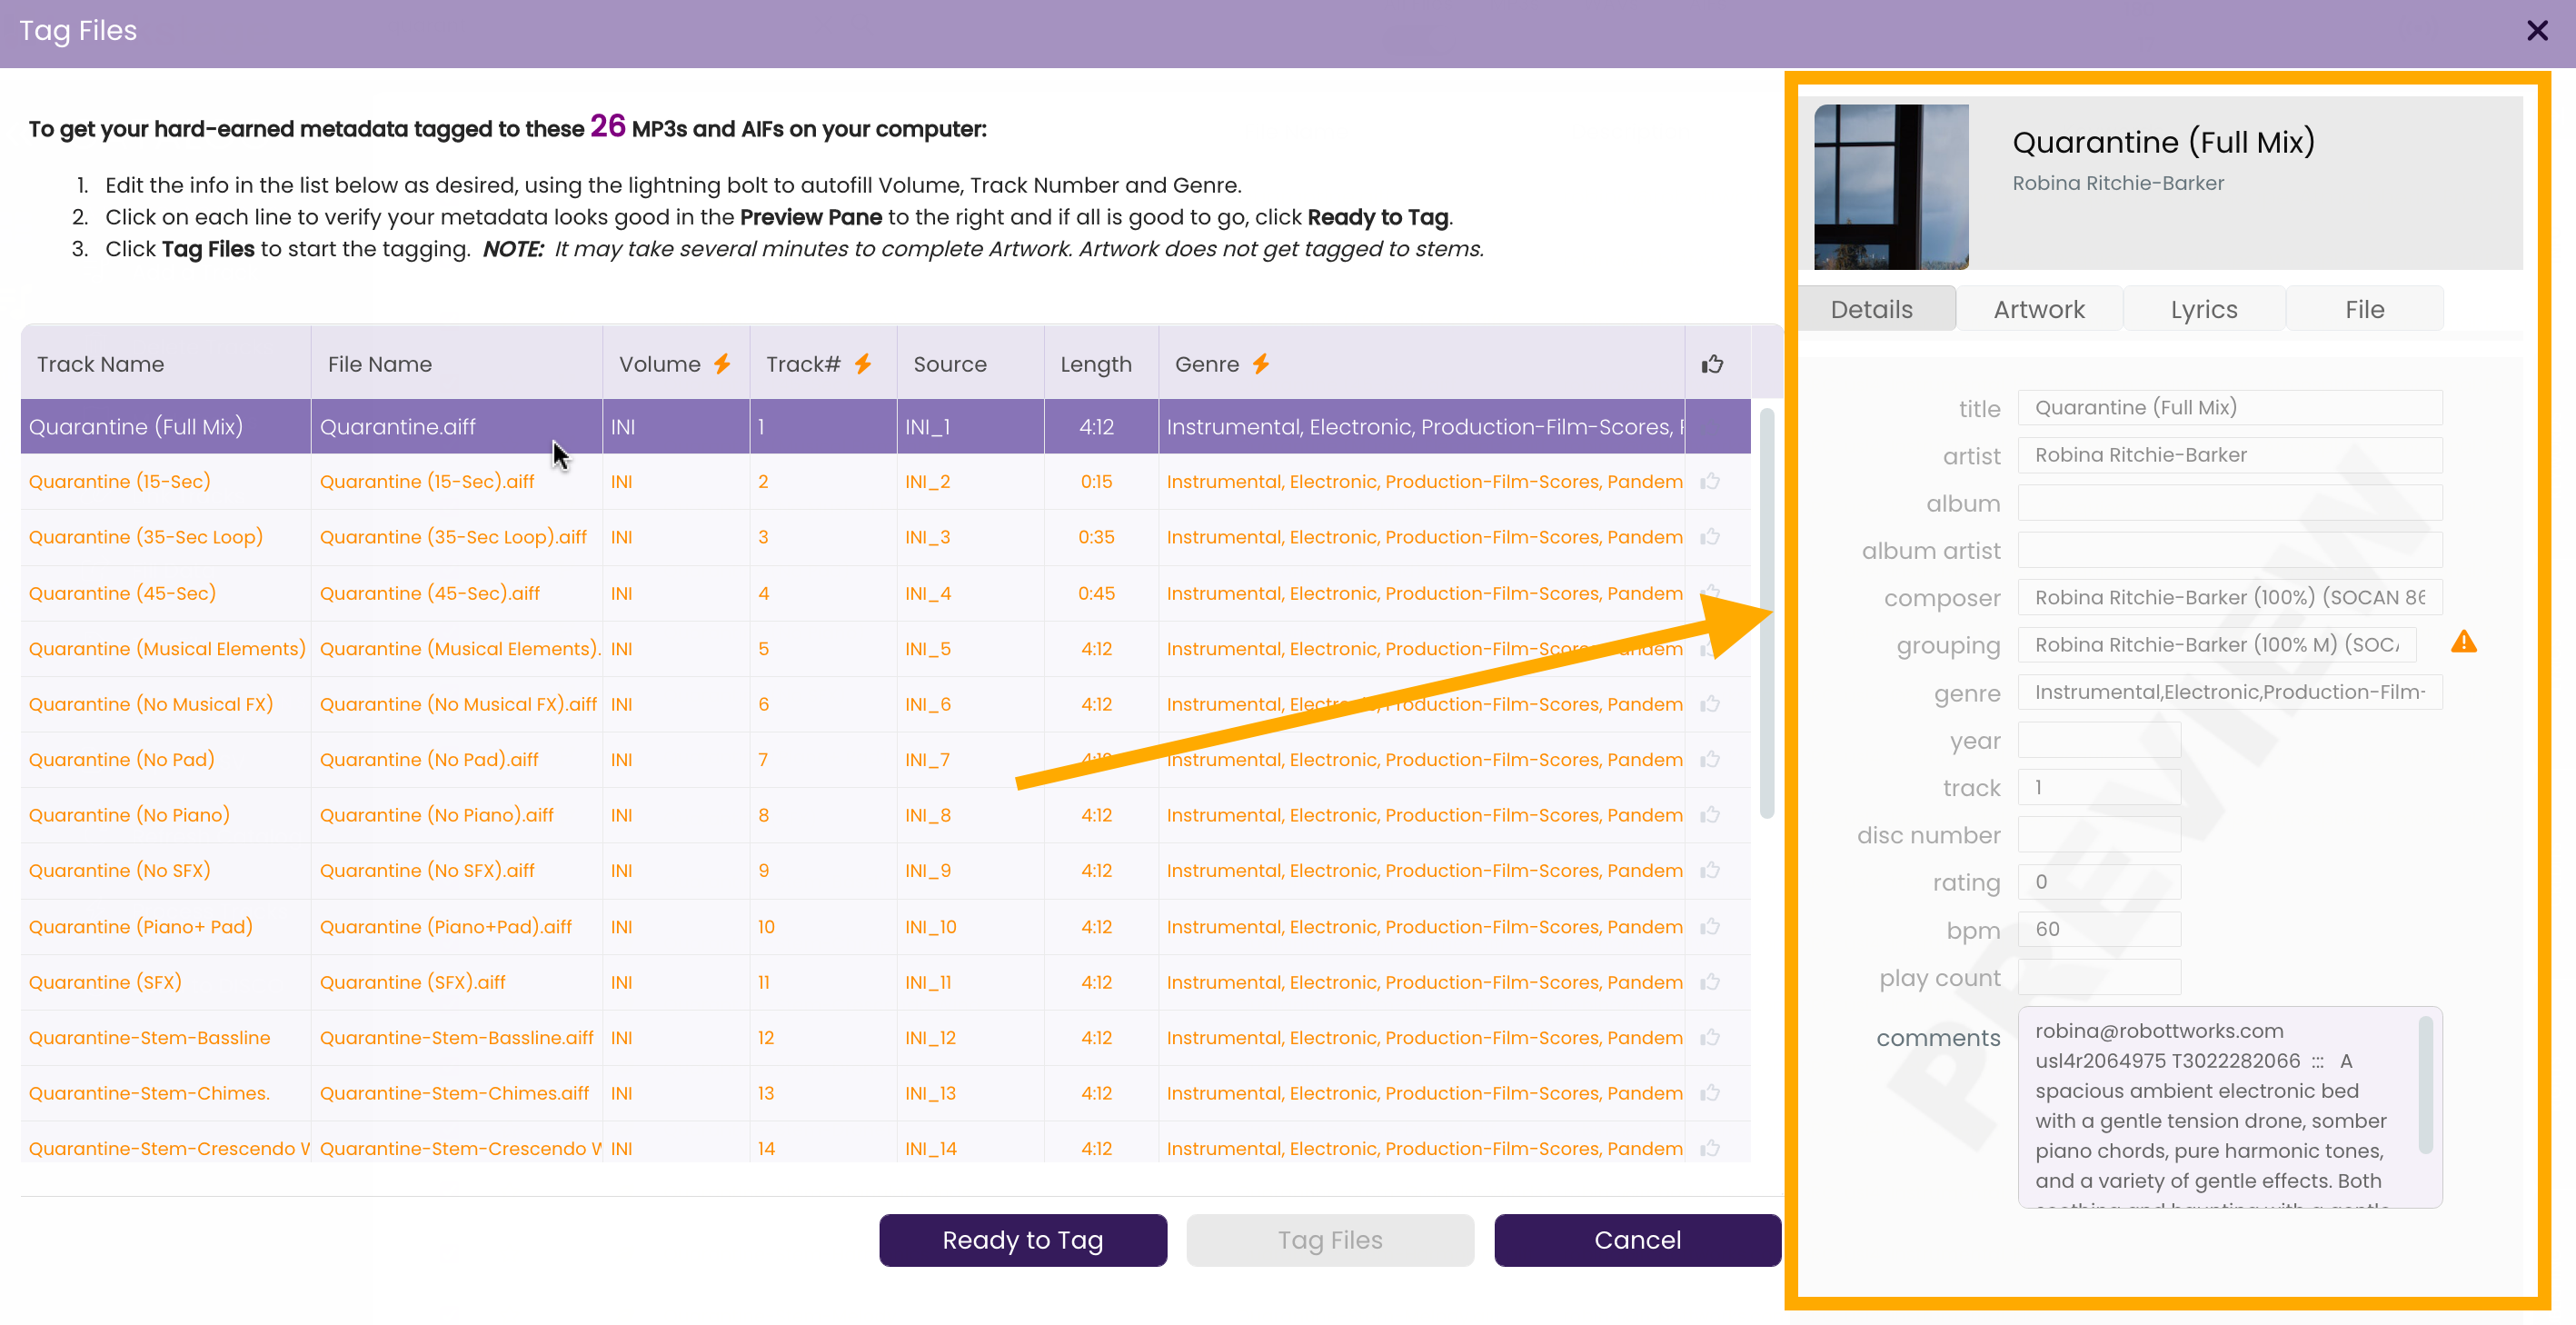
The Tag Files window opens. - Preview your tracks.
Click on a track and use the Preview Pane on the right side of the window to ensure your metadata looks right.
- Make any last-minute updates.
In the Tag Files window, you can adjust the Track Name, Volume, Track #s and Genres (i.e., Holiday, Acoustic) as needed.
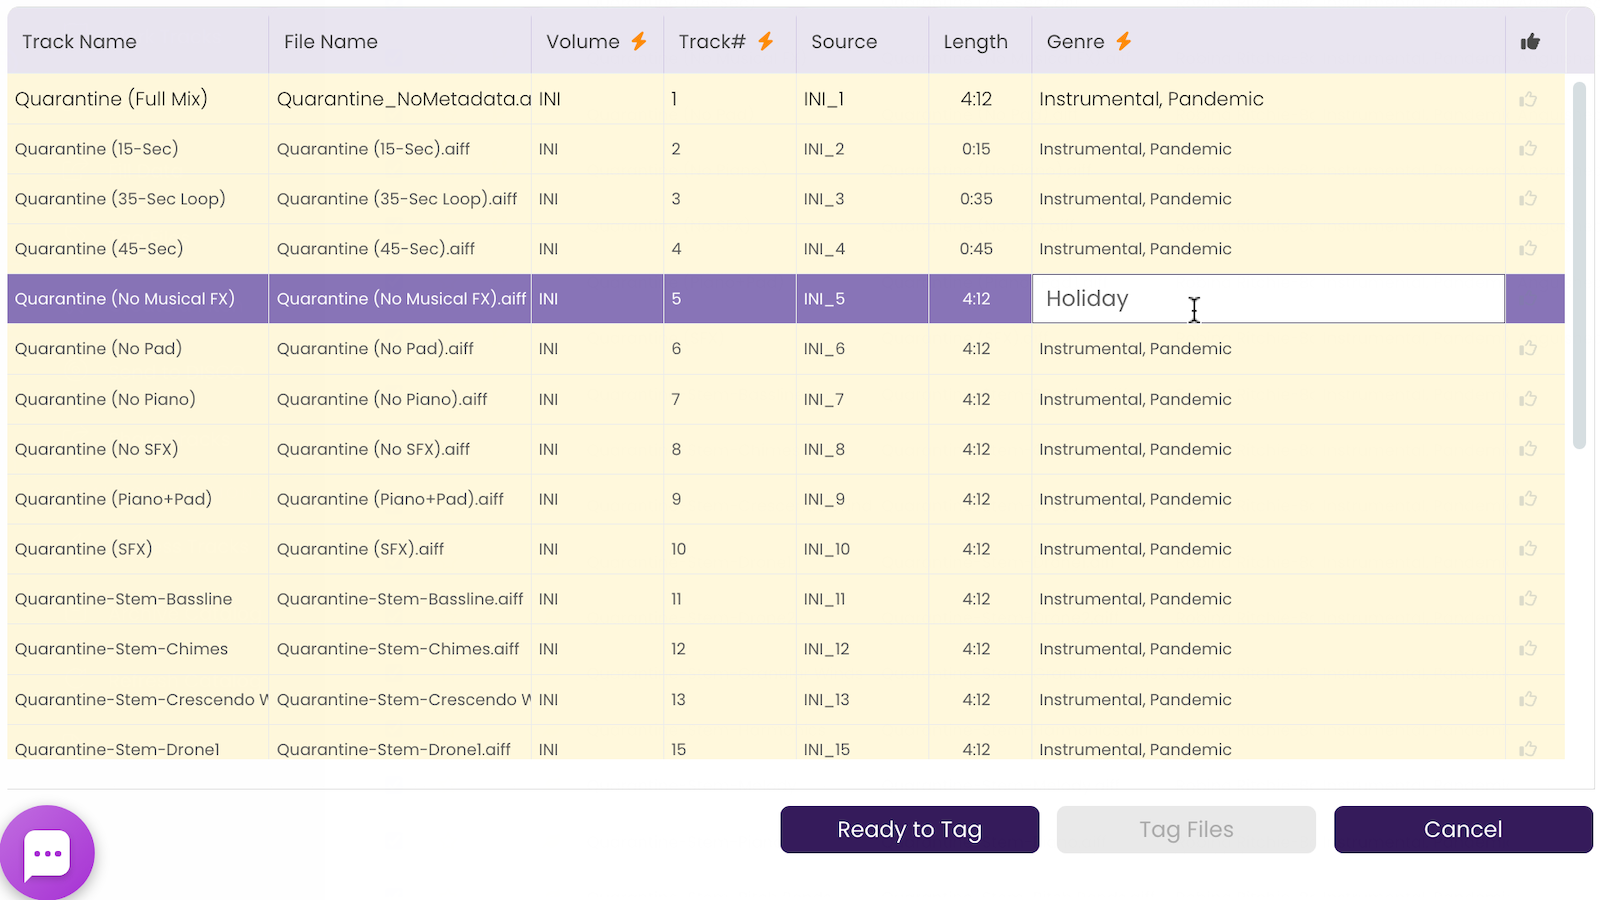
- Click Ready to Tag to save any changes.
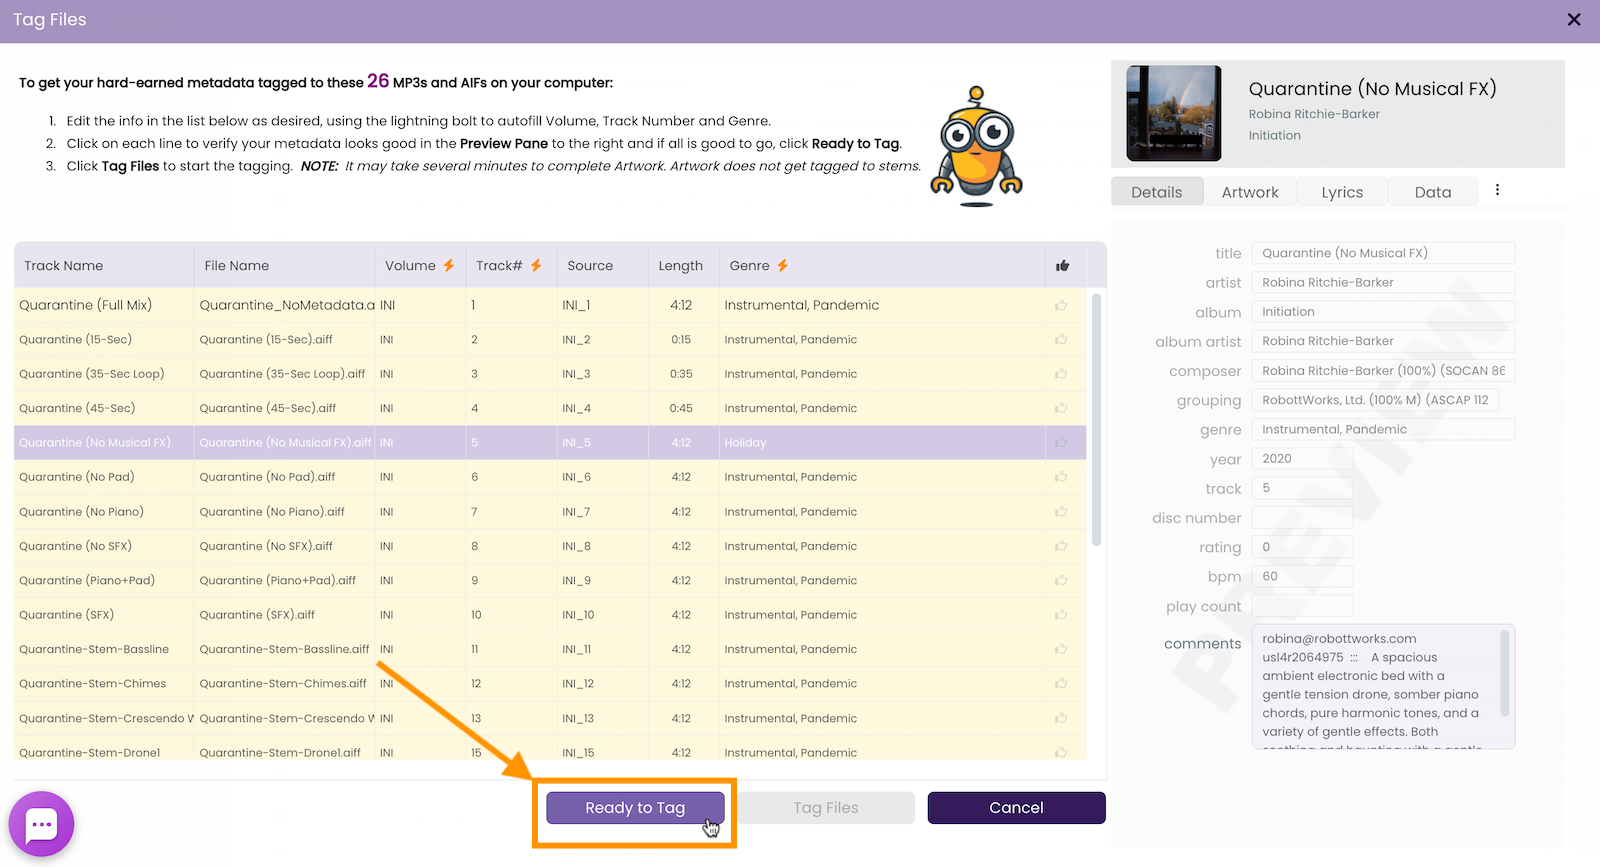
- Click Tag Files.
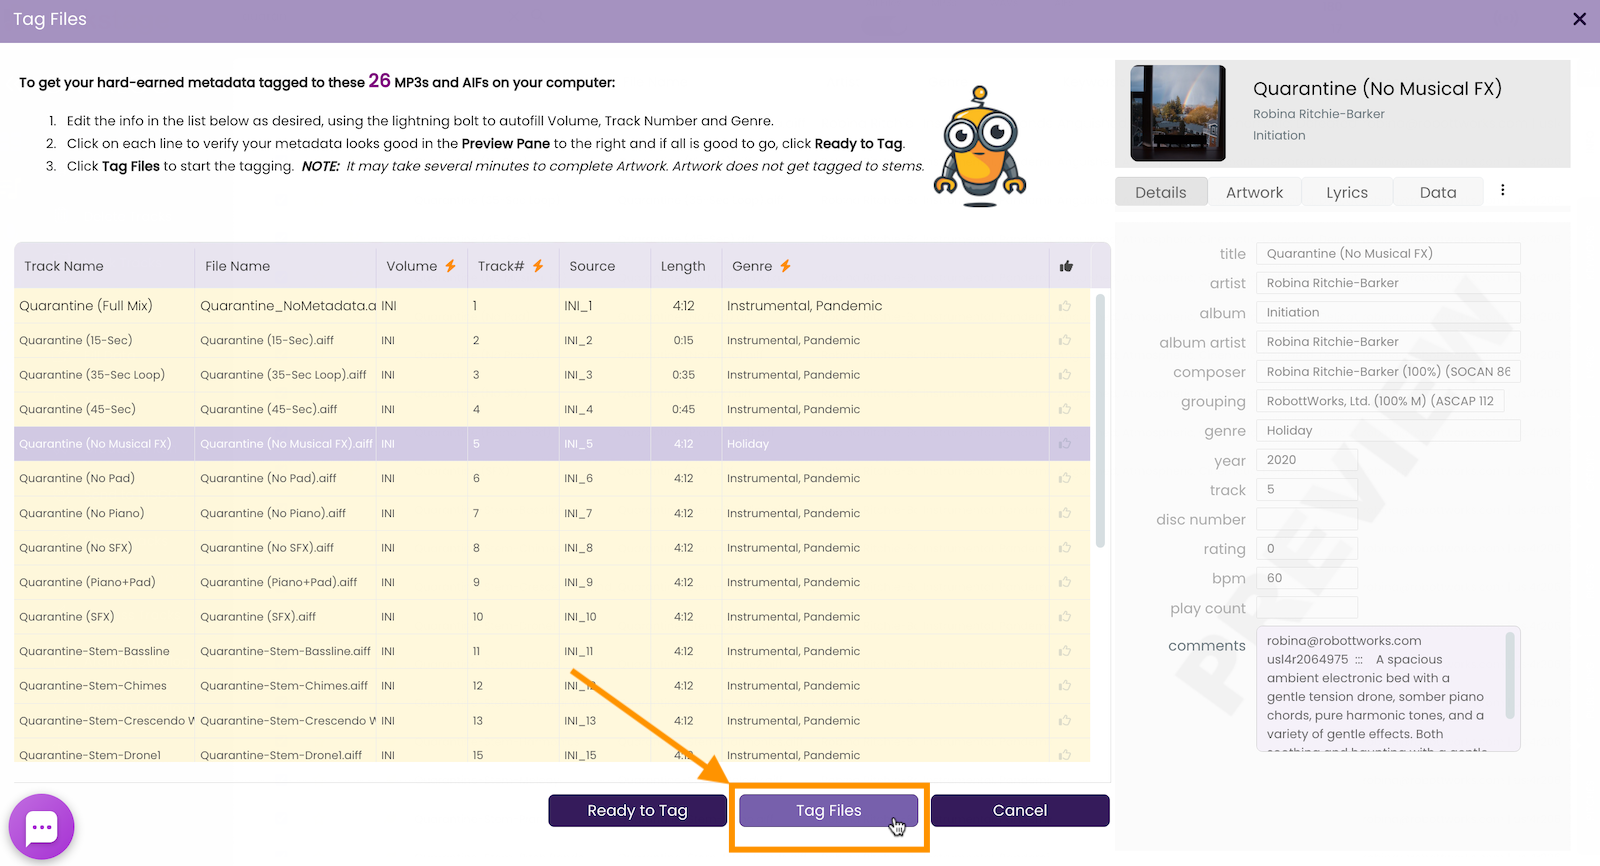
TrackSync will now connect to the audio files on your hard drive and apply the metadata to them. Depending on how many files you are tagging, this might take a little time.
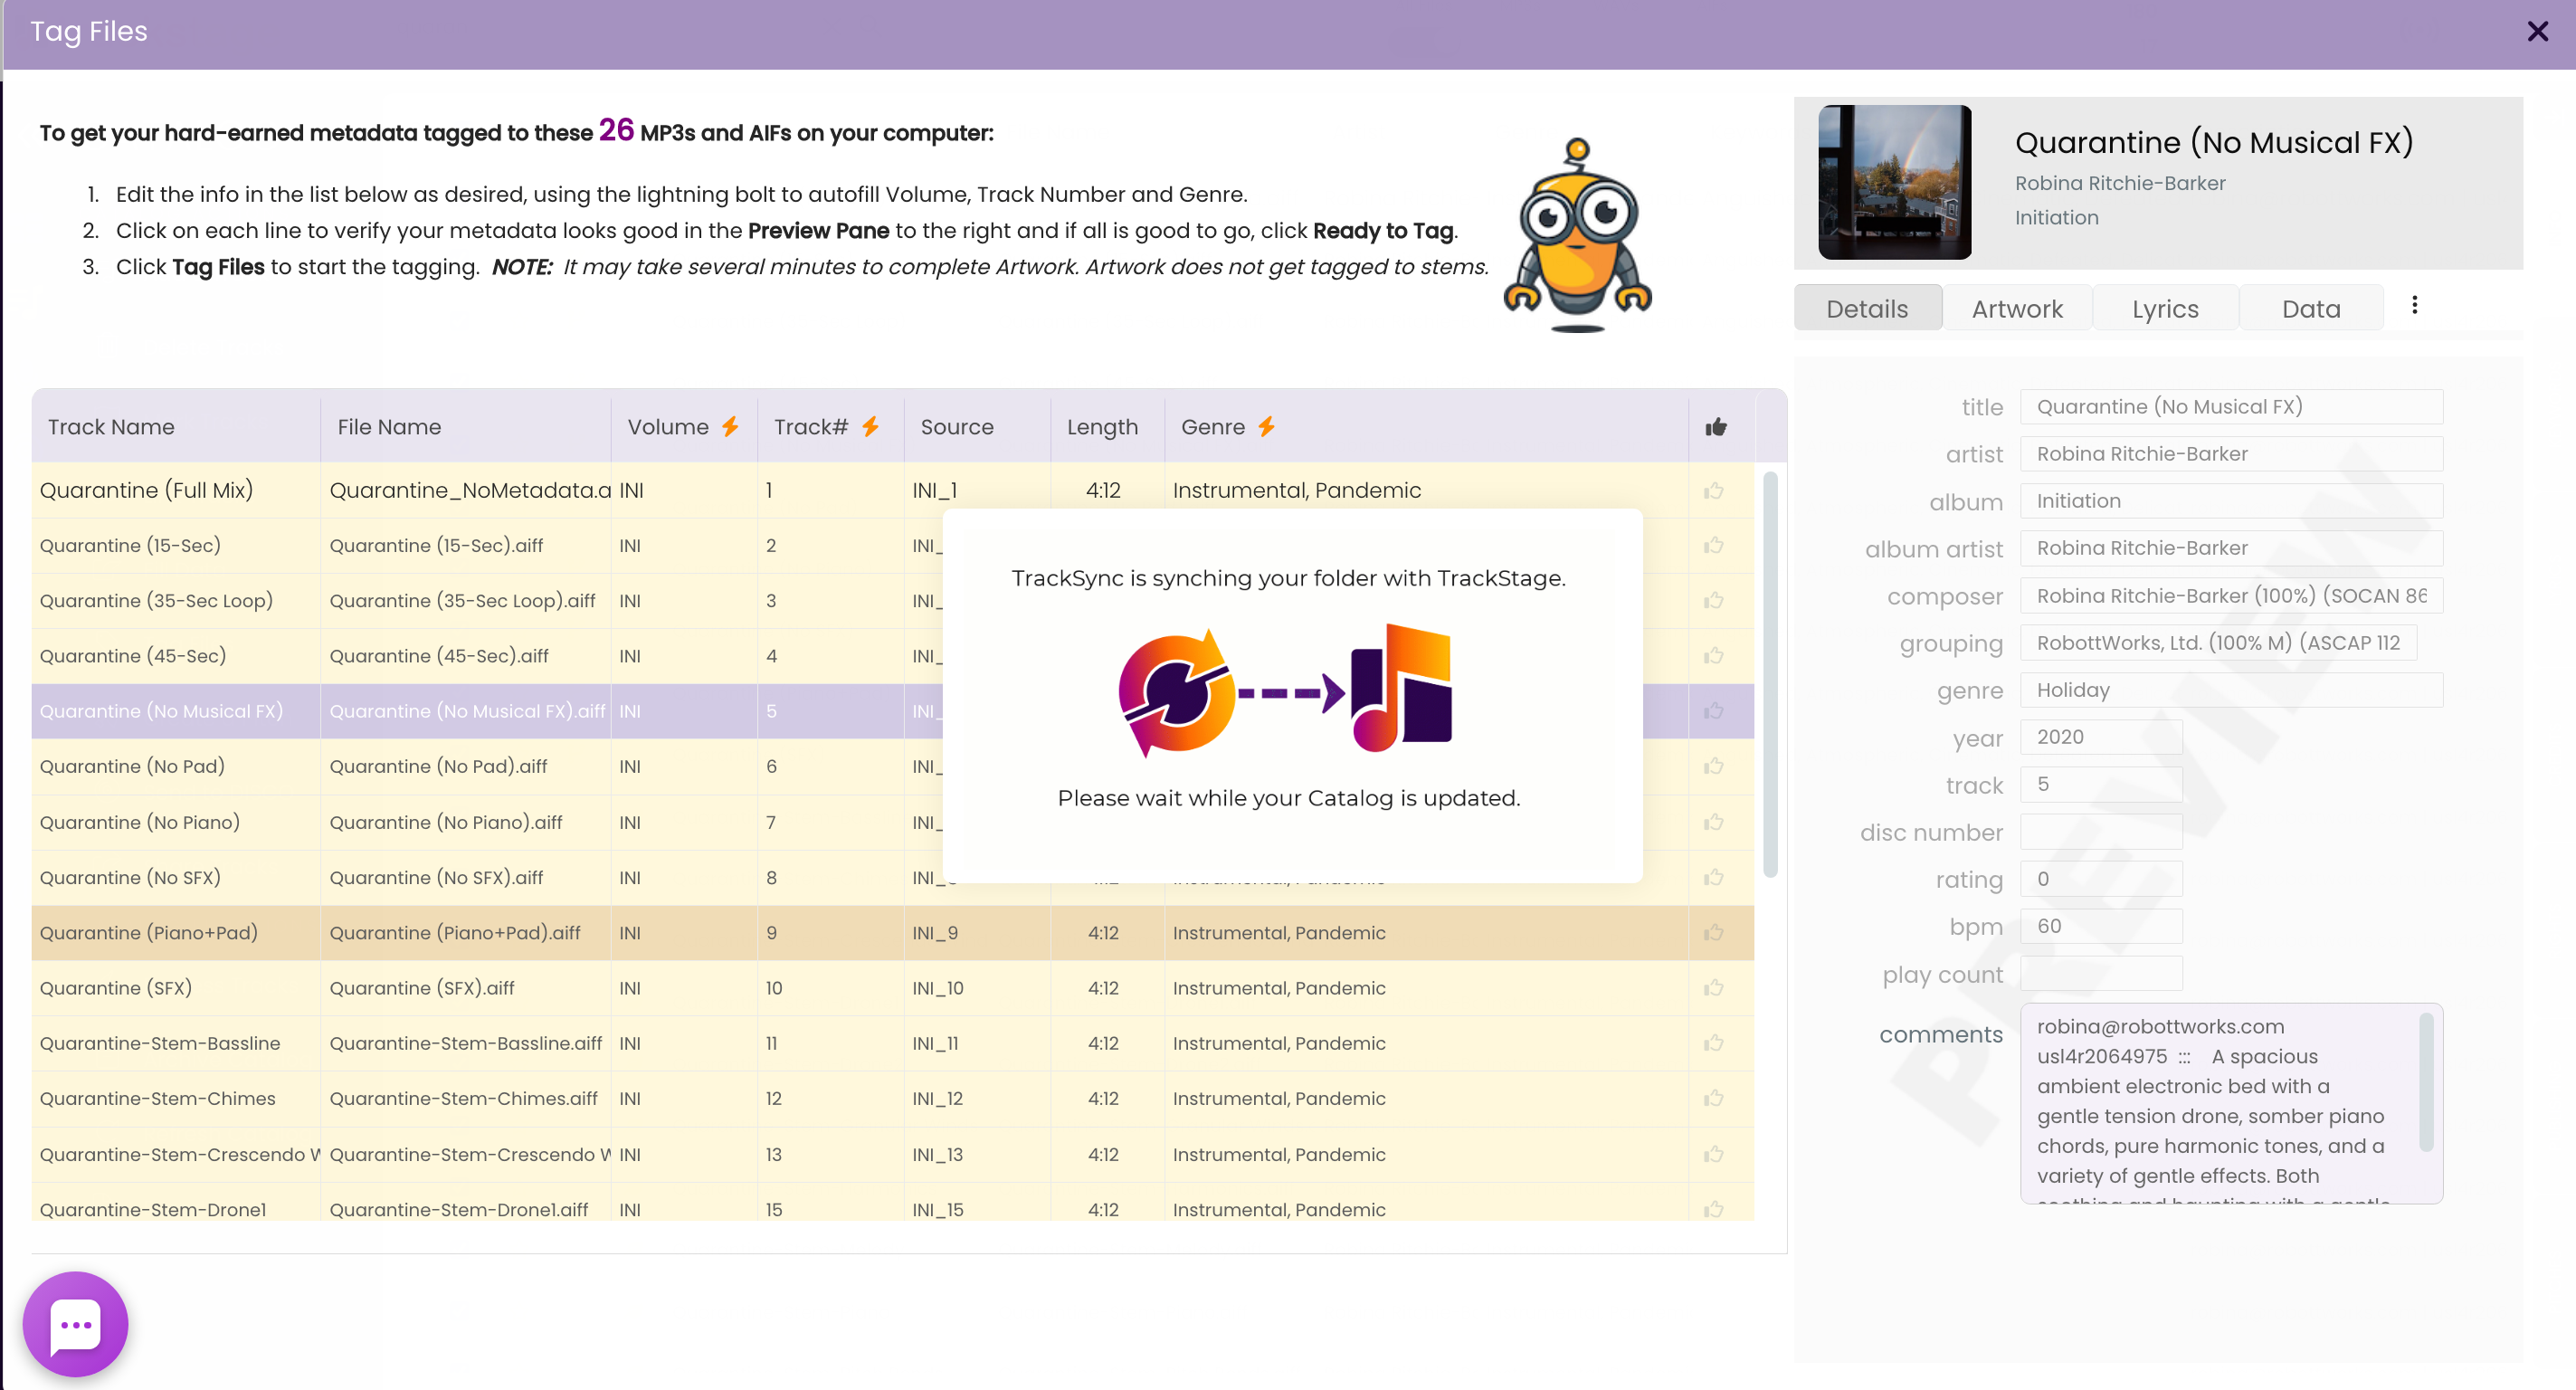
- You’re good to go!
Once TrackSync has completed tagging the files, they will turn black in the CATALOG, meaning you are ready to send your fully tagged audio files to your industry contacts.