
Help Center Getting Started with TrackStage
Setting up your TrackStage Folder
Your TrackStage Folder is where TrackSync looks for your audio. Creating it is the second step in the Getting Started window — see Getting Started for the whole sequence.
Step One: Create your TrackStage Folder
- Click Show Folder Setup on "Create Your Music Folder".
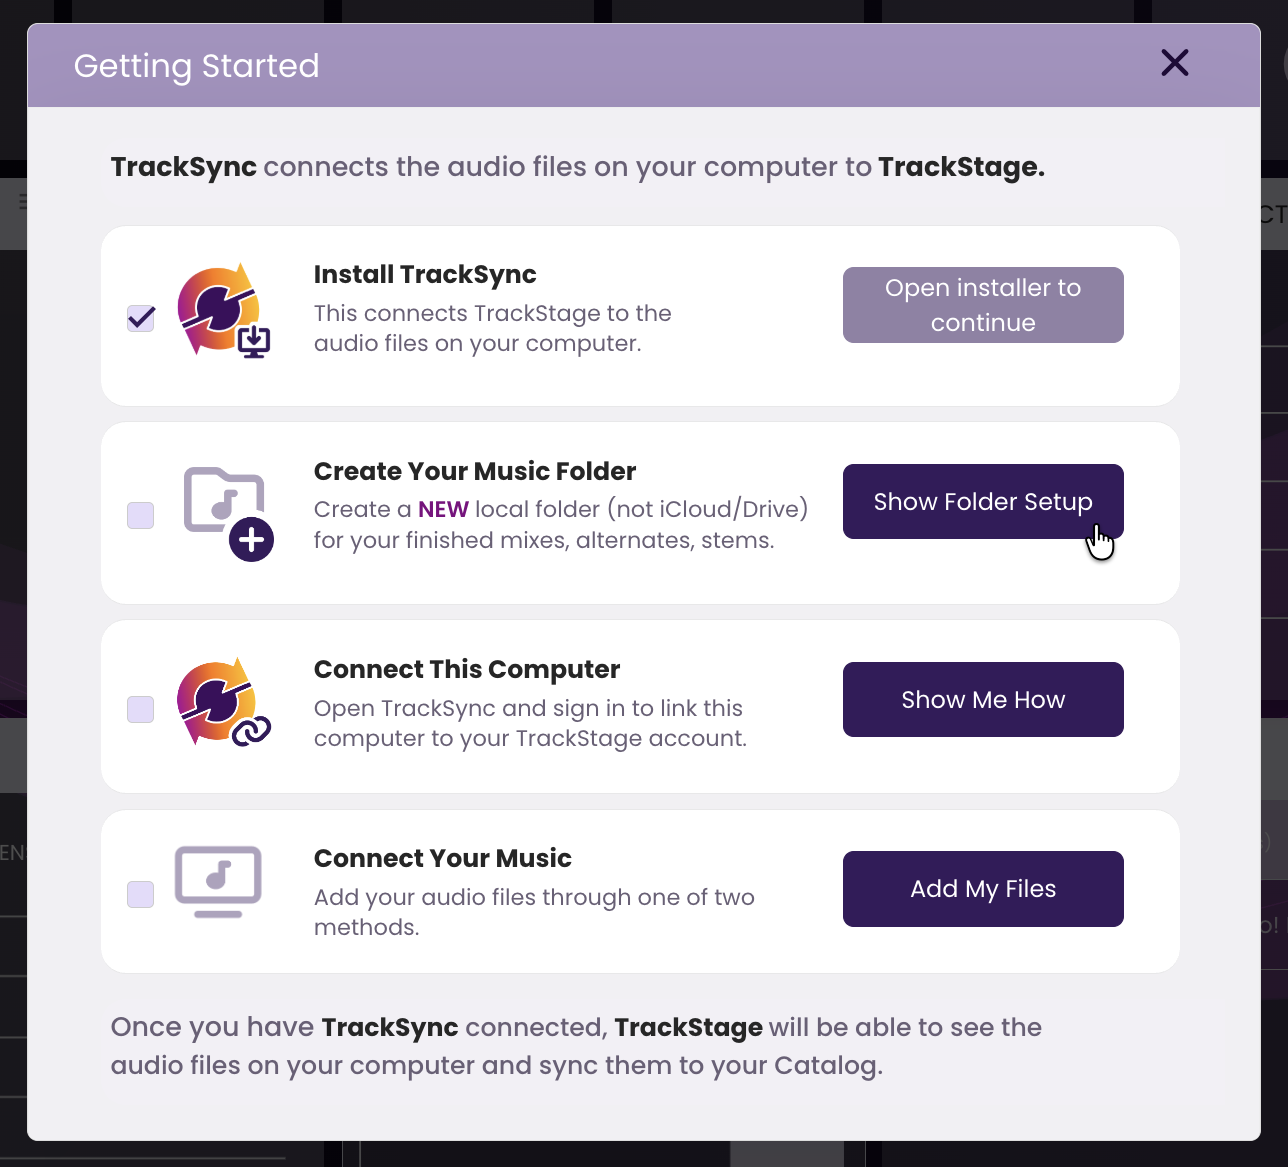
- Create a NEW, empty folder for TrackSync to connect to.
Don't point TrackSync at an existing folder of tracks — you'll bring those in at Step Six, once everything is connected.
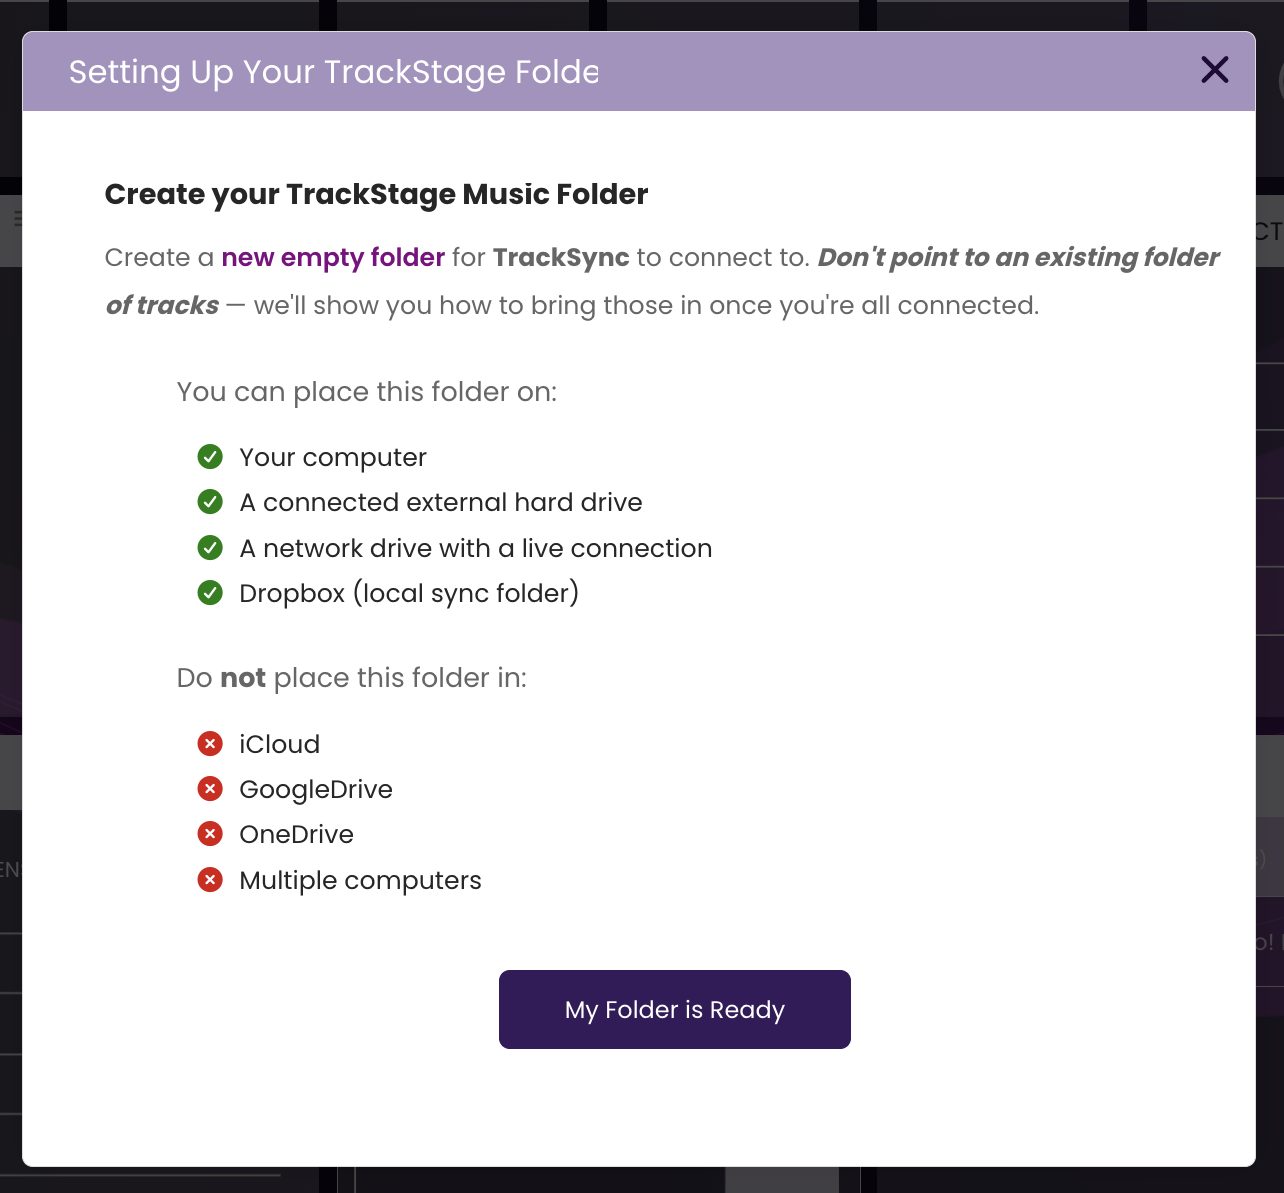
- Put the folder somewhere TrackSync can reach it.
You can place it on your computer, a connected external hard drive, a network drive with a live connection, or in Dropbox (the local sync folder).
Do not place it in iCloud, Google Drive or OneDrive, and don't try to share one folder across multiple computers. These services move and reclaim files behind TrackSync's back, which breaks the link to your Catalog. For more on what belongs in the folder, see Setting up your TrackStage Folder. - Click "My Folder is Ready" when you've made it.