
Help Center Getting Started with TrackStage
Working with TrackSync
TrackSync does all the heavy lifting between your online catalog and the files in your TrackStage Folder. It's the powerhouse that sets TrackStage apart from catalogs that aren't synched with your actual audio files.
Jump to:
- TrackSync or No TrackSync?
- The TrackSync Tools Menu
- Starting TrackSync
- Restarting & Closing TrackSync
- Process Folder Updates
- Cache Tracks to Cloud
- Archiving your Catalog
- Software Update
- Reinstalling TrackSync
- Resetting your TrackSync Link
TrackSync Data Flow
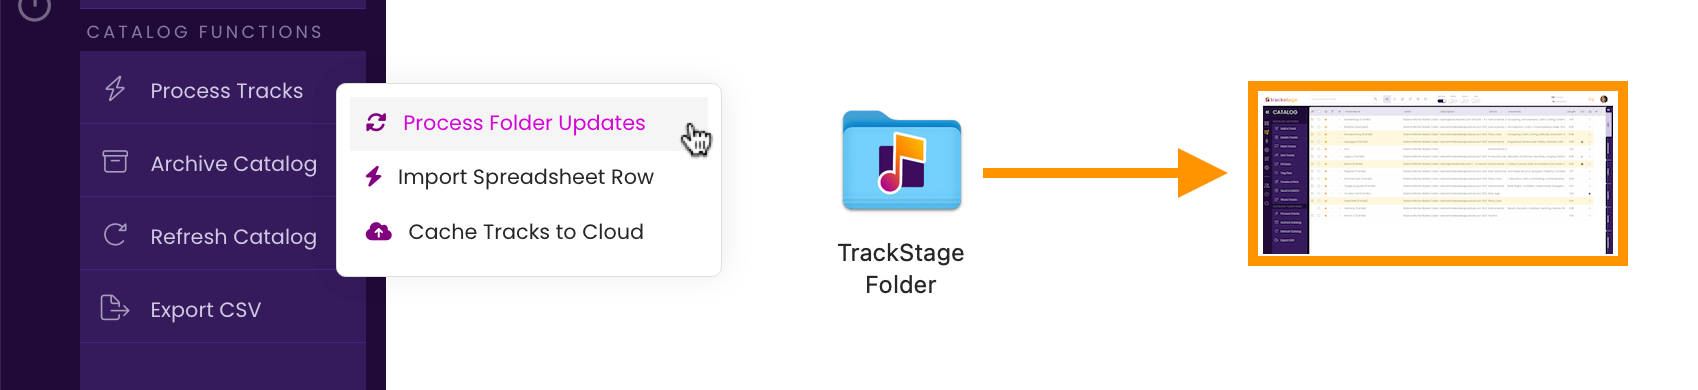
Processing Folder Updates moves changes FROM your TrackStage Folder TO your CATALOG.
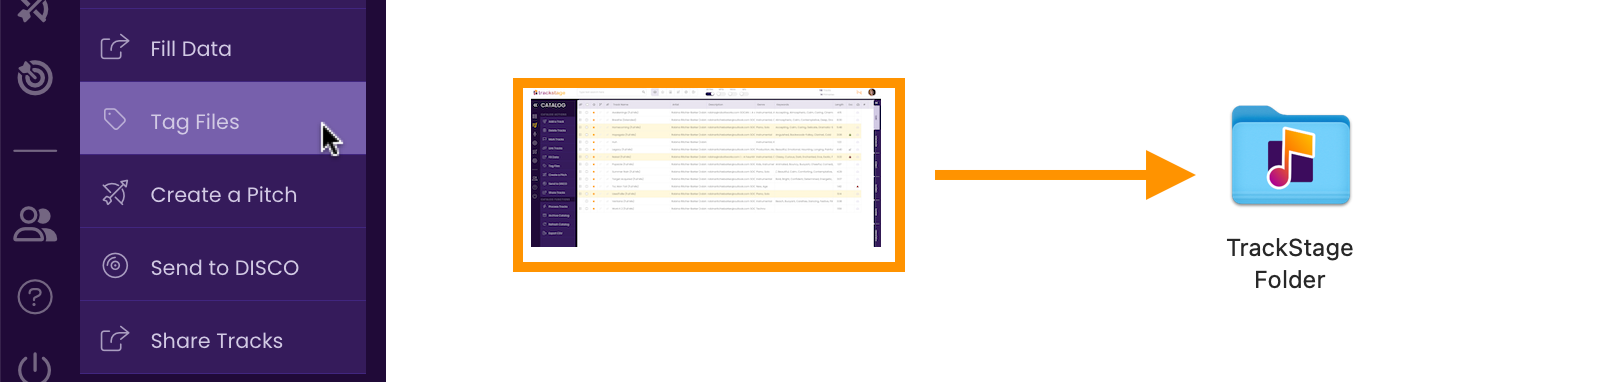
Tag Files works in the OPPOSITE direction, moving updates FROM your CATALOG TO your audio files in your TrackStage Folder.
TrackSync or No TrackSync?
As you already know, TrackStage is made up of two components: the TrackStage portal and the TrackSync application on your computer’s hard drive. Most of your work will take place in the TrackStage portal, but there are some tasks that can only be done while TrackSync is running.
When you MUST use TrackSync
TrackSync must be running for you to:
- Add/Remove Tracks from your CATALOG
- Tag metadata to your audio files
- Cache Tracks to the Cloud
- Archive your TrackStage Folder
- Send Tracks to DISCO
- Share Tracks
- Create PITCHES via DISCO or Upload
What you can do WITHOUT TrackSync
You can do any of the following from anywhere you have an internet connection without having to use TrackSync:
CATALOG
- Edit track information
- Add/Edit Rights/Publishing Splits
- Mark Tracks
- Link Tracks
- Fill Data
- Import Spreadsheet Rows
- Export to CSV
- Access the Knowledge Base
CREATIVE
- Everything
TARGETS, PITCHES, & LICENSES
- Create, Edit, Delete, and Research TARGETS
- Add, Edit, or Remove TARGET Opportunities
- Create PITCHES via Share a Playlist Link or Email*
- Record and Edit LICENSES
CONTACTS
- Everything
DASHBOARD
- Everything
The TrackSync Tools Menu
Everything you do to TrackSync itself lives in one place: TrackSync Tools, under CATALOG FUNCTIONS in the Side Menu.
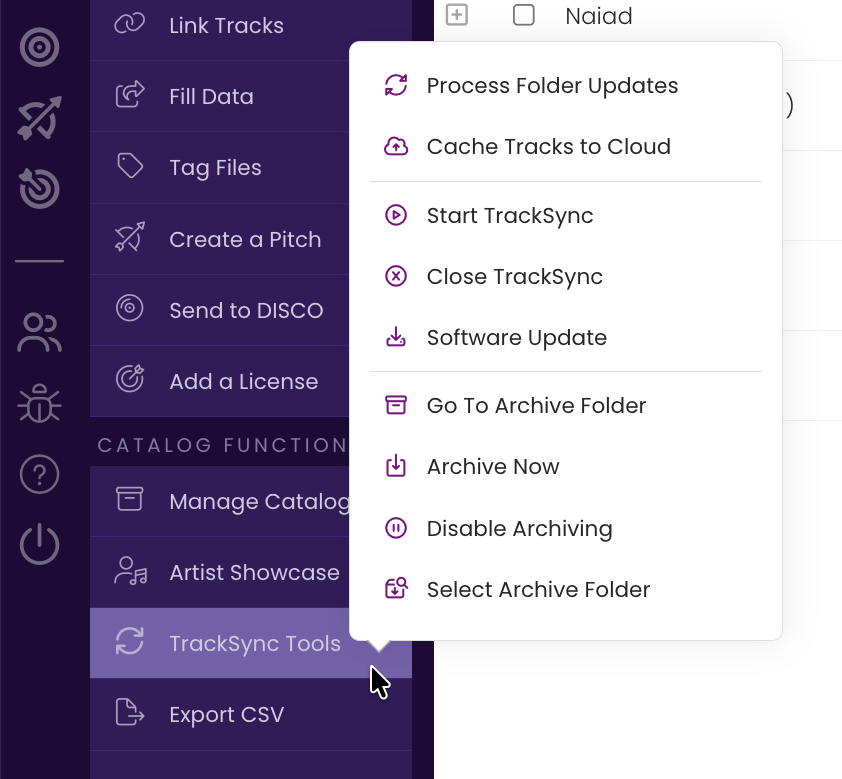
- Process Folder Updates — syncs changes in your TrackStage Folder to your Catalog by hand. See below.
- Cache Tracks to Cloud — makes an MP3 of a track so it can be pitched or played. See below.
- Start TrackSync / Close TrackSync — start or shut down the helper application.
- Software Update — download and install a newer TrackSync. See below.
- Go To Archive Folder, Archive Now, Disable Archiving, Select Archive Folder — your backup copy. See below.
Catalog tasks that don't involve TrackSync — importing metadata, clearing tag flags, opening your Catalog folder — live in Manage Catalog instead. See Manage Catalog.
Starting TrackSync
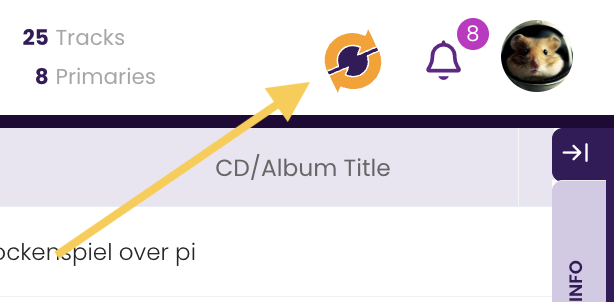
Whenever you make changes to your TrackStage Folder like adding or deleting tracks, or whenever you want to tag metadata to your audio files, or cache tracks to send them to contacts, TrackSync needs to be running. The status icon at the top of the window tells you: purple means running, orange means not.
There are three ways to start it, and you will usually meet one of them without going looking.
Click the status icon
Clicking the orange status icon opens TrackSync Help, where Restart TrackSync starts it up.
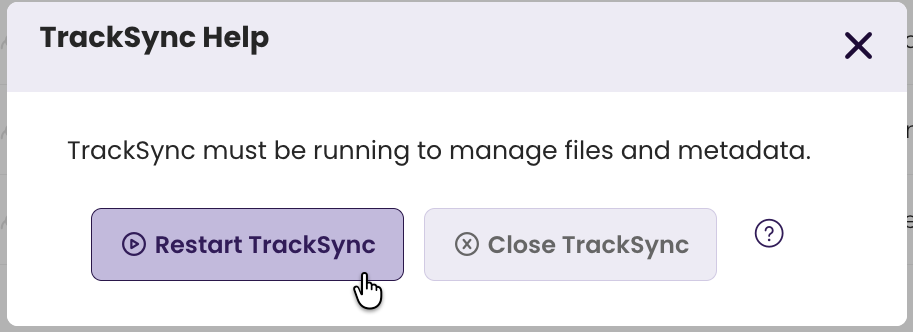
Start it when TrackStage asks
If you try to do something that needs TrackSync while it's off — tagging, caching, adding or deleting tracks — TrackStage offers to start it for you.
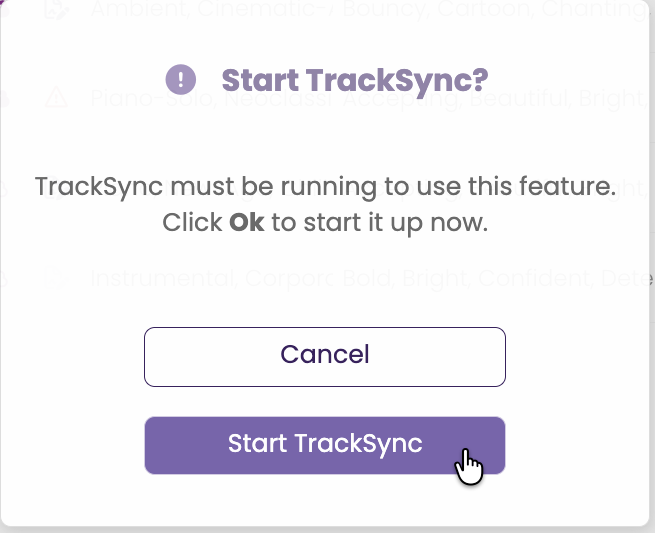
Click Start TrackSync and carry on with what you were doing.
Start it from the menu
Click TrackSync Tools › Start TrackSync.
However you start it, TrackSync can take a moment to come up. The status icon turns purple when it's ready.

Restarting & Closing TrackSync
If TrackSync seems hung up and is taking too long to process or tag files, restart it.
- Click the TrackSync status icon.
The TrackSync Help window opens.
- Click Restart TrackSync.
TrackSync shuts down and starts again on its own. The status icon turns purple when it's back.
To shut TrackSync down without restarting it, click Close TrackSync in that same window, or TrackSync Tools › Close TrackSync.
Process Folder Updates
Processing folder updates moves changes in your TrackStage Folder into your CATALOG. You rarely need to run it yourself: it happens behind the scenes whenever you use Add Tracks from TrackStage Folder or Delete Tracks.
TrackSync Tools › Process Folder Updates runs it on demand. It's there for the times you've moved files in or out of your TrackStage Folder by hand and want your Catalog to catch up without waiting.
Depending on the speed of your computer and your internet connection, and how many tracks are involved, this can take some time.
Cache Tracks to Cloud
As AIFs and WAVs are generally too large in file size to be feasible to transmit, share or stream, before you can Pitch a track or play it in the Player it needs to be cached as an MP3 version in the cloud.
- Verify that TrackSync is running.
Make sure the TrackSync status icon in your CATALOG is purple.
- Select the track in your CATALOG and open the INFO Tab.
The track's Cache status appears in the top right corner.
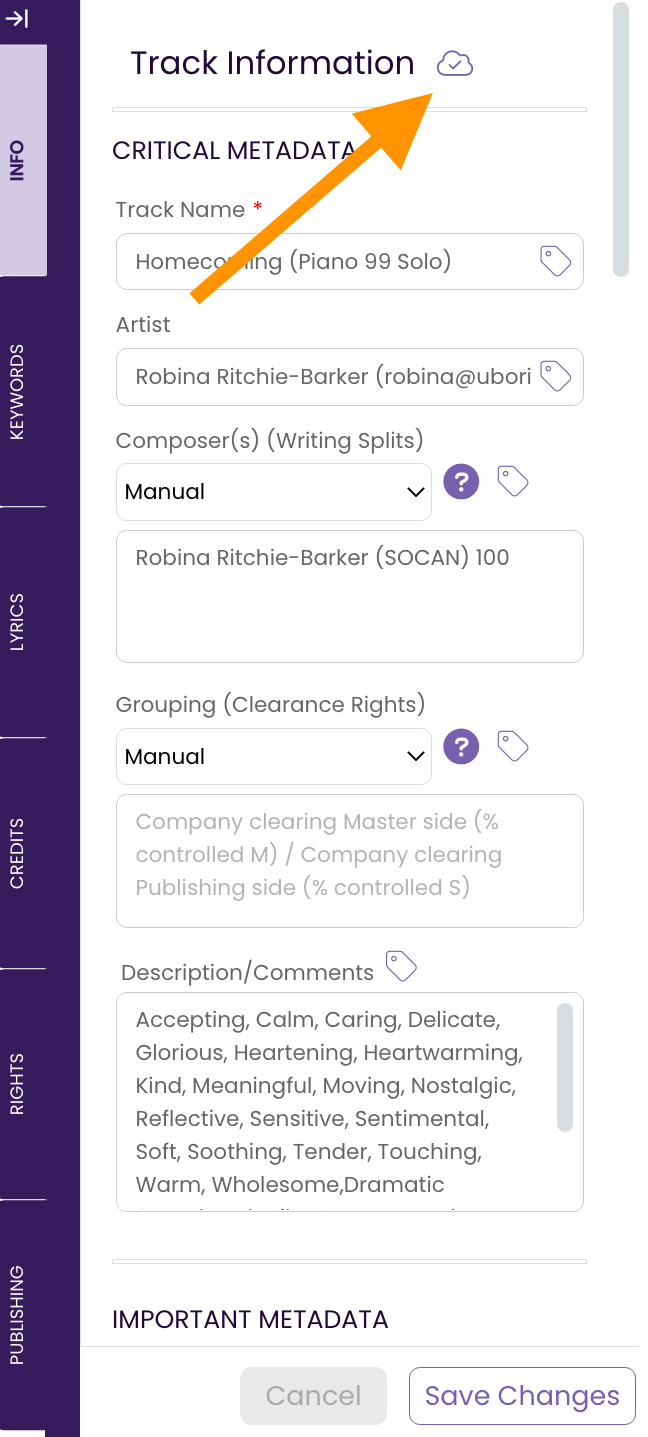
If the track has been cached, the icon will be
If the track has NOT been cached, the icon will be
- Select the track(s) you wish to cache.
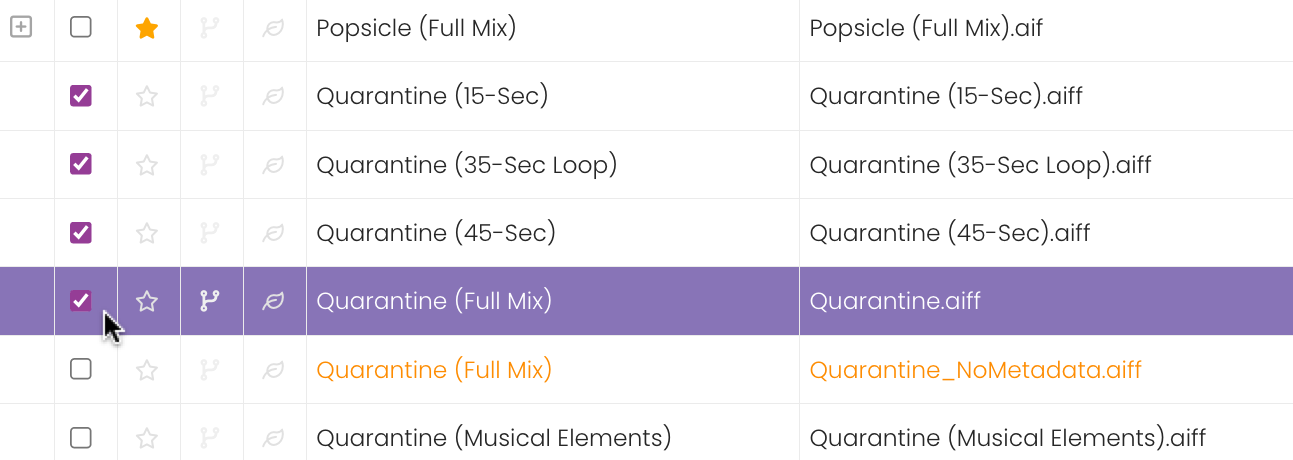
- Click TrackSync Tools › Cache Tracks to Cloud.
The Cache Tracks confirmation dialog will open. - Click Ok.
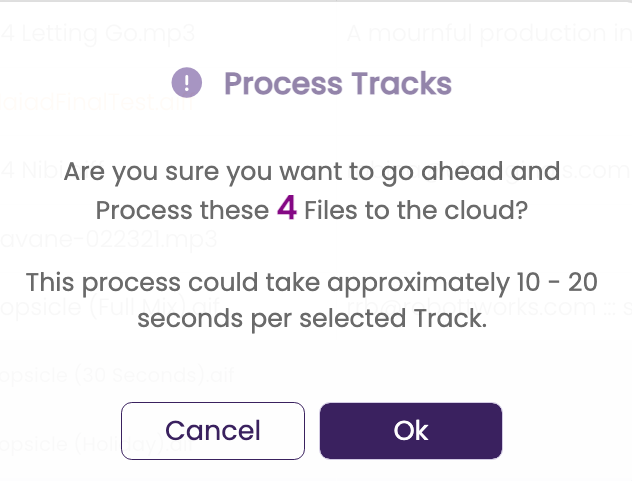
TrackSync will convert the selected track(s) to MP3 version(s) and upload them to the cloud, making them ready for you to send through the TrackStage CONTACTS or PITCHES modules. All you need to do is select the original track (can be MP3, AIF, or WAV), and TrackStage will automatically attach the cached version to your email.
Archiving your Catalog
TrackStage can keep a duplicate copy of your TrackStage Folder in a separate location you choose — an extra layer of security so you know your tagged files are safe. Four of the TrackSync Tools commands drive it:
- Select Archive Folder — choose where the copy lives. Do this once, before the rest will work.
- Archive Now — back up on demand, rather than waiting for TrackSync to start or quit.
- Disable Archiving — stop the automatic copies.
- Go To Archive Folder — open the archive on your computer.
For how to set it up and what gets copied when, see Archiving.
Software Update
The majority of TrackSync updates are done behind the scenes and you don't need to do anything to stay up to date. You may, however, need to perform a Software Update if:
- you are having repeated issues with TrackSync and there's reason to suspect you have an outdated version installed; or
- you get an alert on starting up that directs you to update your TrackSync version.
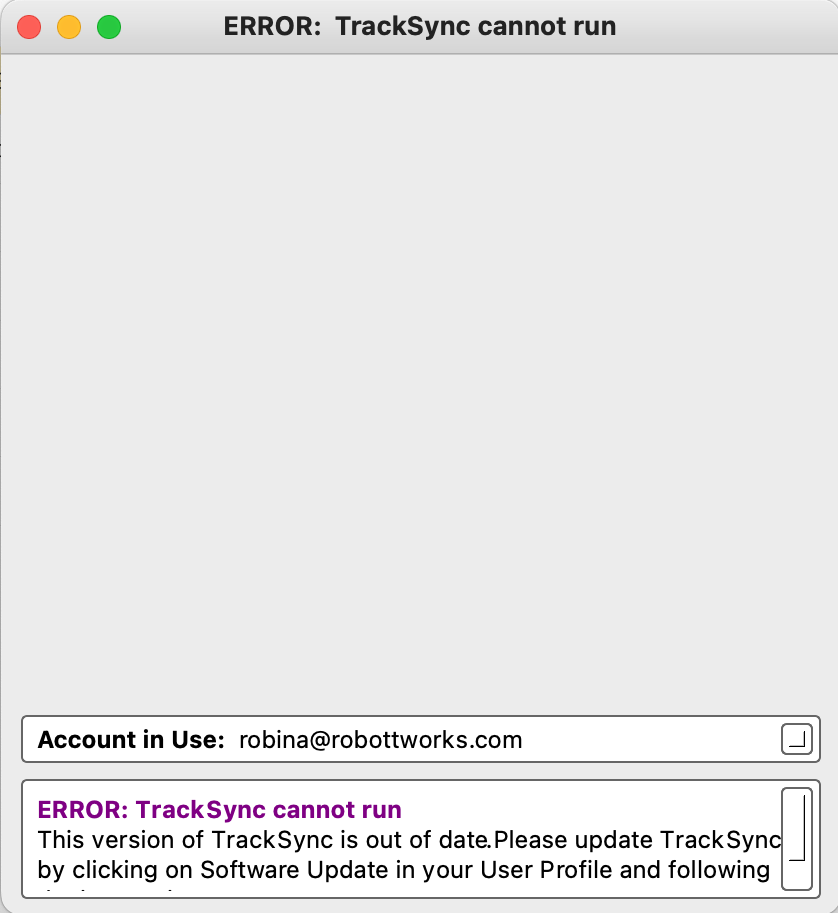
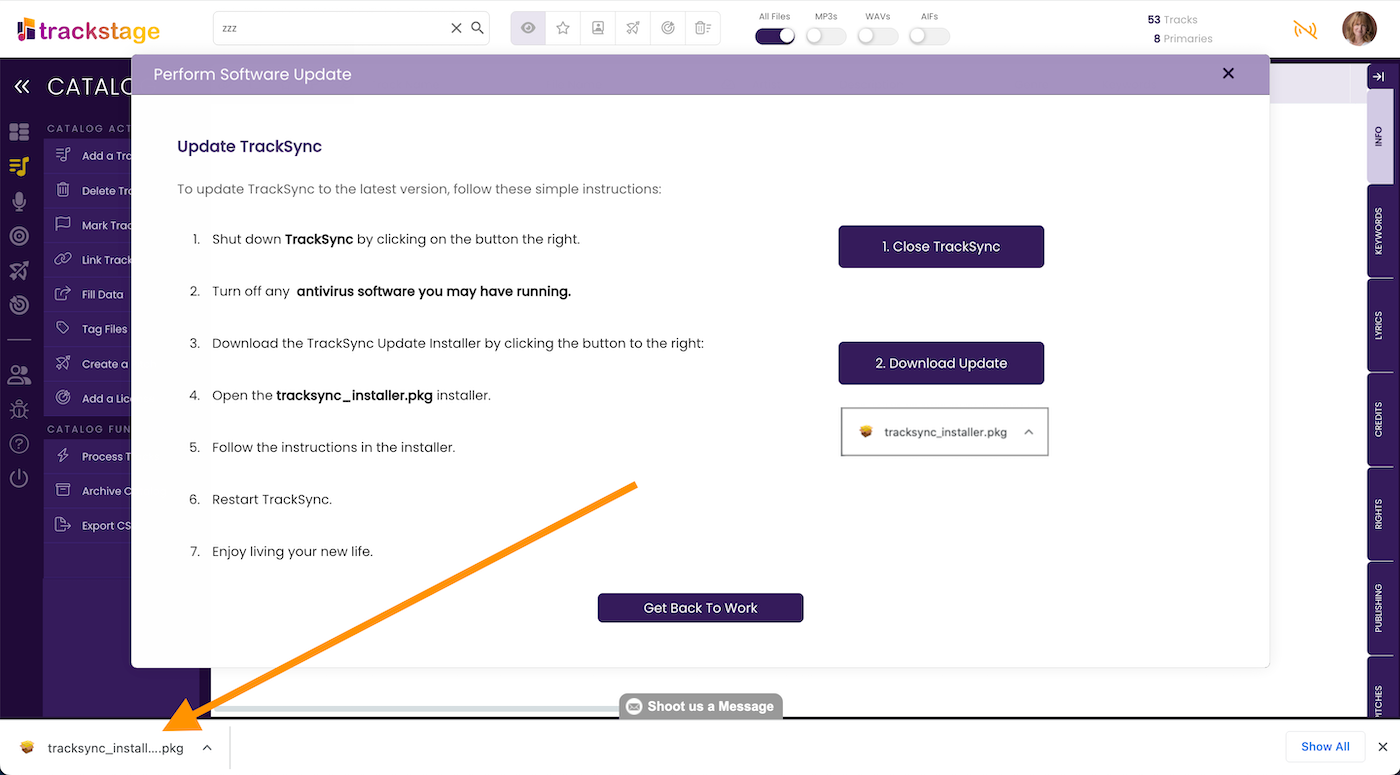
To update TrackSync...
- Do NOT uninstall TrackSync!
This would mean your Catalog would have to be completely resynced. This could take a lot of time and would no doubt really piss you off. - Click TrackSync Tools › Software Update.
You can also get there from User Profile › Software Update. The Software Update window opens. - Click the Close TrackSync button.
This will ensure TrackSync is fully shut down.
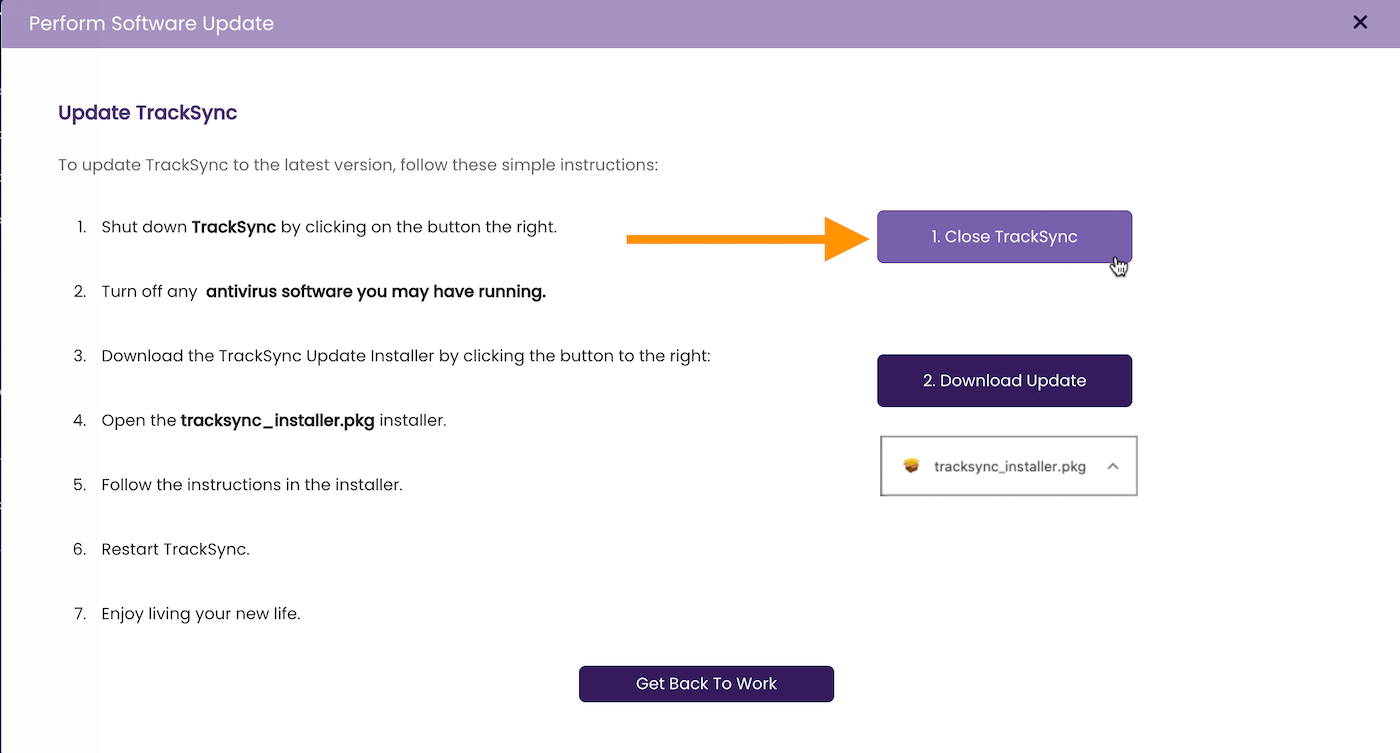
- Click the Download Update button.
The installer will download to your computer.
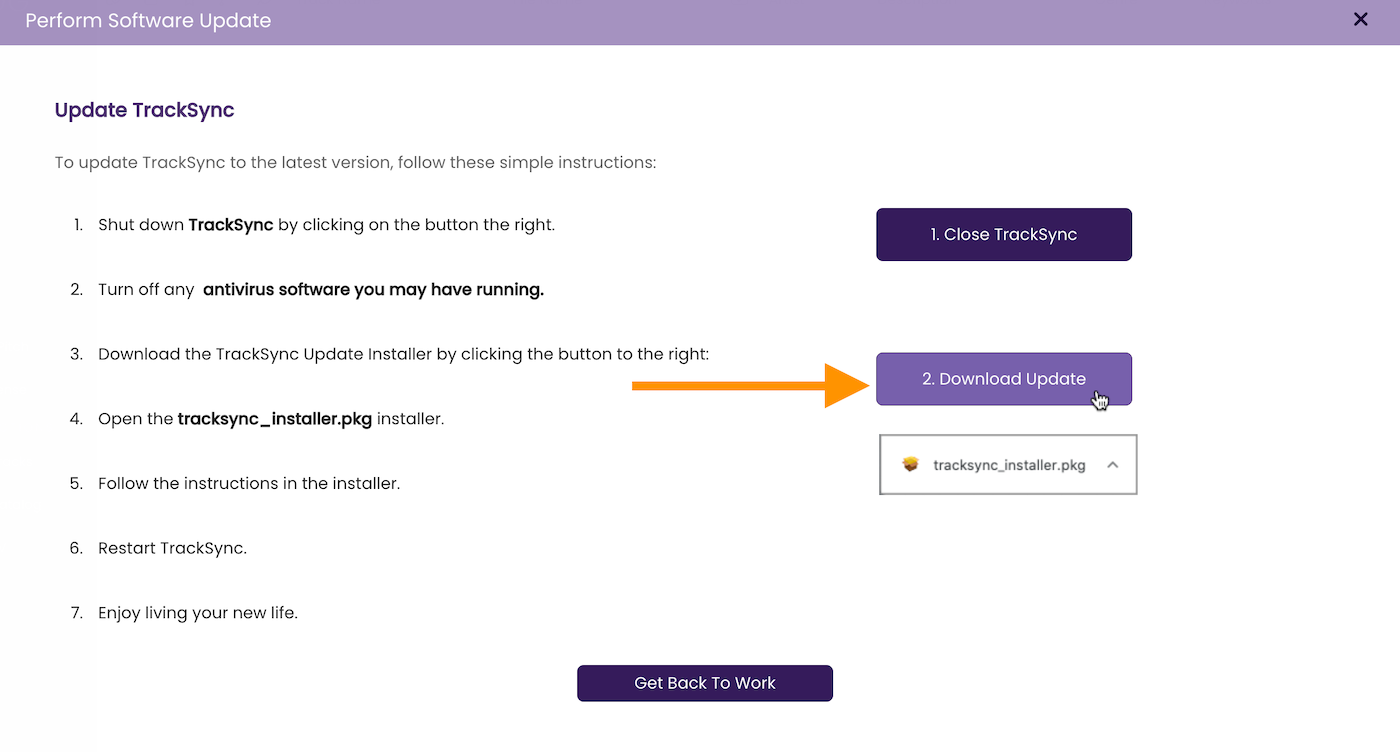
- Open the Installer and follow the installer instructions.
Reinstalling TrackSync
In the event you need to reinstall TrackSync, you first need to delete the TrackSync and TrackCache applications from your computer.
Mac OS
- Go to the Applications Folder on your Hard Drive.
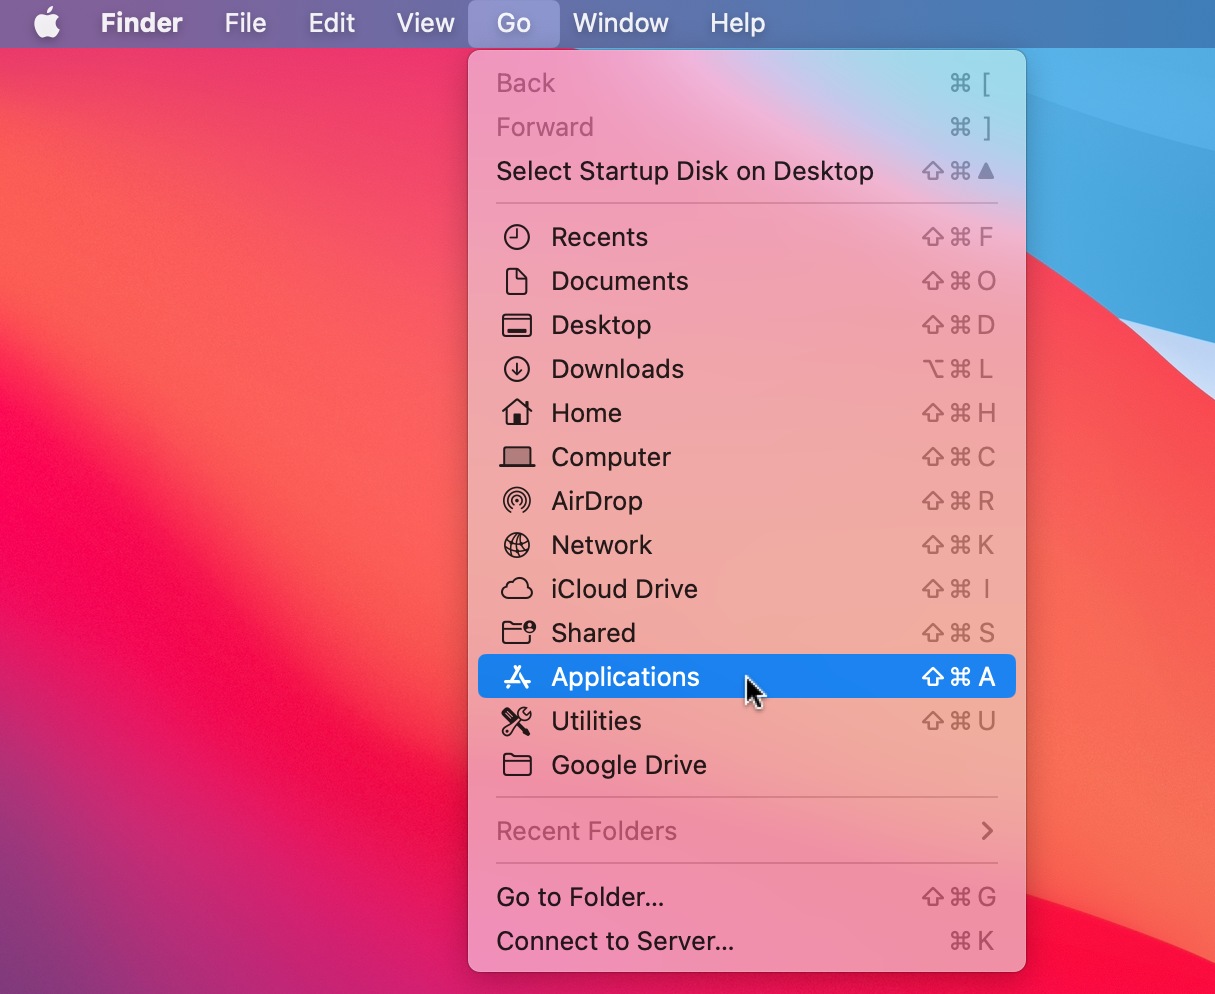
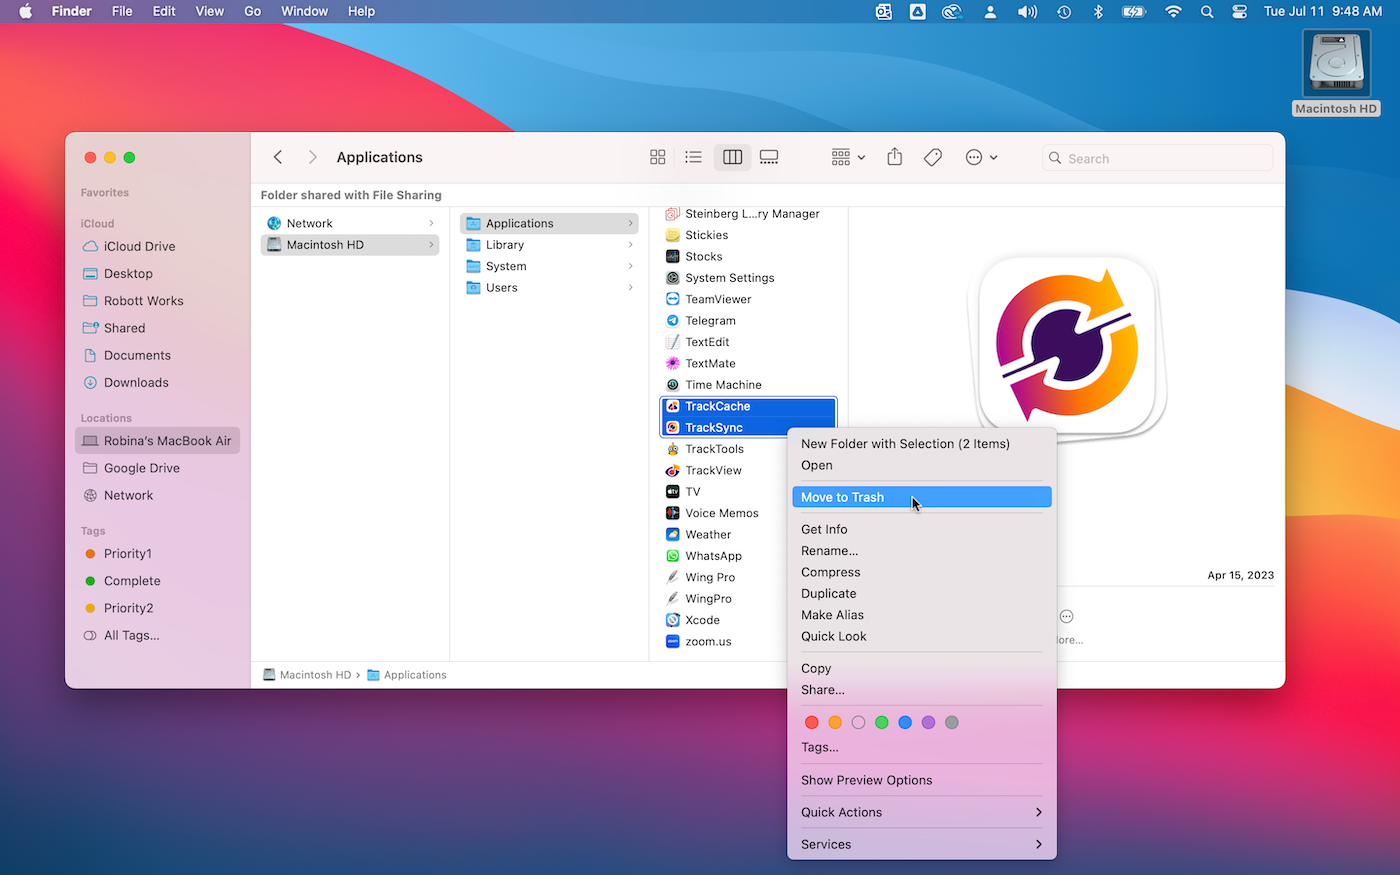
- Delete the TrackSync & TrackCache applications.
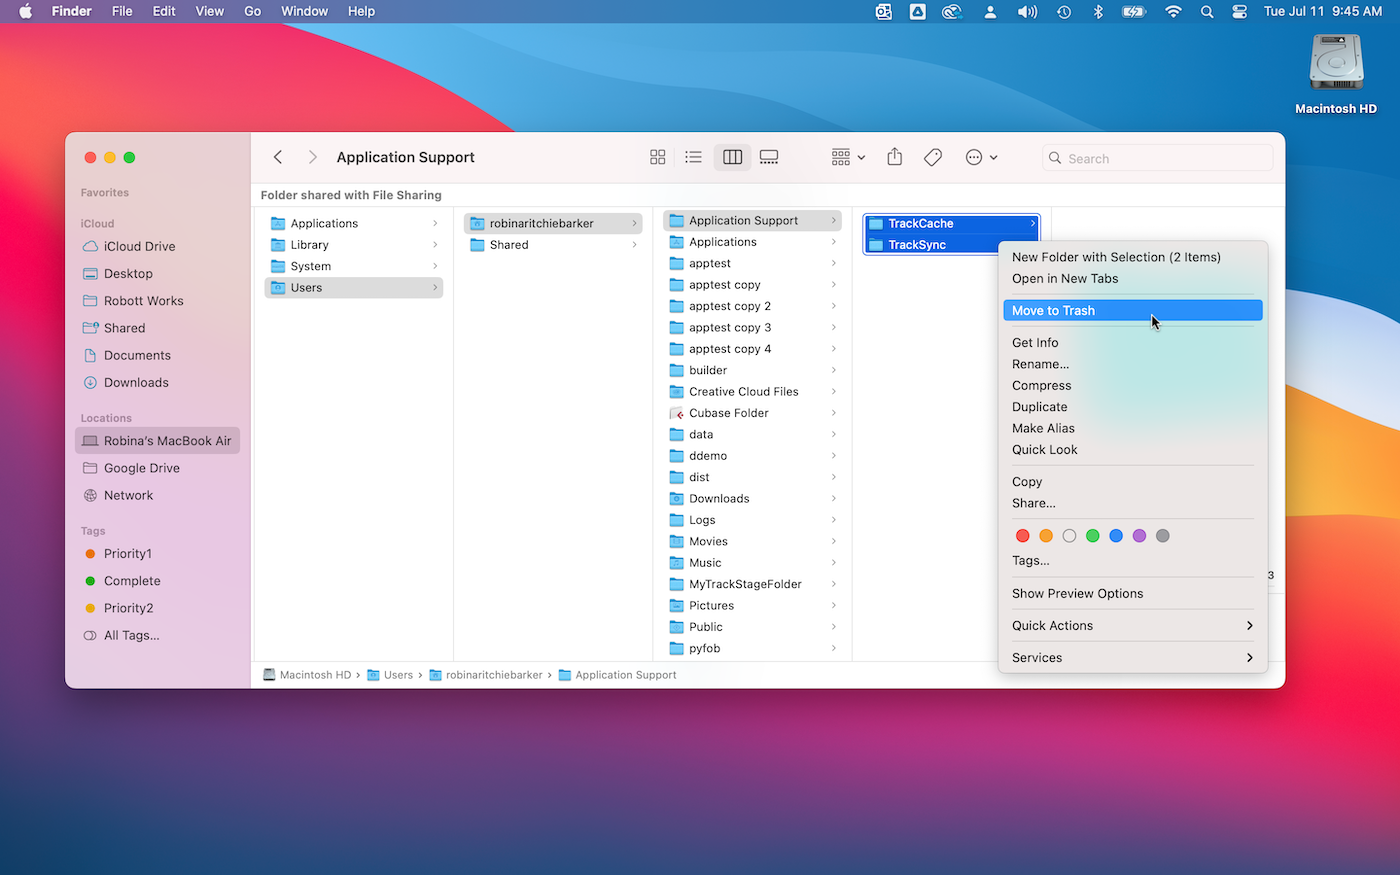
- Delete the TrackSync & TrackCache folders from Application Support.
Go to Macintosh HD > Users > [yourname] > Application Support and move the folders to the Trash.
Windows
- Uninstall TrackSync.
From the Start Menu, click on TrackSync and select Uninstall.
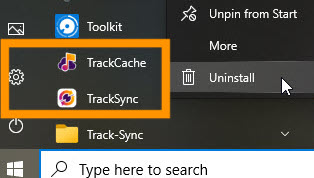
Follow the prompts to complete the uninstall process. - Uninstall TrackCache.
Repeat the above process for TrackCache.
Reinstall TrackSync
Once the applications are removed, you can find the TrackStage installer within your User Profile.
- From the User Profile dropdown menu, select System Settings.
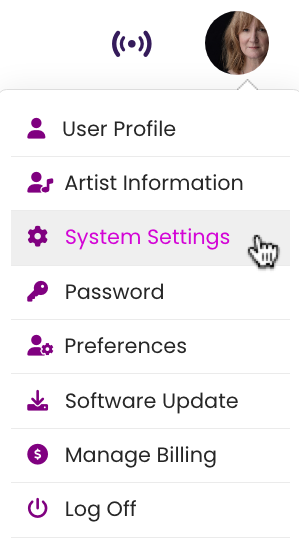
- Click on the Install TrackSync button.
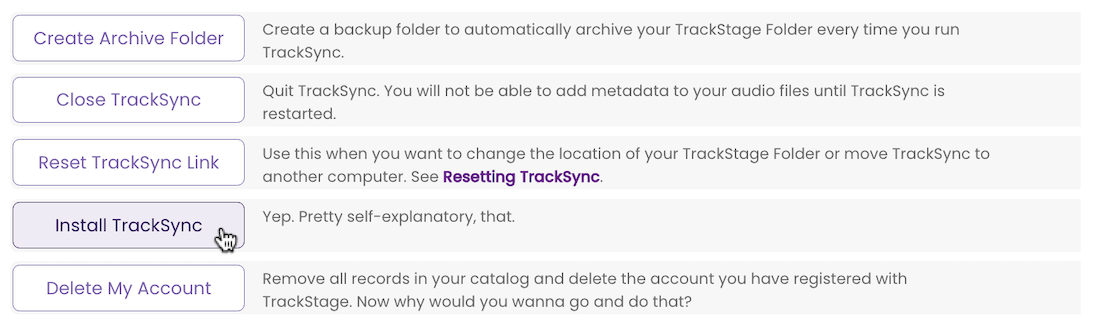
The TrackSync installation window opens. - Follow the instructions in the installer to reinstall TrackSync.
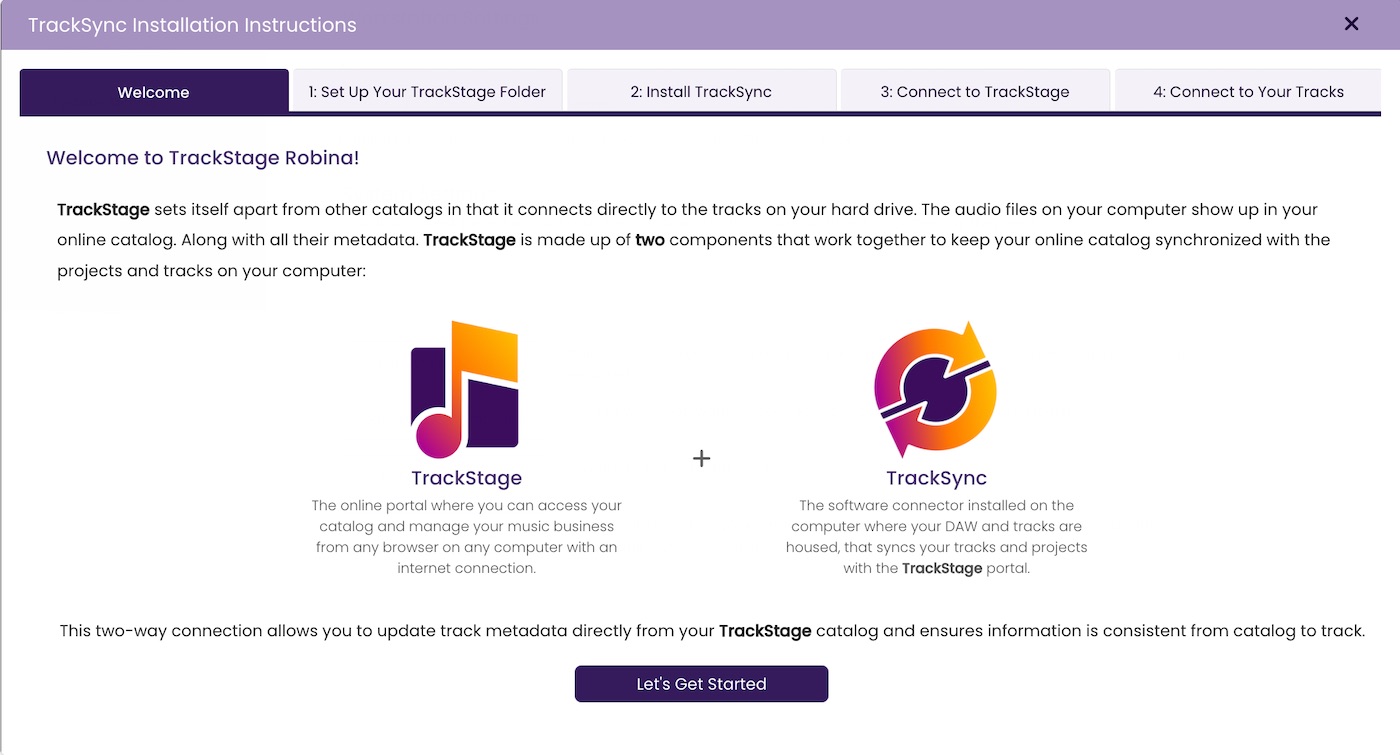
Resetting the TrackSync Link
Use the Reset TrackSync function when you want to move TrackSync and/or your TrackStage Folder to another computer/drive/location. Once the connection between TrackSync and the tracks in your TrackStage Folder has been established, you have to exercise extreme caution when changing the location of either component to prevent data loss and account corruption.
- Verify that TrackSync is running.
Make sure the TrackSync status is purple.
- From the User Profile dropdown menu, select System Settings.
- Click on the Reset TrackSync Link button.
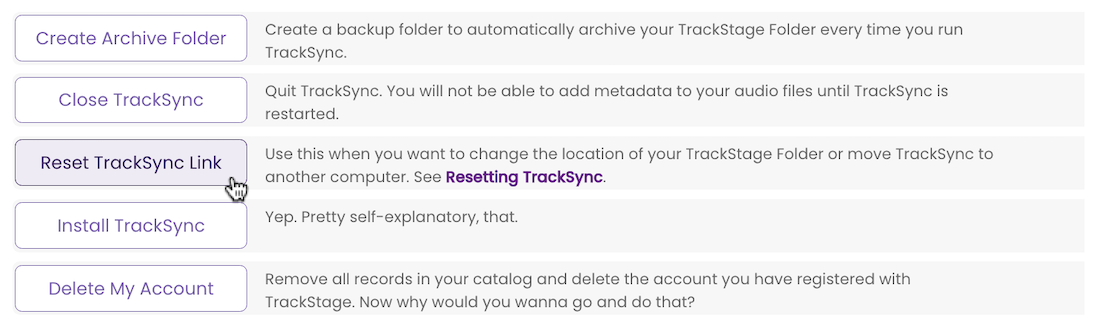
The Reset TrackSync Link confirmation dialog opens. - Click Ok.
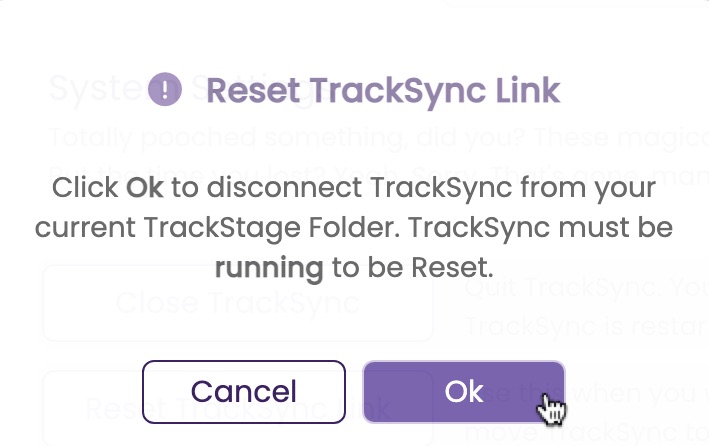
The TrackSync link to your TrackStage Folder and account is reset. - Install TrackSync on the new computer/drive (if applicable)
If you are just moving your TrackStage Folder to a different location on the same computer, there is no need to reinstall TrackSync. For instructions on how to install TrackSync on the new computer, see Installing TrackSync. - Open TrackSync.
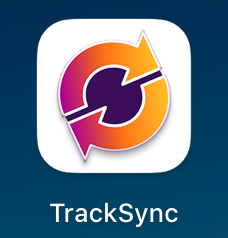
Mac OS: Go to your Applications folder and click on the TrackSync application icon.
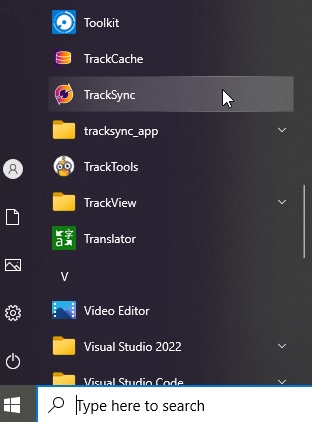
Windows: Go to your Start Menu and click on TrackSync.
- Log in to TrackSync.
Use the same email and password as you used to create your TrackStage account.
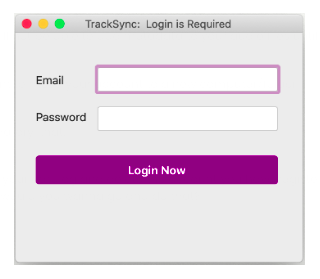
- Click Login Now.
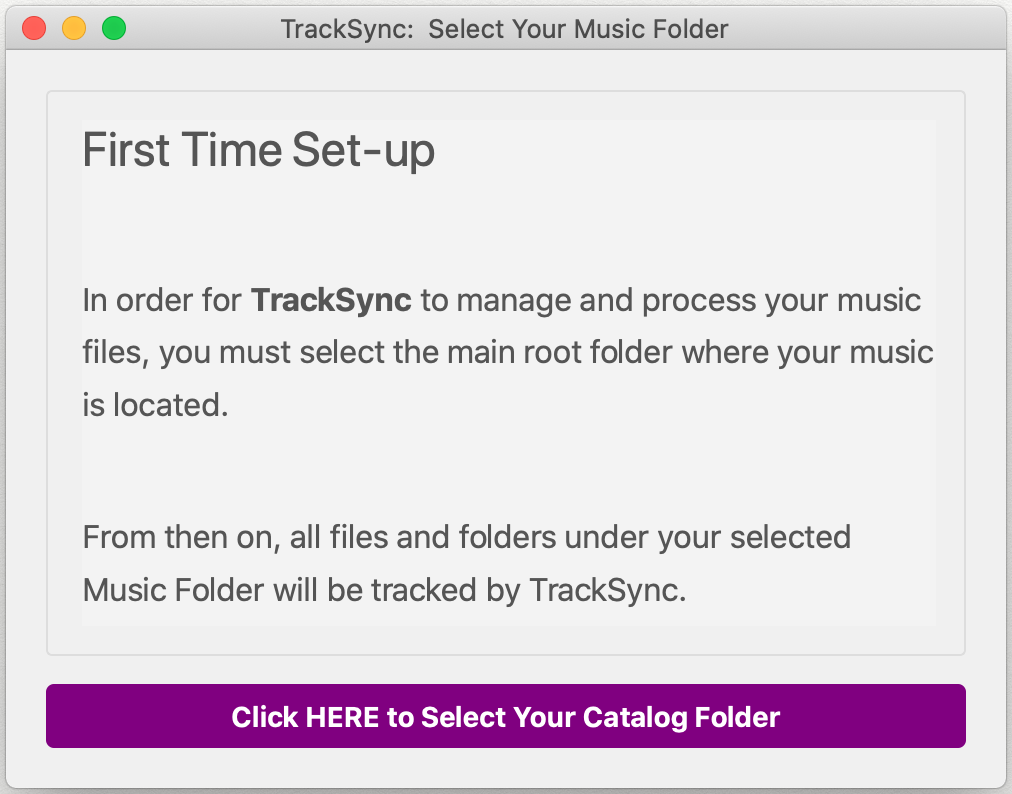
After a few moments, the TrackSync Set-up window will open automatically. - Select your Catalog Folder in the TrackSync Set-Up window.
Click on the Click HERE to Select Your Catalog Folder button.
- Navigate to the new location of your TrackStage Folder.
- Click Open to select your folder.
TrackSync will connect to the folder and then will log you out and back in to TrackStage. - Click TrackSync Tools › Process Folder Updates.
- Allow TrackSync to Process Your Tracks
TrackSync will now go through your TrackStage folder and reconnect to each track. All metadata and information that was on your tracks in the previous location will be preserved.