
Help Center Getting Started with TrackStage
Connecting TrackSync to TrackStage
Once TrackSync is installed, it needs two things: your TrackStage login, so it knows whose Catalog to sync to, and your TrackStage Folder, so it knows which files to watch. This article covers both. If you haven't installed it yet, start with Installing TrackSync.
From the Getting Started Window
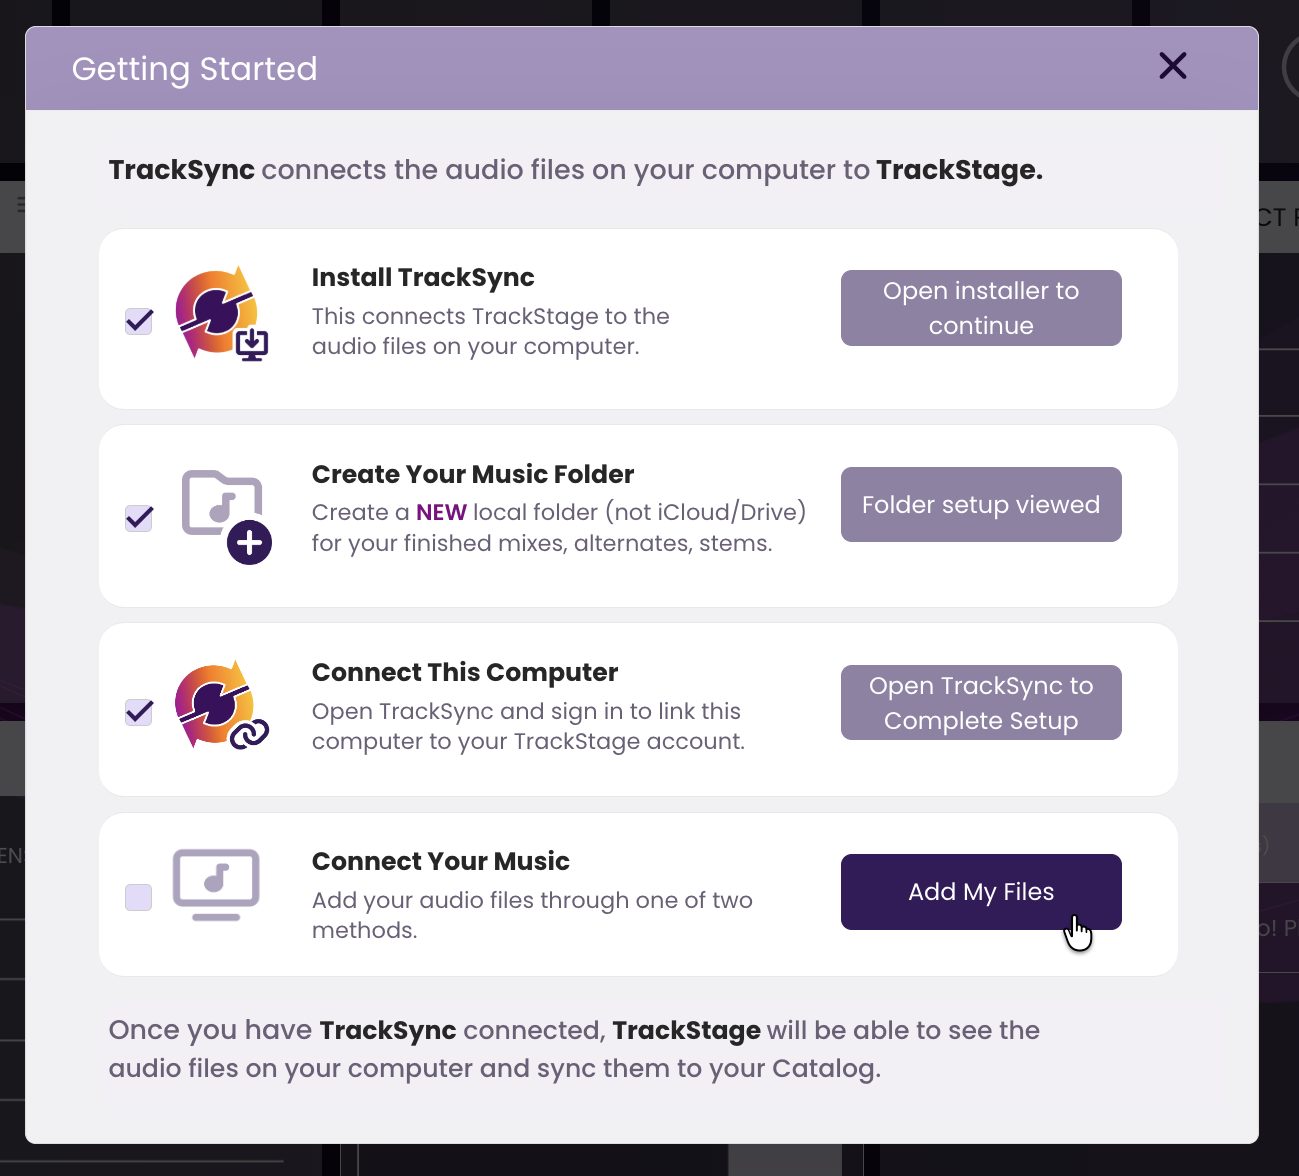
Step three of the Getting Started window handles the connection. Here is the short version; the sections below walk through the same thing on each platform, with the screens you will see.
- Click Show Me How on "Connect This Computer".
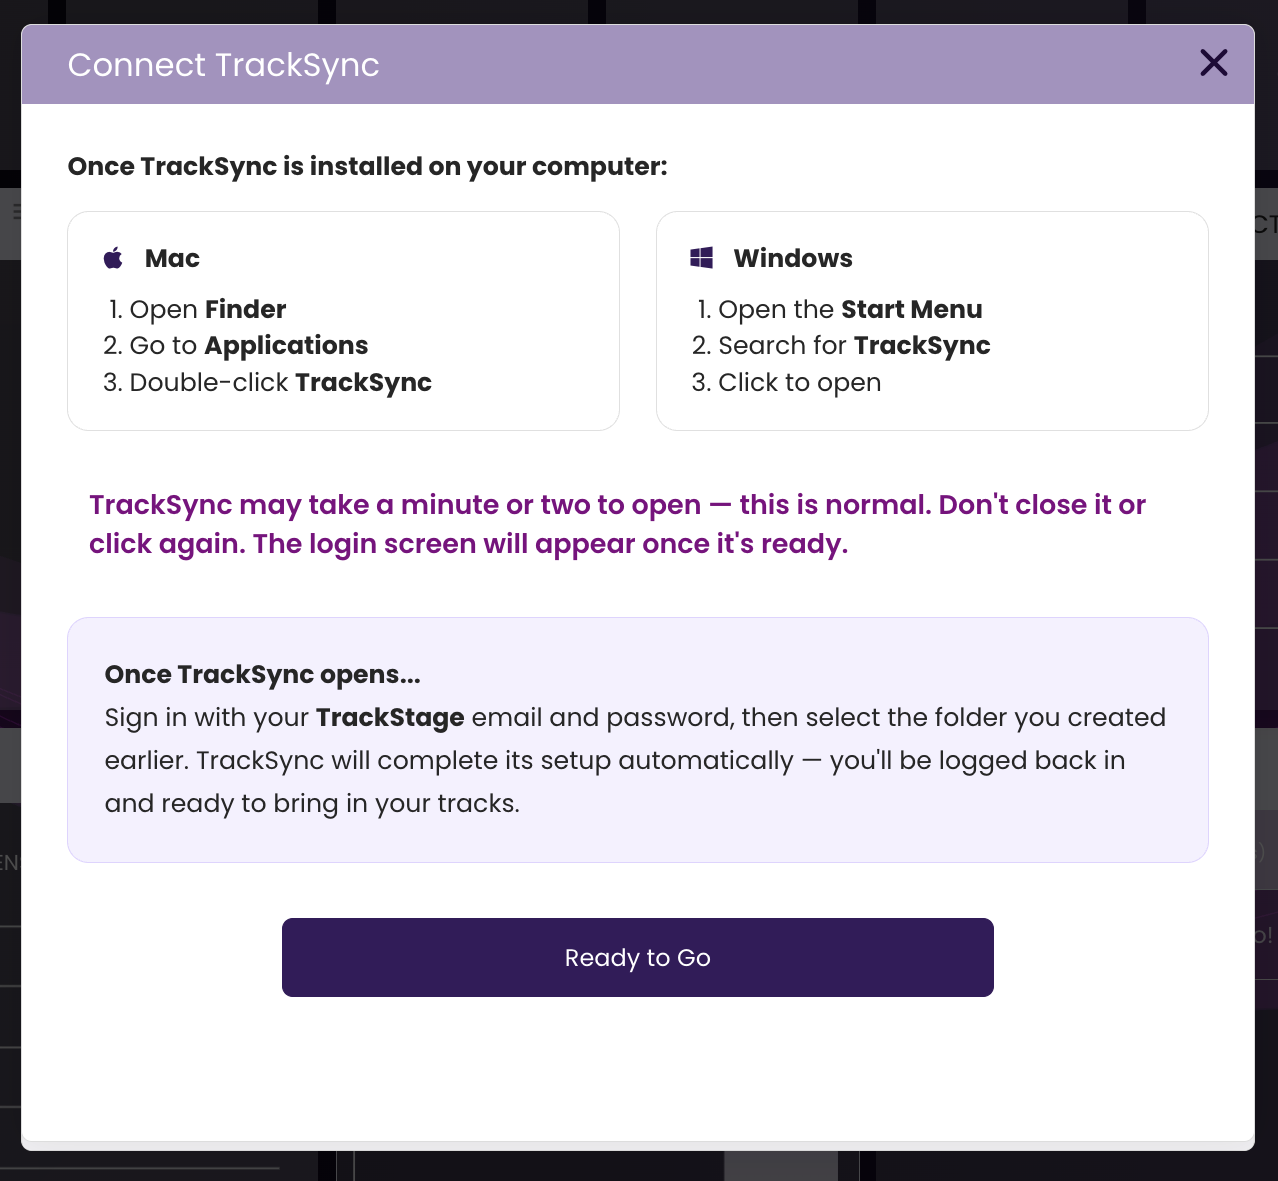
- Open TrackSync on your computer.
On a Mac: open Finder, go to Applications, and double-click TrackSync.
On Windows: open the Start Menu, search for TrackSync, and click to open.
NOTE: TrackSync can take a minute or two to open the first time. This is normal — don't close it or click again. The login screen appears once it's ready. - Sign in to TrackSync with your TrackStage email and password, then select the folder you made earlier.
TrackSync finishes its setup on its own, logs you back in, and the first steps show as done.
Step by Step
Signing in and choosing your folder is a one-time setup. Follow the section for your computer.
Mac OS | Go to Windows
Step One : Open and Sign In
TrackSync will push changes in your TrackStage folder up to your TrackStage Catalog.
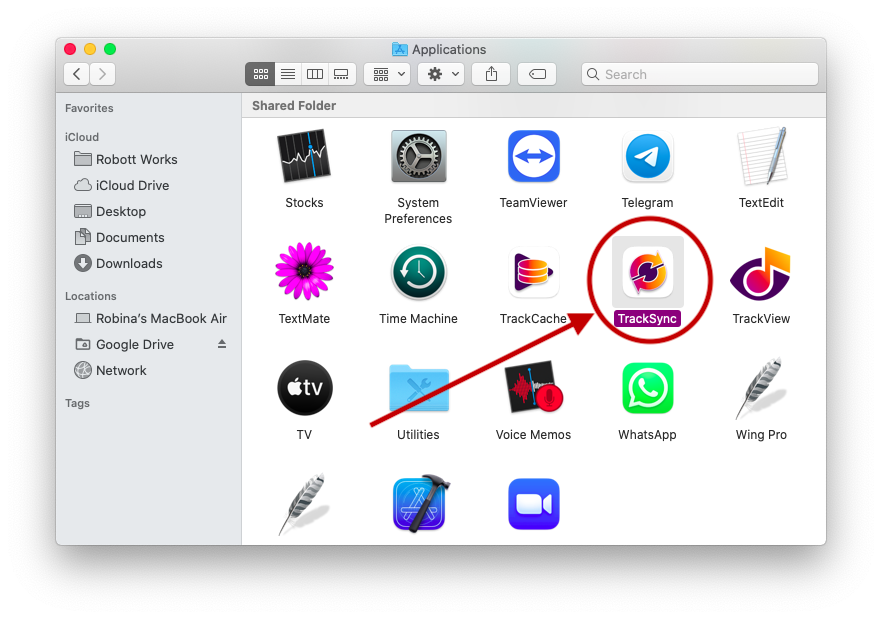
- Open TrackSync from your Applications folder.
Open Finder, go to Applications, and double-click TrackSync.
Because this is the first time TrackSync is running on your computer, it can take a minute or two to configure itself before the login window opens. This is normal — don't close it or double-click again.
- Log in to TrackSync.
Use the same email and password as you used to create your TrackStage account.
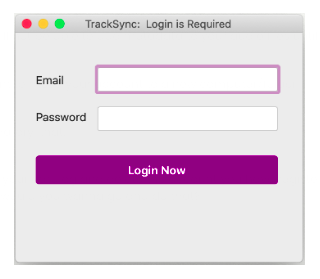
- Click Login Now.
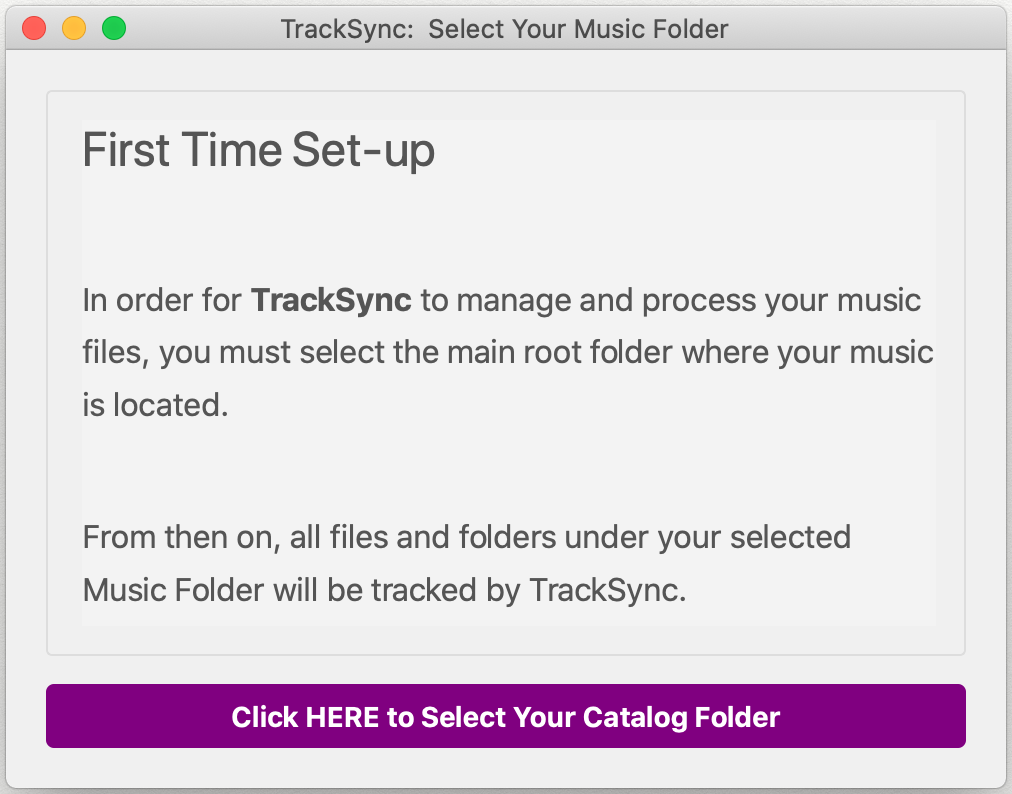
After a few moments, the TrackSync Set-up window will open.
Step Two : Connect to Your Tracks
- Select your Catalog Folder in the TrackSync Set-Up window.
Click on the Click HERE to Select Your Catalog Folder button.
- Navigate to your TrackStage folder.
This is the folder you set up to contain all your AIFs, MP3s and WAVs.
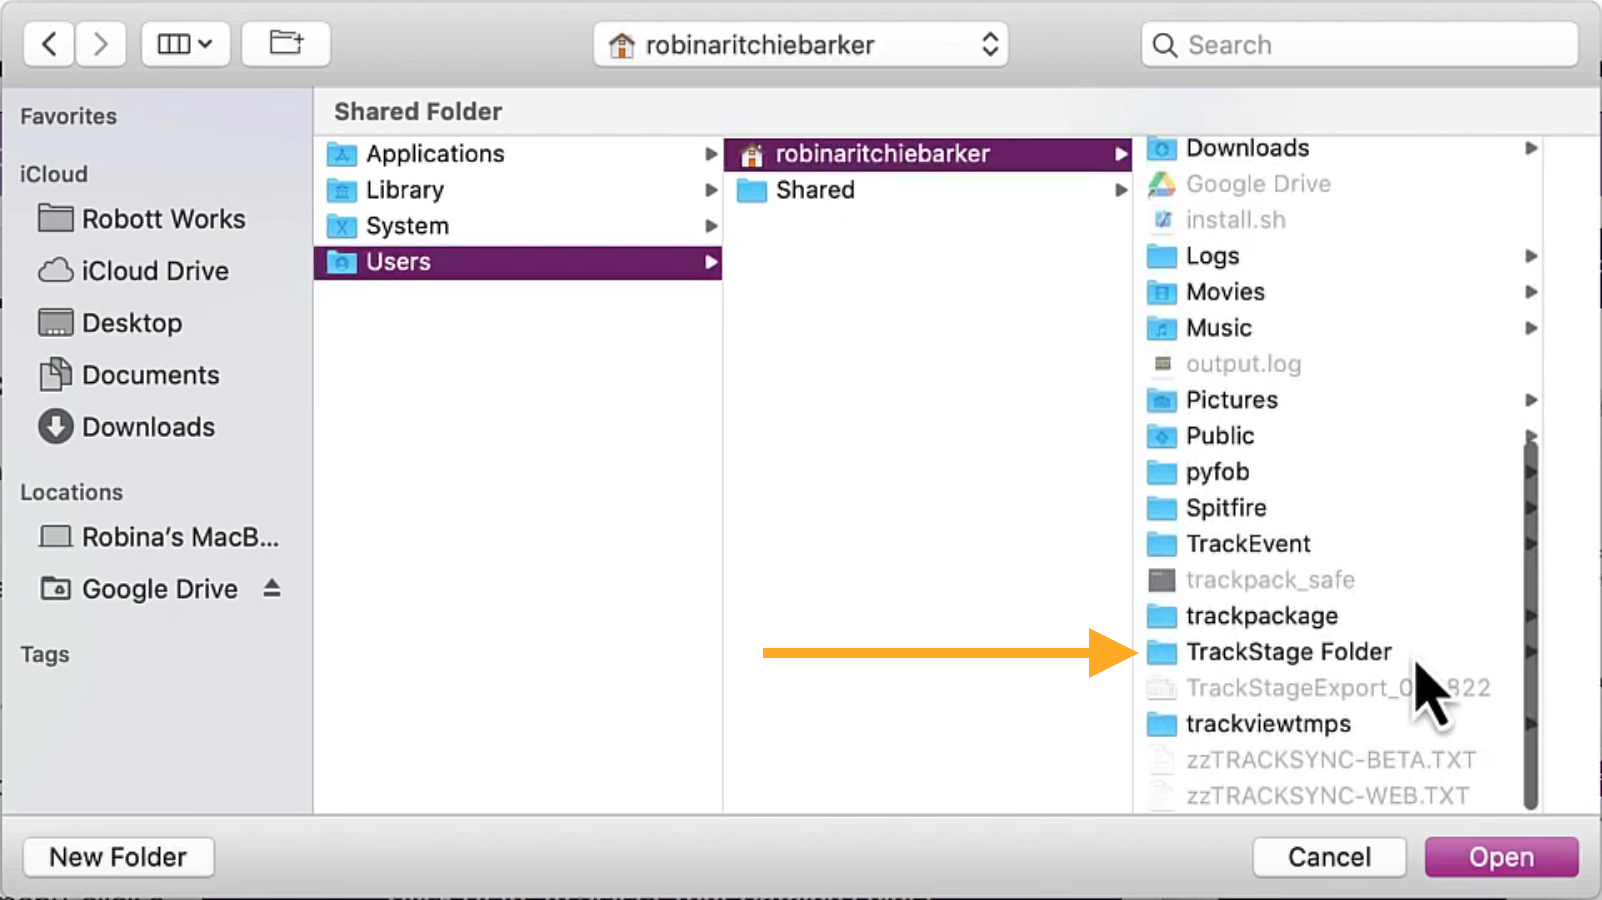
- Click Open to select your folder.
TrackSync connects to the folder, then logs you out and back in to TrackStage.
Windows | Go to Mac OS
Step One : Open and Sign In
TrackSync will push changes in your TrackStage folder up to your TrackStage Catalog.
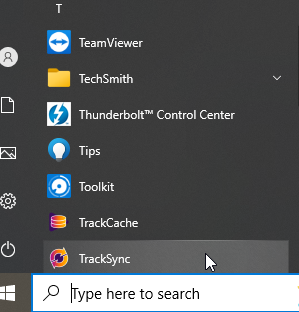
- Open TrackSync from your Start Menu.
Open the Start Menu, search for TrackSync, and click to open. There is no need to open TrackCache — it runs in the background automatically when TrackSync opens.
The first time it runs, TrackSync can take a minute or two to configure itself before the login window opens. This is normal — don't close it or click again.
- Log in to TrackSync.
Use the same email and password as you used to create your TrackStage account.
- Click Login Now.
After a few moments, the TrackSync Set-up window will open automatically.
Step Two : Connect to Your Tracks
- Select your Catalog Folder in the TrackSync Set-Up window.
Click on the Click HERE to Select Your Catalog Folder button.
- Navigate to your TrackStage folder.
This is the folder you set up to contain all your AIFs, MP3s and WAVs.
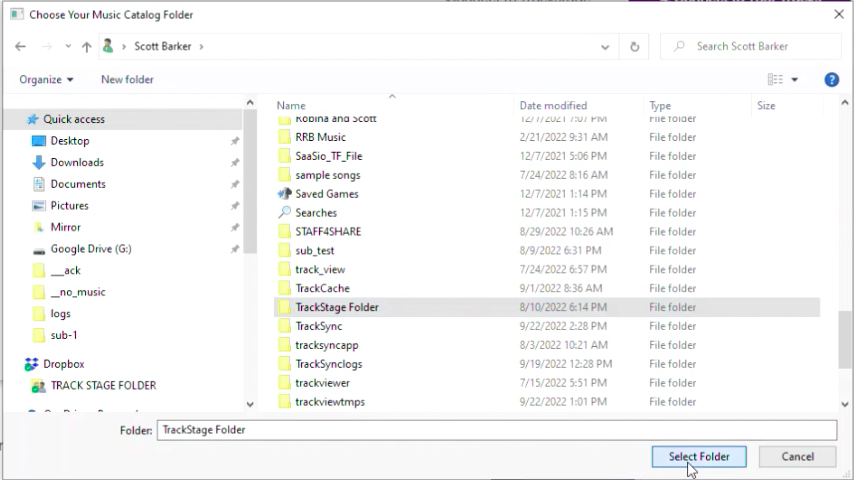
- Click Open to select your folder.
TrackSync connects to the folder, then logs you out and back in to TrackStage.
Next: Bring in Your Music
With this computer connected, the last step of the Getting Started window — Connect Your Music — is how your audio gets into your Catalog. Click Add My Files and choose TrackStage GO for new tracks one at a time, or Bulk Import for a folder of finished tracks all at once. See Bringing in Your Music.