
Help Center The CATALOG Module
Manage Catalog
The Manage Catalog menu holds the Catalog housekeeping that doesn't involve TrackSync — opening your Catalog folder, clearing tag flags, and importing metadata from outside TrackStage.
The Manage Catalog Menu
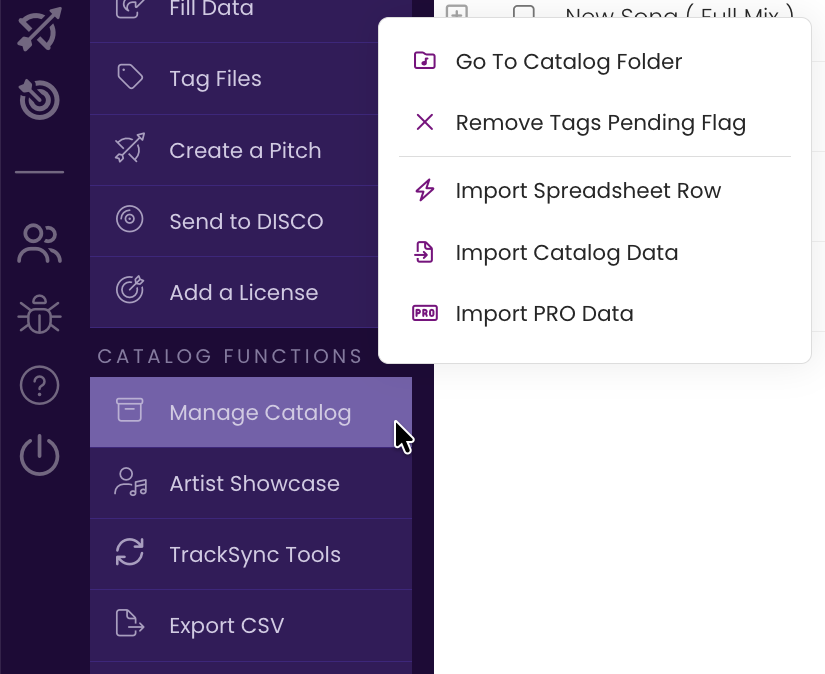
Manage Catalog is found under CATALOG FUNCTIONS in the Side Menu and contains five commands:
Go To Catalog Folder,
Remove Tags Pending Flag,
Import Spreadsheet Row,
Import Catalog Data, and
Import PRO Data.
Anything to do with TrackSync itself — syncing, caching, archiving, updating — lives in TrackSync Tools instead. See Working with TrackSync.
Go To Catalog Folder
Opens your TrackStage Folder on your computer, so you don't have to go hunting for it in Finder or File Explorer. A single click opens the folder in question.
Remove Tags Pending Flag
Whenever you update fields on a track that will affect the metadata on the associated audio file, TrackStage highlights the track so that you know you need to run the Tag Files process to sync the data between CATALOG and audio file.
If, however, you made an edit in error - even if you undo the change, the highlight will remain. You can either clear the highlighting by proceeding with the Tag Files function, or you can Clear the Flag.
- Select the track(s) that you want flags removed.
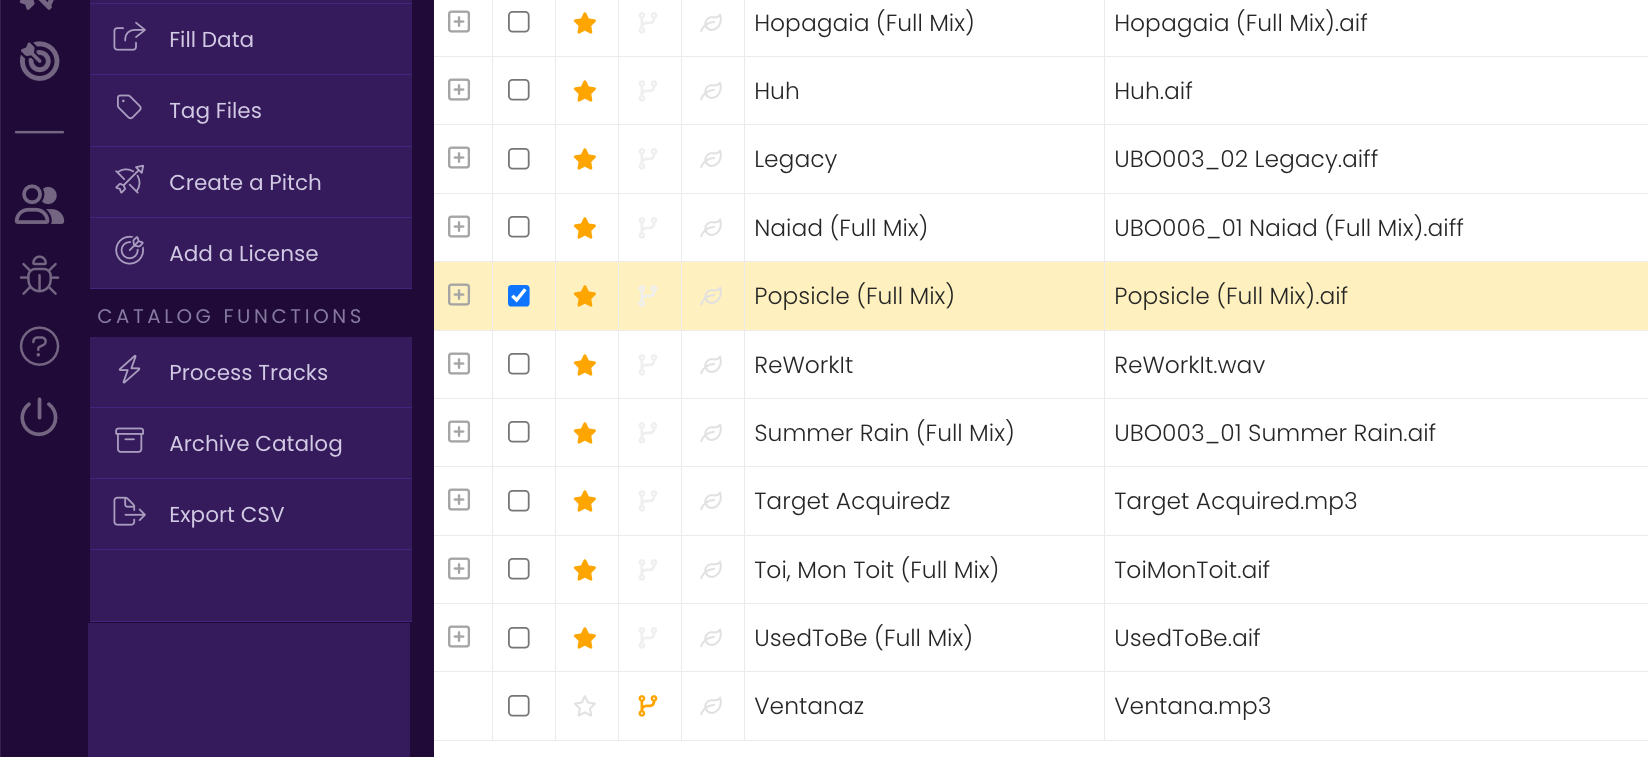
- Click Manage Catalog › Remove Tags Pending Flag.
An alert dialog appears. - Click Ok
NOTE: Be absolutely certain there haven't been any important changes to your metadata before you clear the flag or you may miss tagging critical information to your audio files!
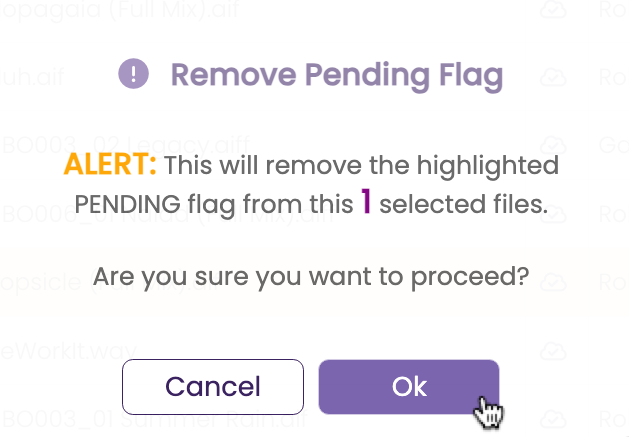
The highlighting is removed from your track(s), but NO tagging is performed.
Import Spreadsheet Row
If you have your track metadata saved in an external spreadsheet, the Import Spreadsheet Row function makes it easy to bring that metadata into TrackStage.
- Prepare your spreadsheet.
Make sure your spreadsheet’s columns match this template EXACTLY and are in precisely the SAME ORDER.
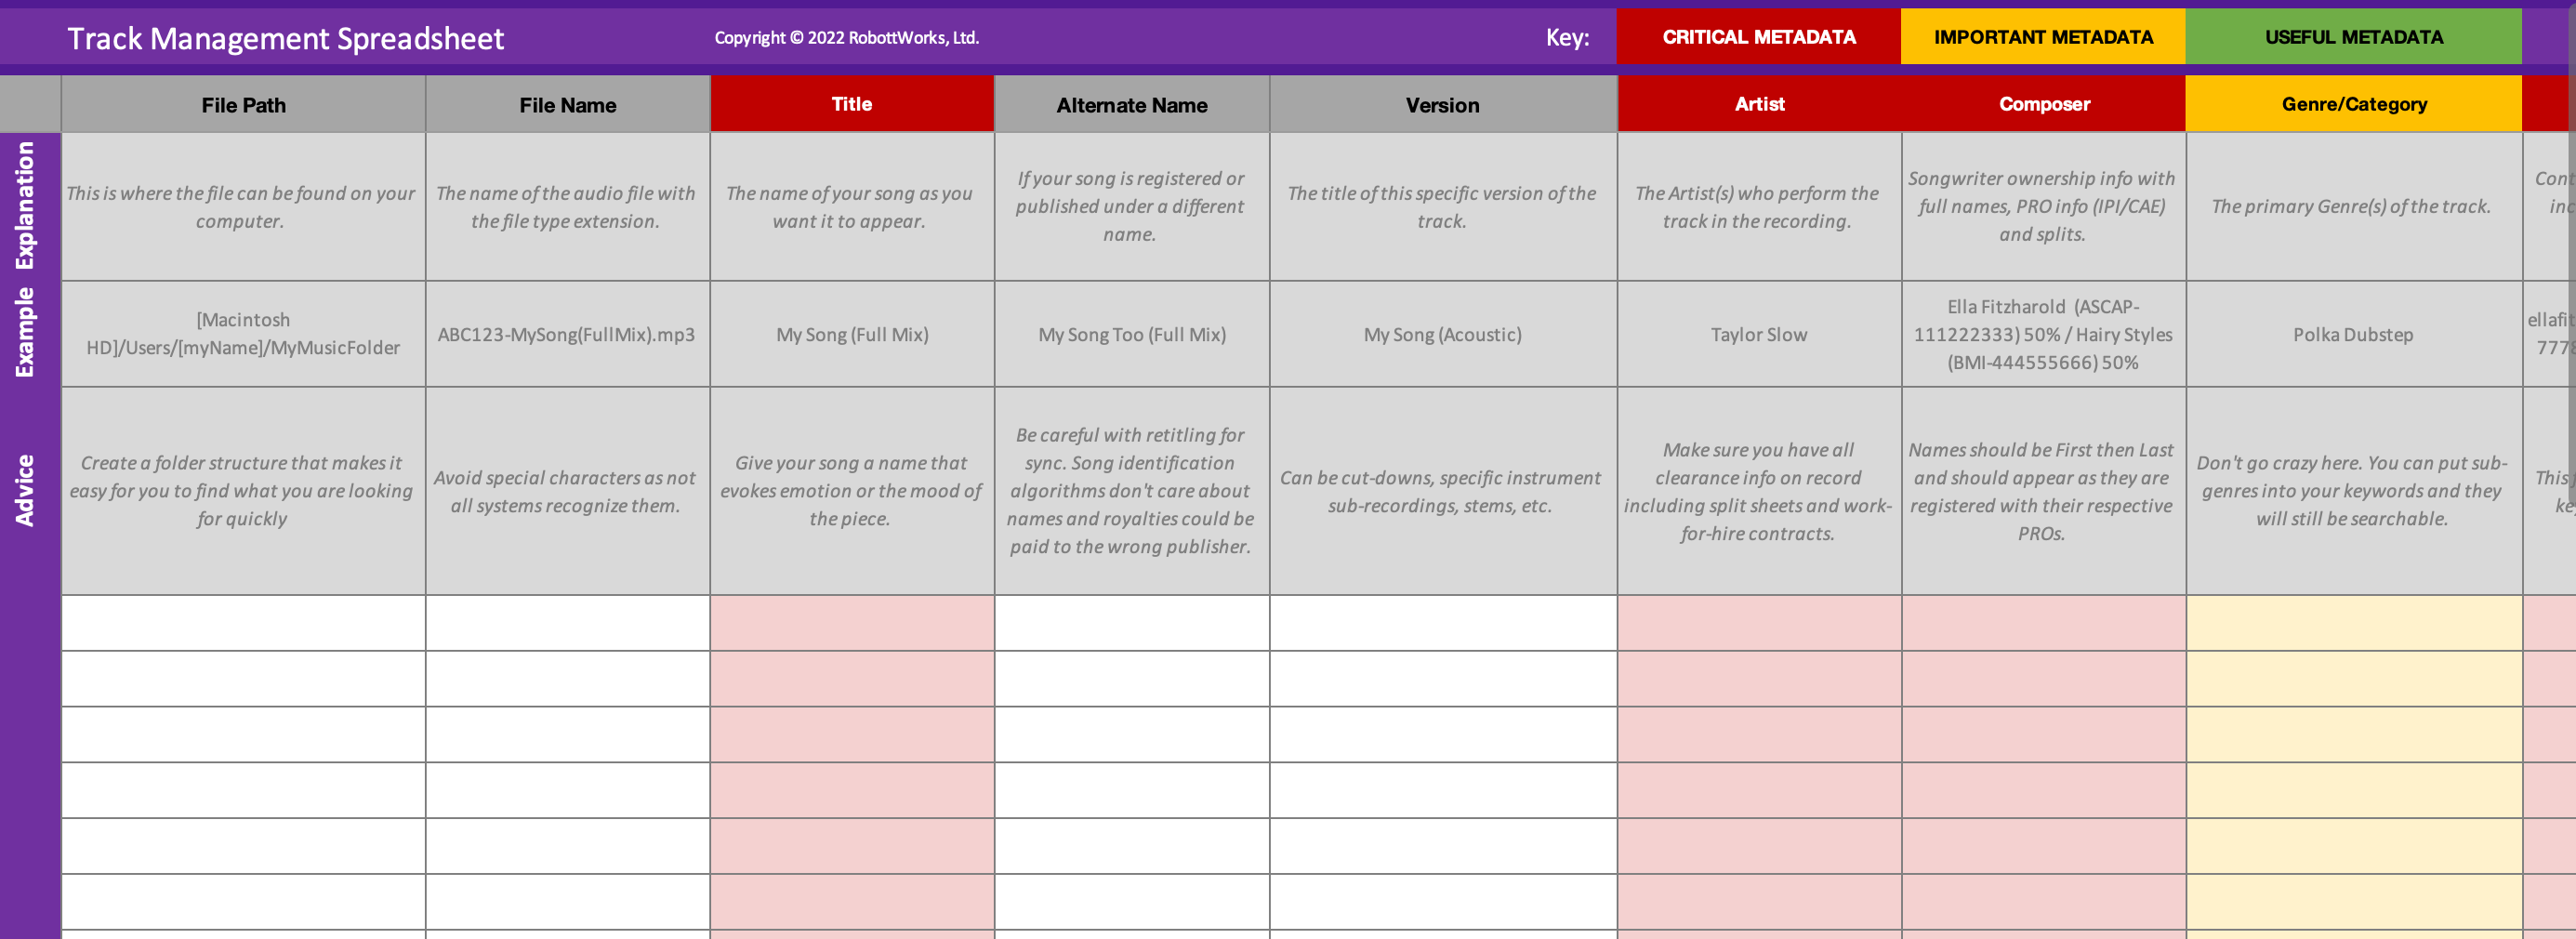
Note that the first column in this template is 'blank', and used for labeling purposes. Your spreadsheet's first column will likewise need to be blank and contain no data for the fields to properly line up when the row is pasted. - Copy the entire row in your spreadsheet.

- In TrackStage, click on the track to which you want to paste the data and open the INFO Tab.
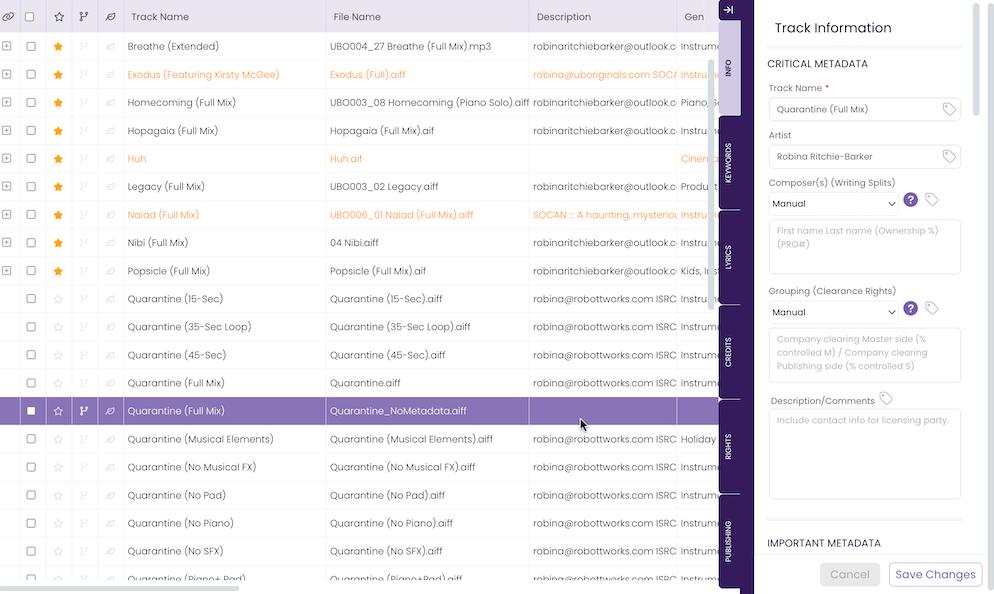
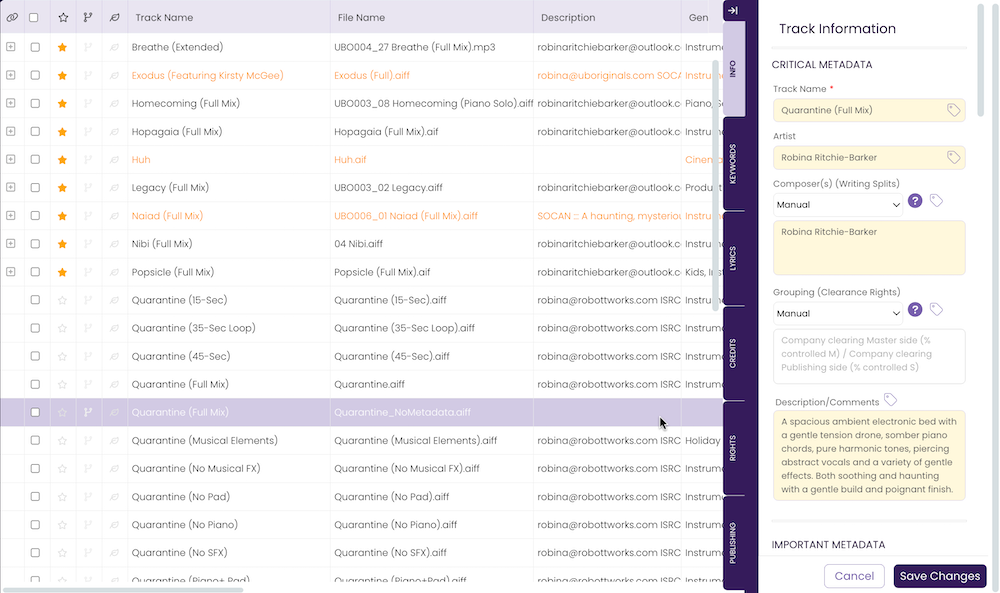
- Click Manage Catalog › Import Spreadsheet Row.
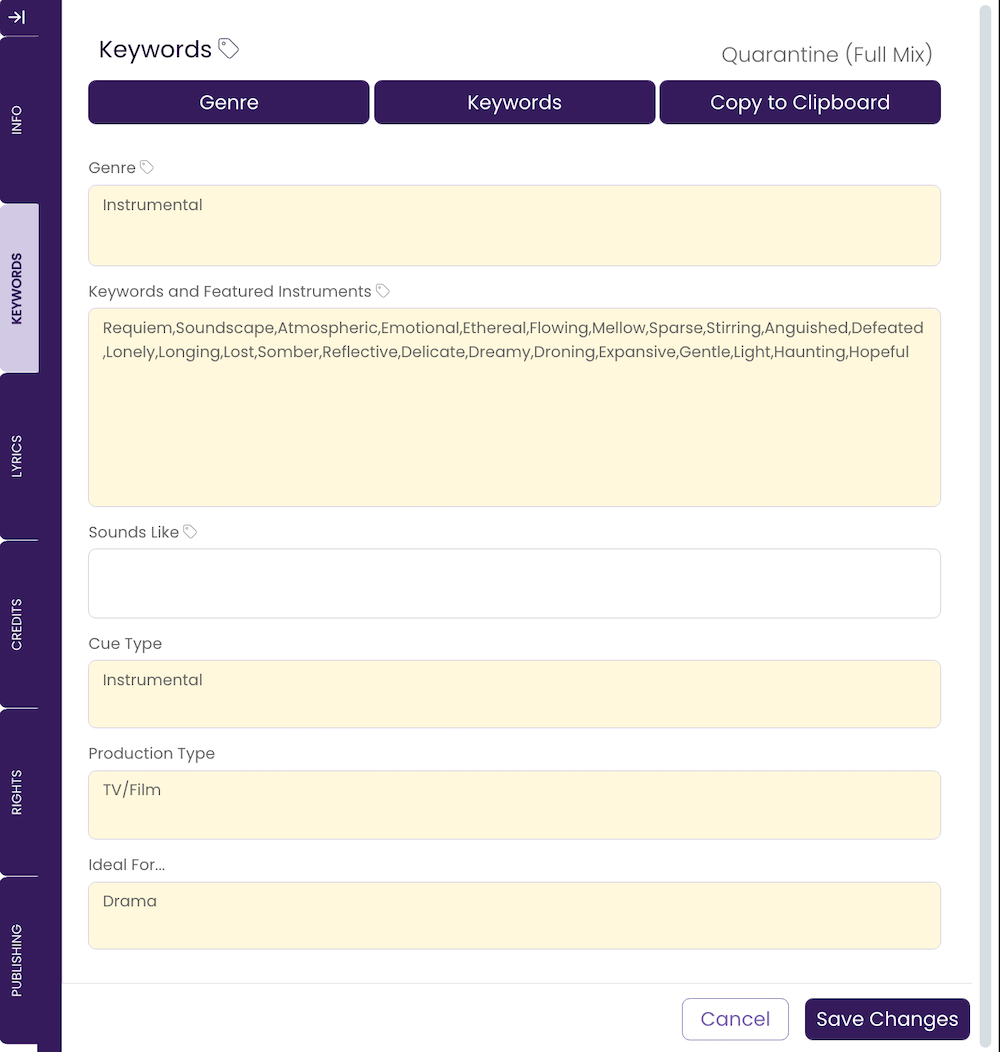
The data is pasted into the INFO Tab...
...and the KEYWORDS Tab.
- Click Save Changes.
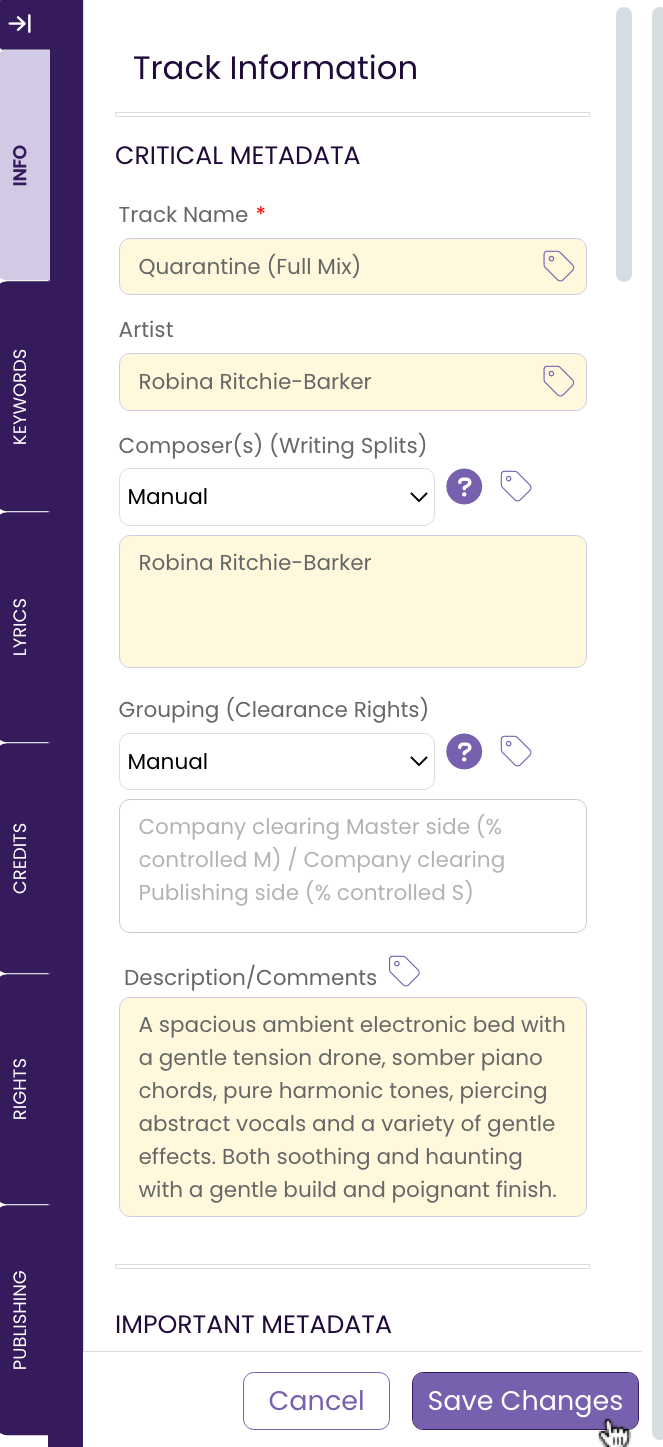
The data is saved to the track, ready to be tagged to the audio file.

Import Catalog Data
Got a whole spreadsheet filled with metadata that you want to add to your tracks in TrackStage? The Import Catalog Data dramatically reduces the time it takes to do just that.
- Click Manage Catalog › Import Catalog Data.
The Import Catalog Data window opens. - Select the spreadsheet you want to import.
Click on the magnifying glass to navigate to the spreadsheet on your hard drive.

Note: Your spreadsheet needs to be saved in a .CSV format before it can be imported.
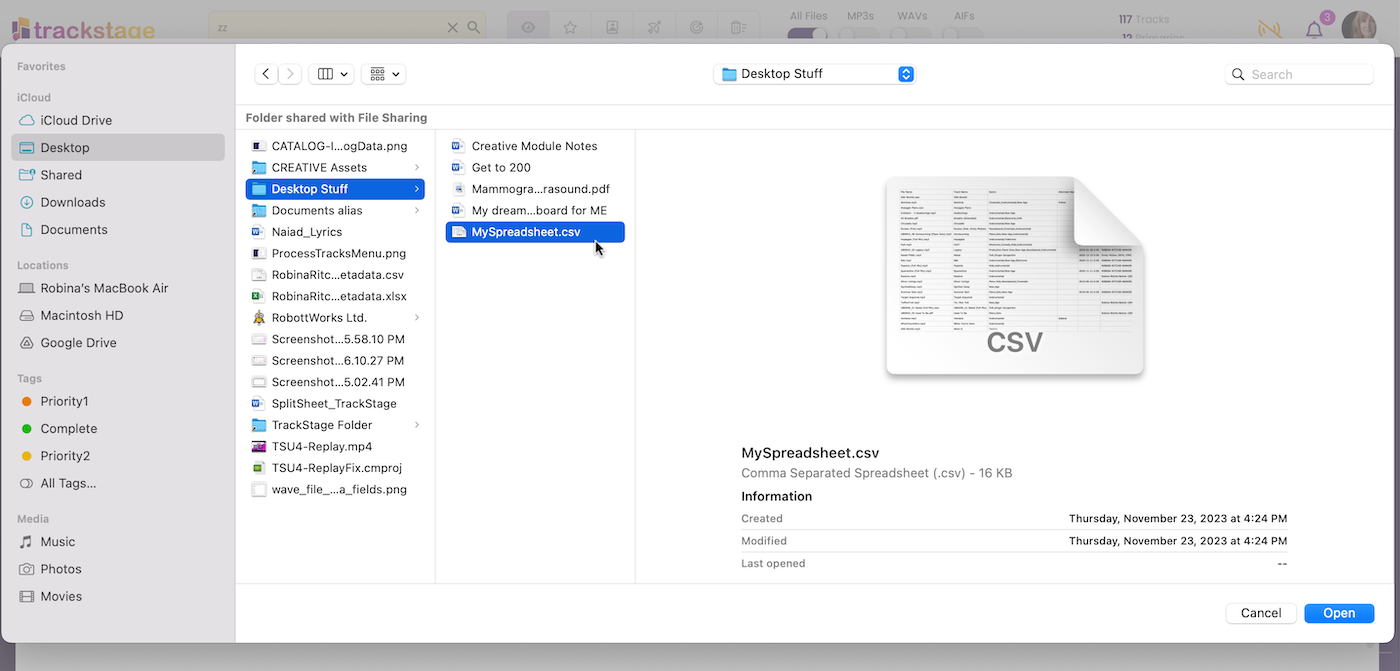
Click Open. The Import Catalog Data Window updates and displays two columns. On the left side are the column headers from your spreadsheet. On the right are all the TrackStage fields that your spreadsheet can populate.
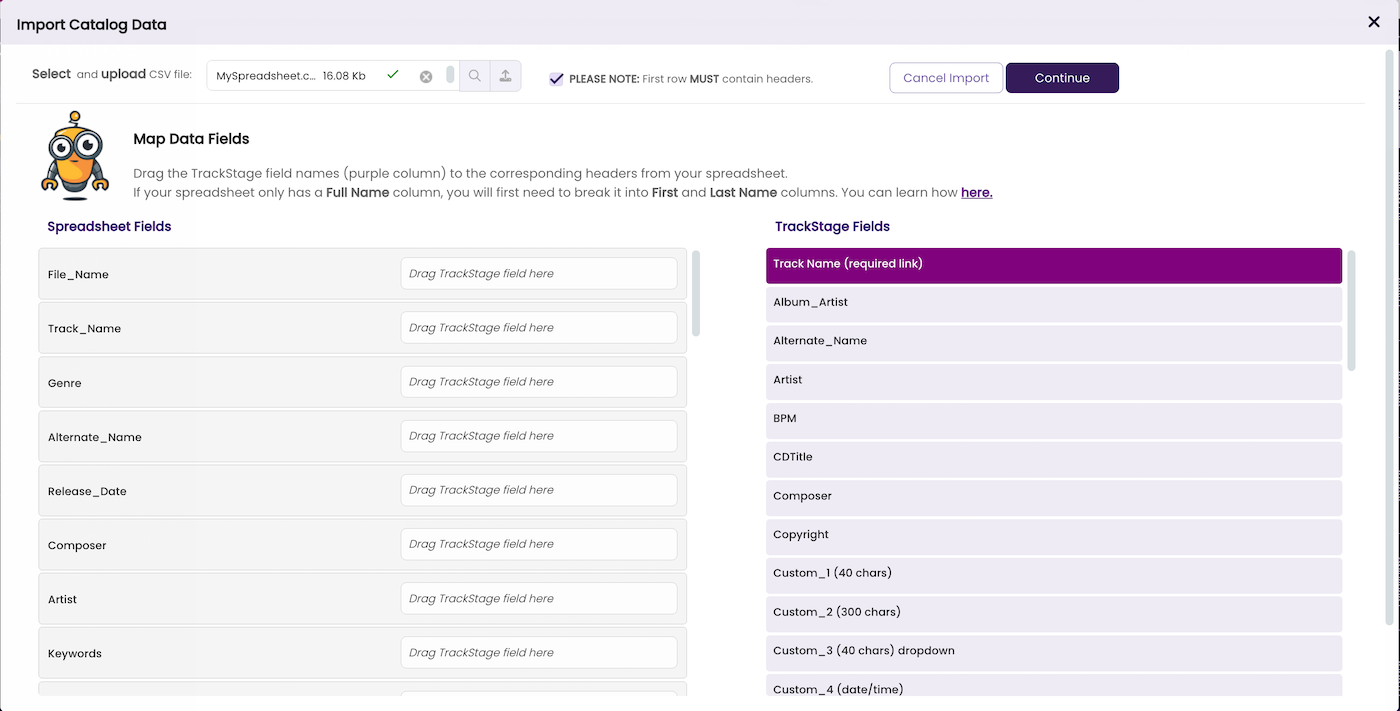
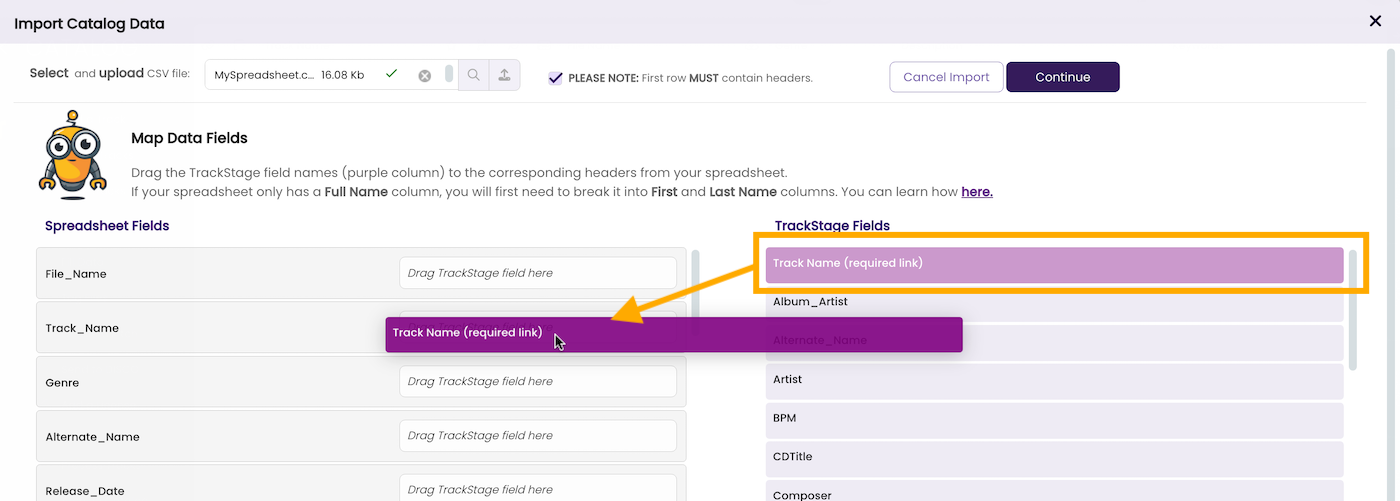
- Match the Track Name fields.
Drag the purple Track Name field from the TrackStage column on the right to the drop zone of the field that contains your track names in the Spreadsheet column on the left.
- Match the TrackStage fields to their corresponding Spreadsheet fields.
Drag the TrackStage field names to the drop zones on the fields in the left column that contain the data you want brought into the TrackStage field.
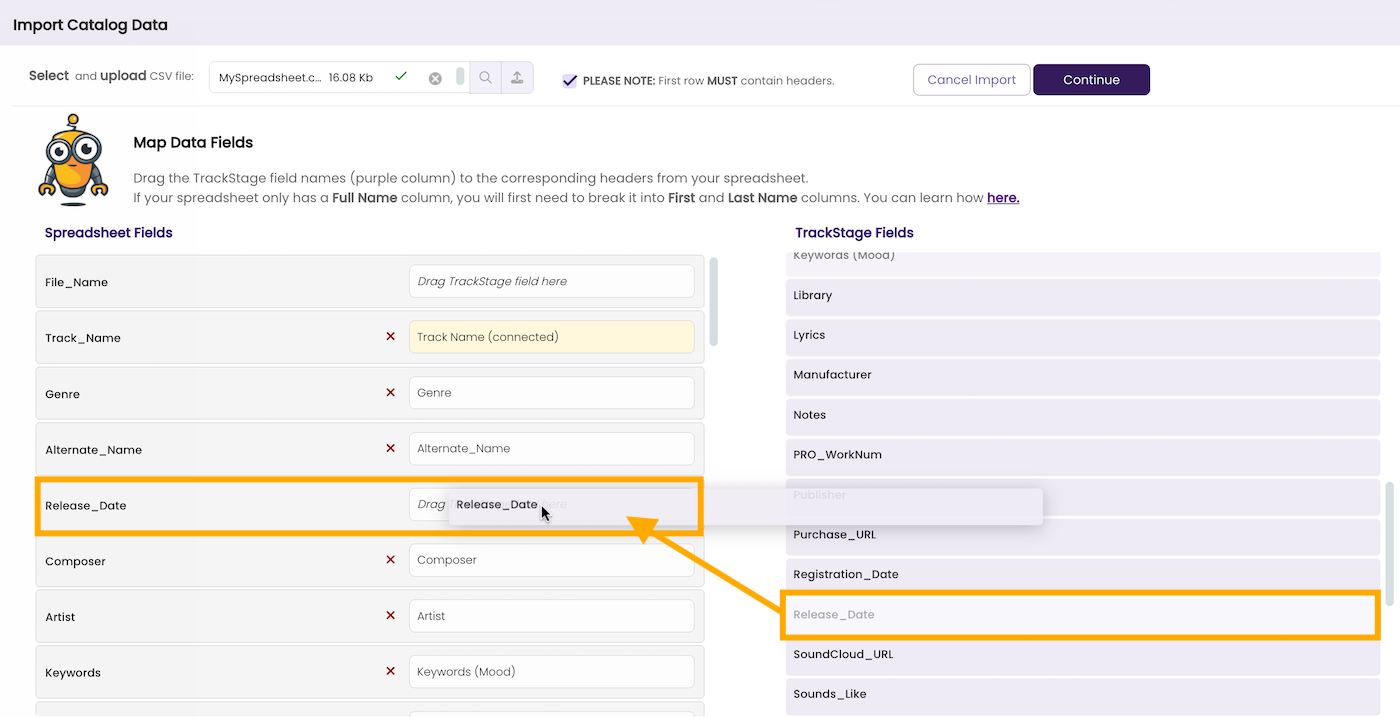
You can drag all available fields that match or, if you only want to import data from a specific column on your spreadsheet, just drag the desired TrackStage field(s) to the corresponding field(s) on the left. - When you have finished matching, click Continue.
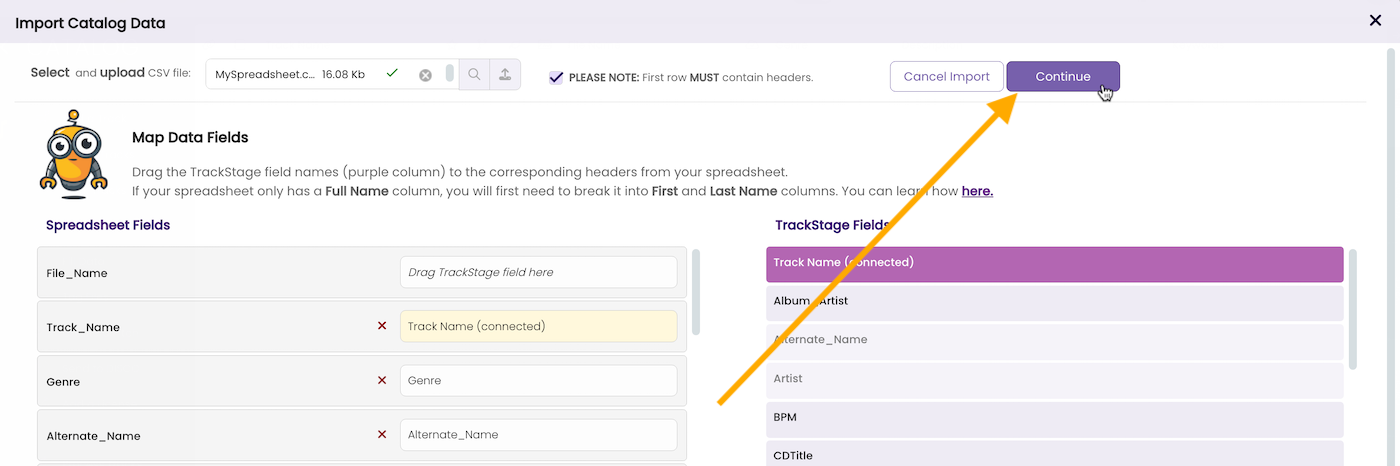
A confirmation dialog opens.
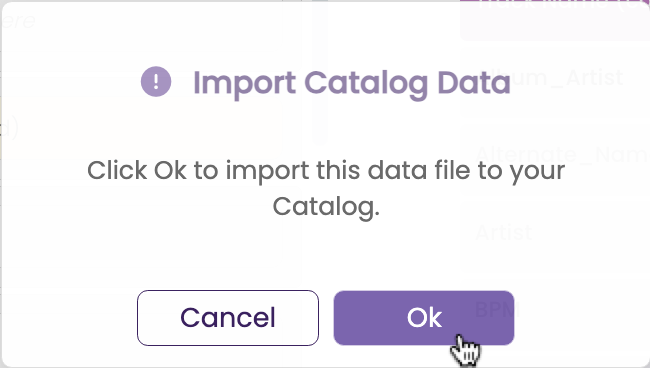
- Click Ok.
The Match CSV Data window opens.
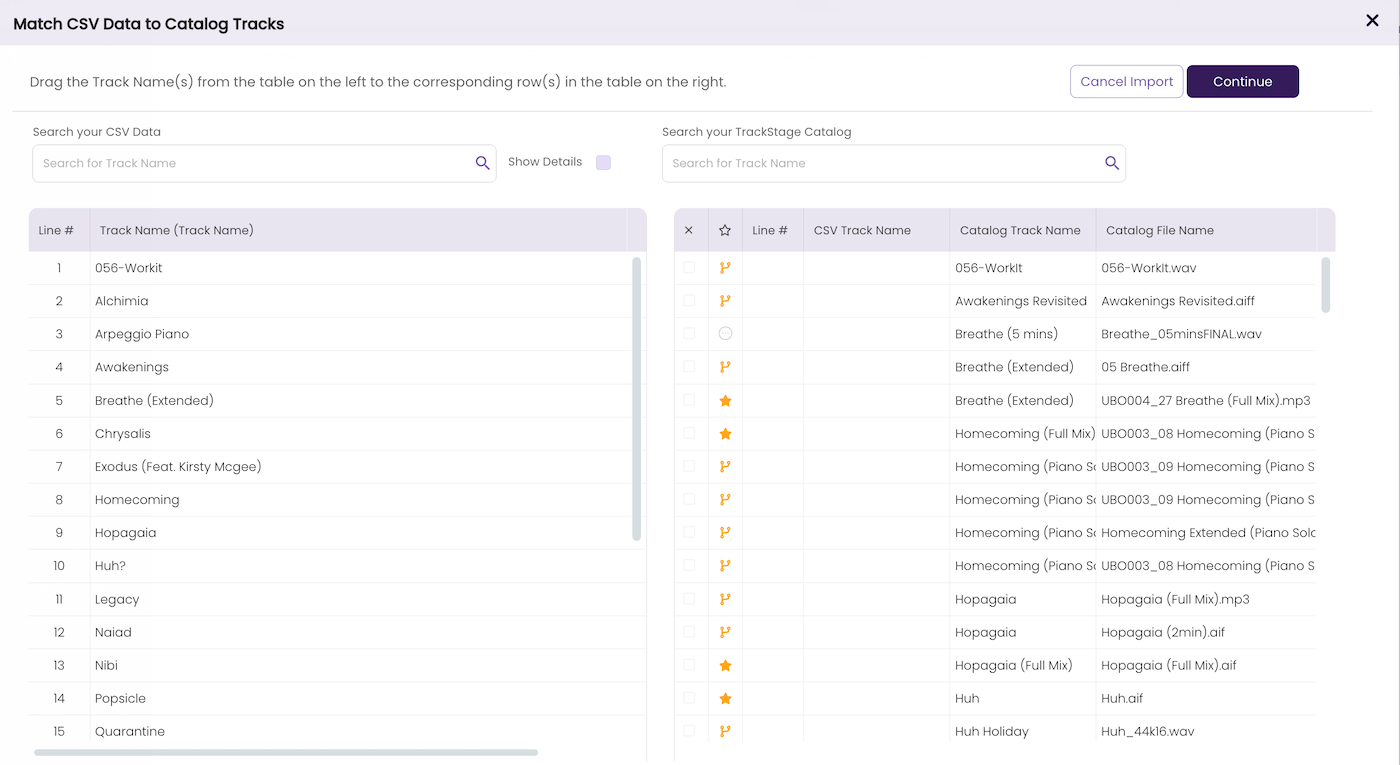
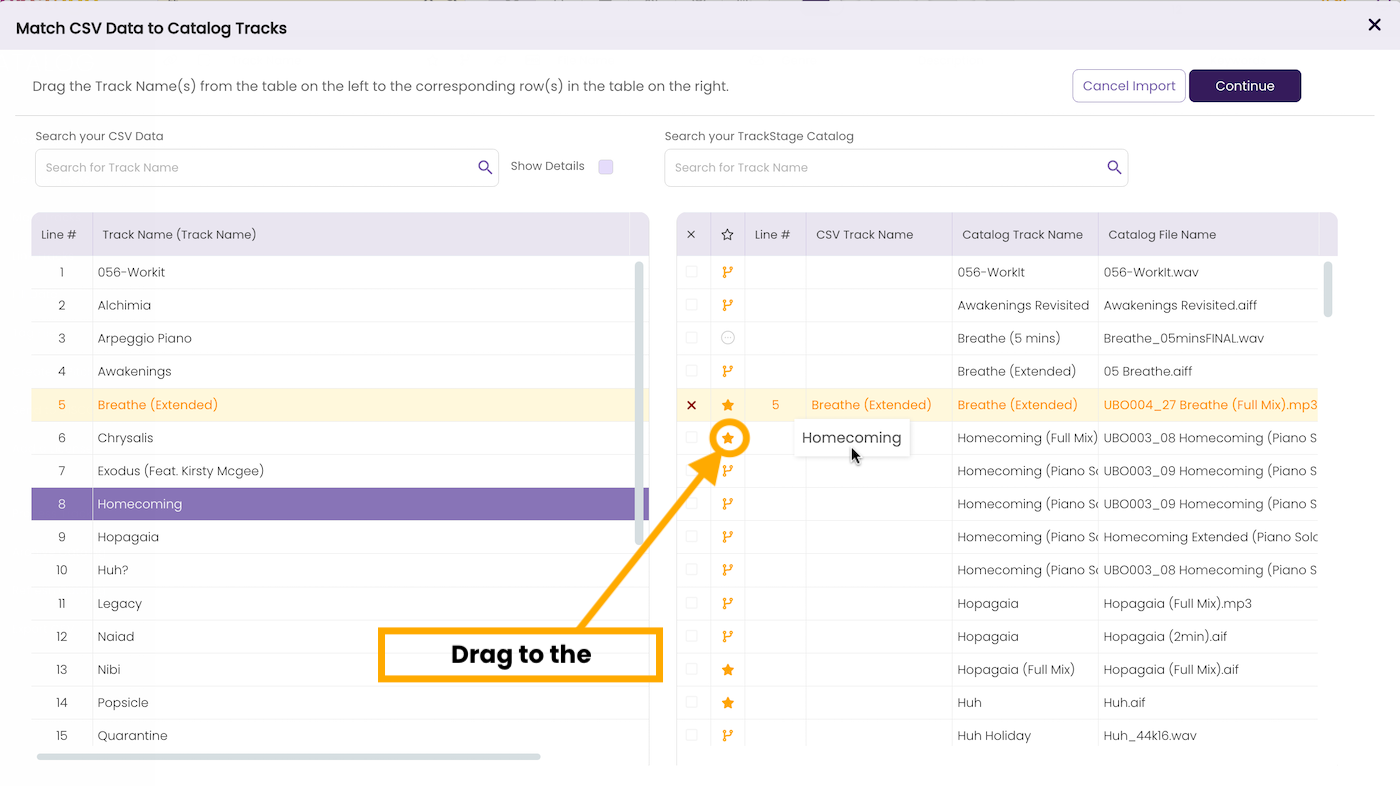
Again, there are two columns. On the left are the tracks that are listed in your spreadsheet. On the right are the tracks that are in your TrackStage CATALOG. - Match the tracks you want to update.
This time, drag from the left column to the right, connecting the tracks in your spreadsheet with the corresponding tracks in your CATALOG.
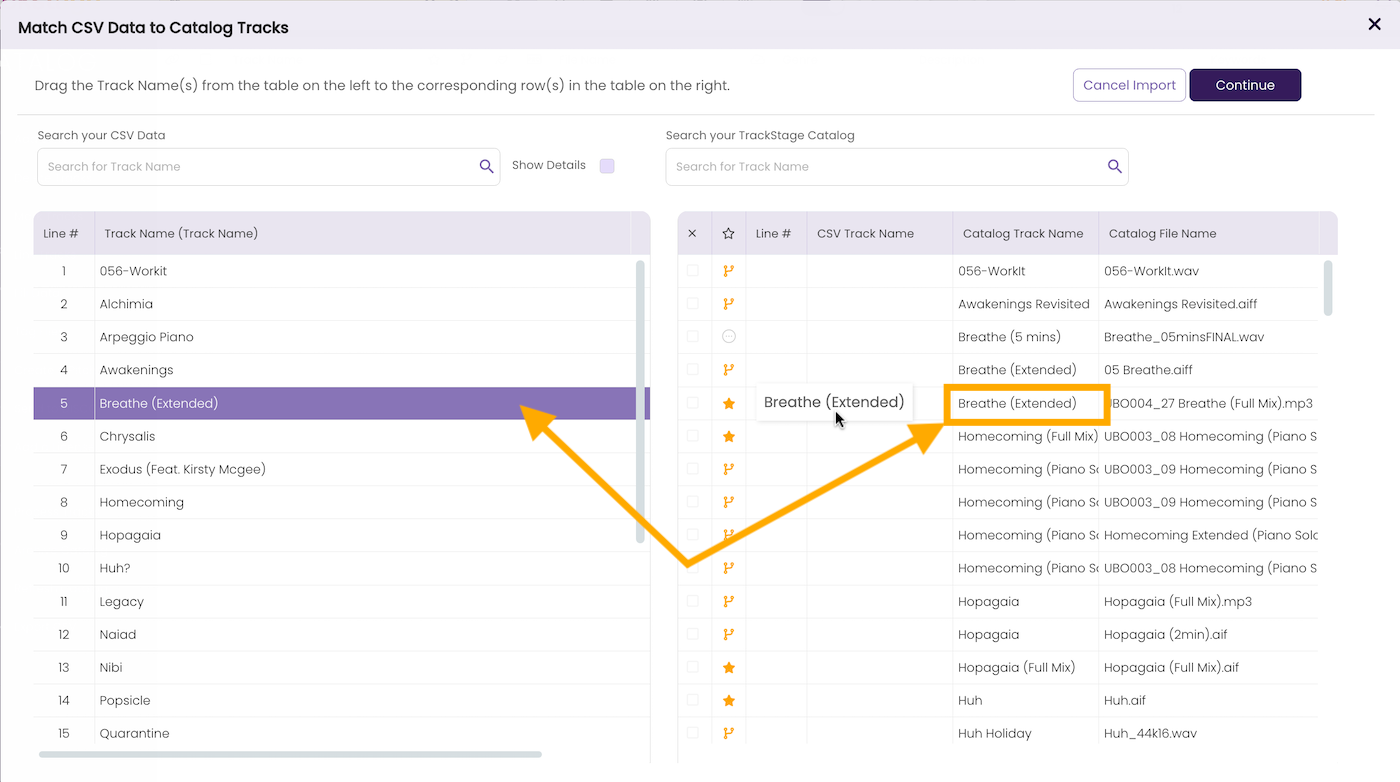
The tracks will highlight in yellow in both columns to confirm they’ve been matched.
TIME SAVING HINT: If you have a lot of alternate and stem versions listed in your spreadsheet, match just the Full Mix in your spreadsheet to the corresponding Primary in the TrackStage column. Then you can use the Fill Data function to copy the info out to the Alternates and Stems in TrackStage without having to drag and drop each one individually.
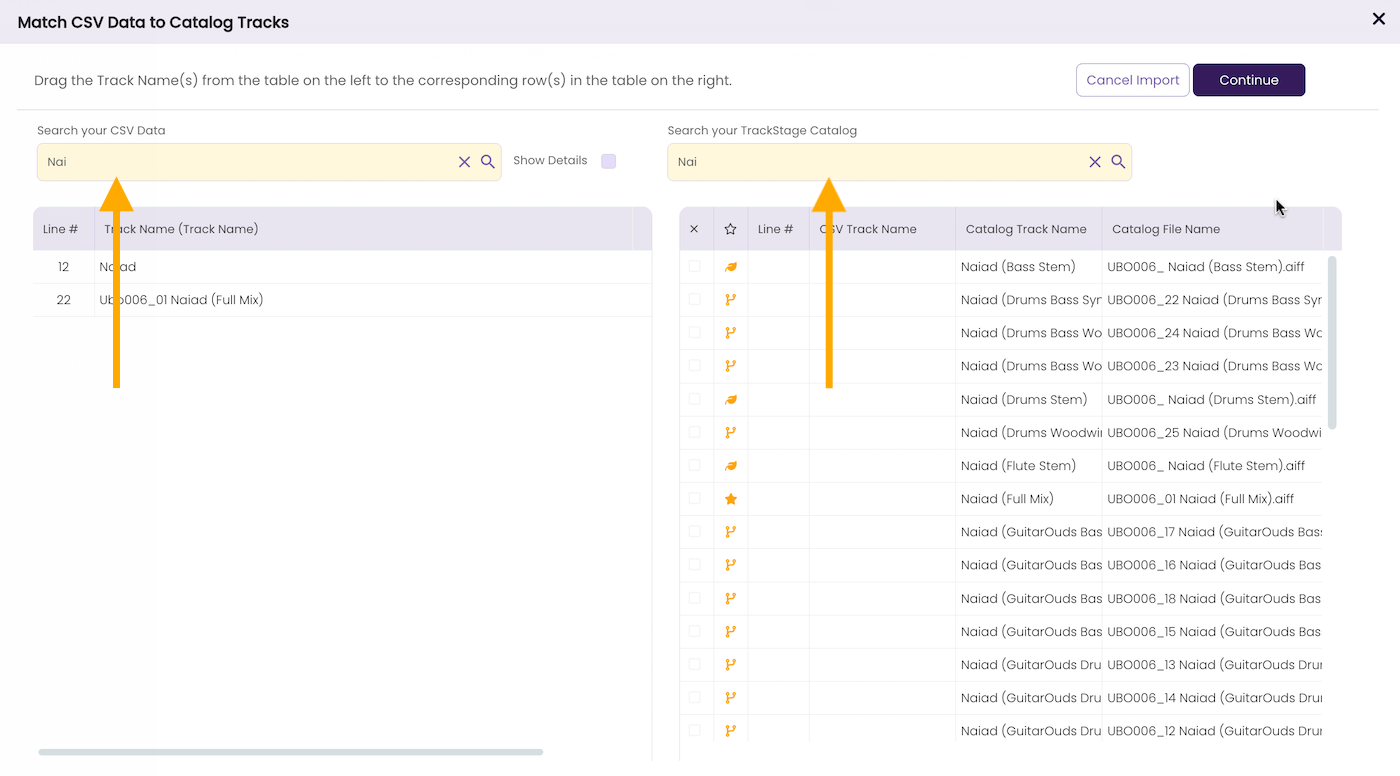
You can also search for tracks within each column to better facilitate the matching.
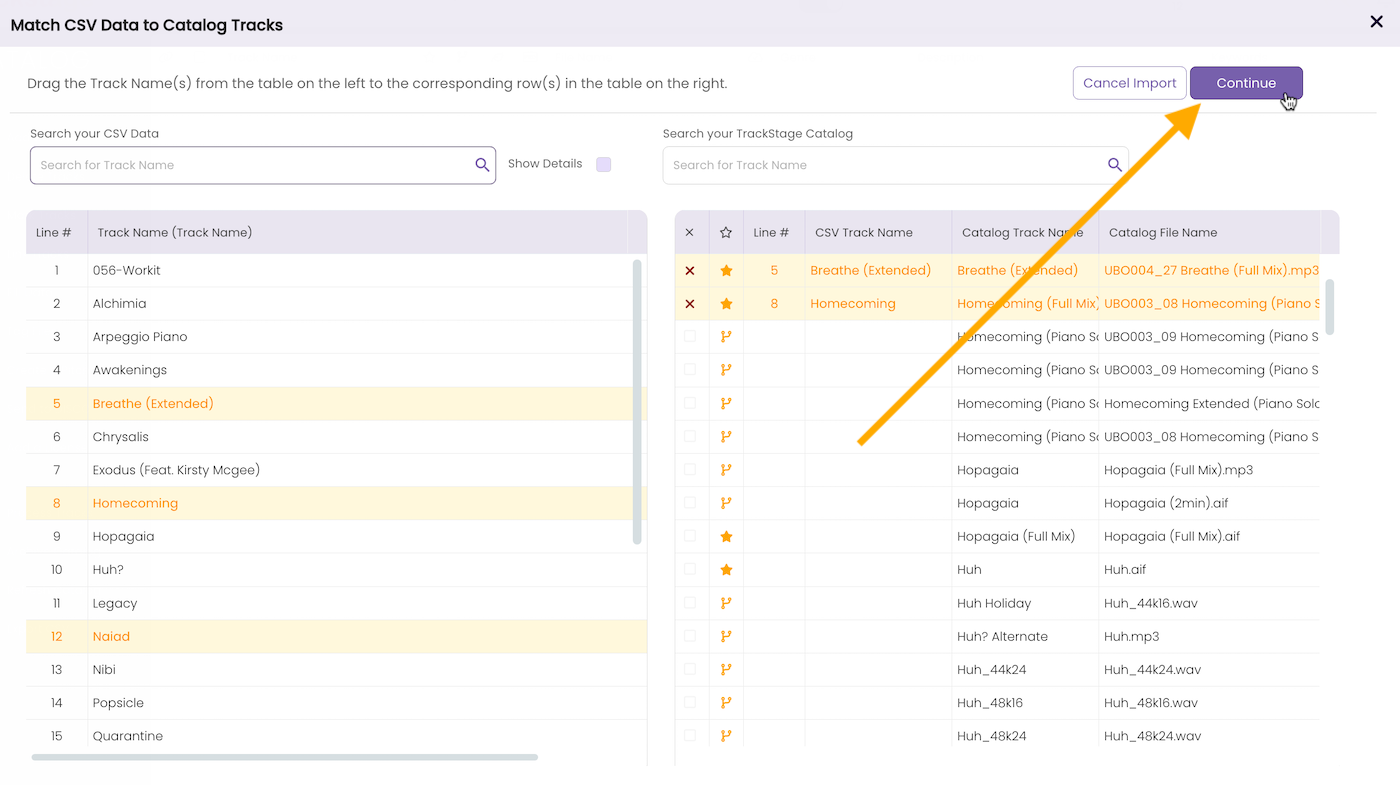
- Click Continue.
Once you have matched all the tracks you wish to update, click Continue to begin the import process.
A confirmation dialog will open. - Click Ok to complete the import.
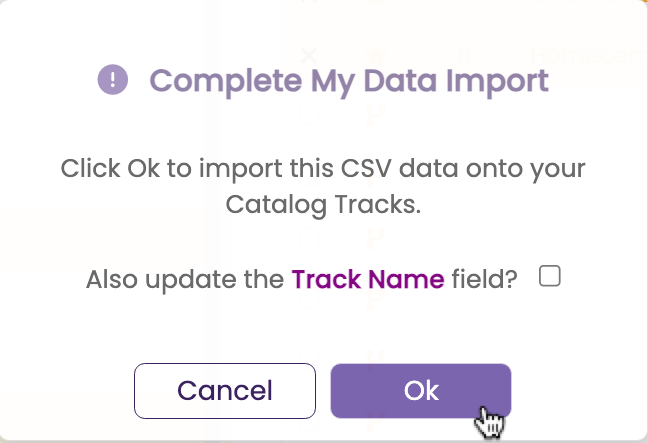
The information will be written to all the selected tracks. Your CATALOG will show the tracks highlighted to alert you that you now need to tag the information to the audio files using the Tag Files process.
Import PRO Data
Coming soon.